Version
Server configuration via Setup module
While it is possible to configure CloverDX Server by modifying the configuration file in a text editor, the Setup with a user-friendly GUI offers a much easier way of configuring basic properties according to your preferences and requirements. Setup is accessible from Server Console under Configuration > Setup.
|
To access the Setup section, you need the Server Setup permission. |
The Setup module consists of multiple tabs that allow you to configure the following:
|
To keep your settings and data in the case of a database migration (e.g., from evaluation to production environment), see Server Configuration Migration. |
Before you start
Before using the Setup module, you must specify the path to the configuration file where Setup saves the configuration, and add the required libraries to the classpath.
-
Specify the path to the configuration file
Setup uses the configuration file to save the Server’s settings. The path to the file is specified by the
clover.config.filesystem property.If you used a CloverDX bundle, one of our cloud marketplace offerings, or the official Docker image to build your Server environment, the configuration file is already created and preconfigured with default settings.
If you used a fresh standalone Tomcat installation, you will need to create the configuration file first and point the Server to it. Until this is done, you will not be able to make any changes in the Setup module.
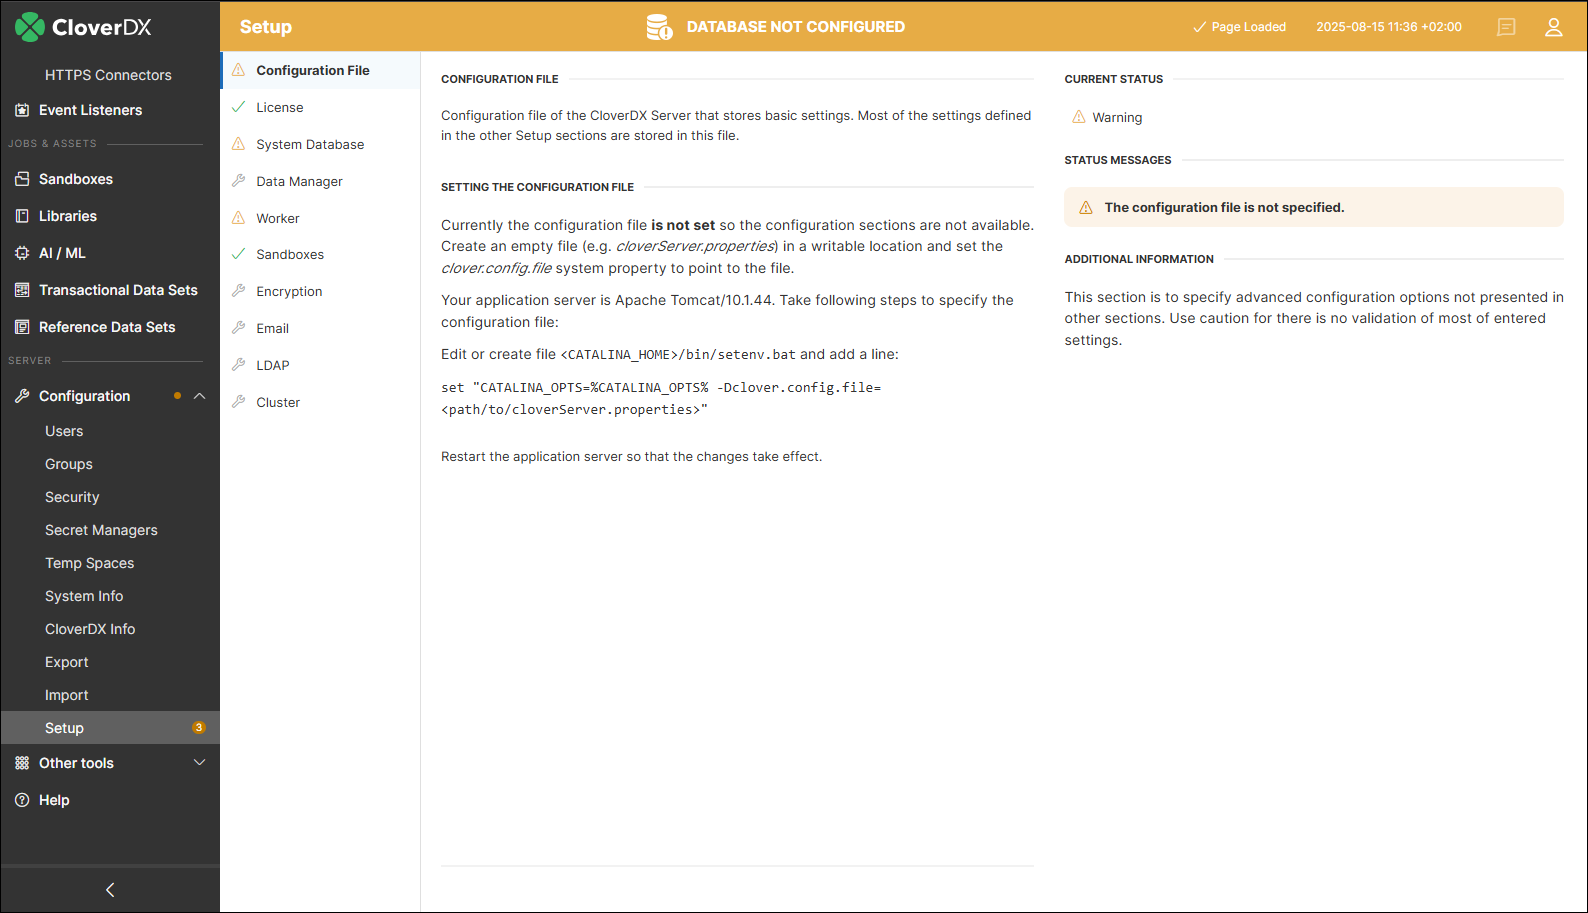
If you start the Server without configuration, you will see decorators pointing to the Setup. The decorators mark problems that require your attention. The displayed number corresponds to the number of items.
The Configuration File tab provides step-by-step instructions for creating and configuring the file.
Figure 122. Setup GUI with decorators -
Add libraries to the classpath
Next, place the libraries required for further configuration in the application server’s classpath. For Tomcat, place the files in the
<TOMCAT_INSTALL_DIR>/libdirectory. You will need:-
A JDBC driver for the system database connection.
-
If you plan to encrypt sensitive data in the configuration file using a custom encryption provider, add the provider’s
.jarfile to the classpath. See Encryption for more information.Make sure to restart the application server to load the newly added .jarfiles.
-
-
If you wish to encrypt the sensitive data in your configuration file, turn on the Encryption feature.
-
Configure individual features
Now, you can use the individual tabs in the Setup module to configure the desired Server features.
-
Restart the Server (if needed)
Some changes require you to restart the Server. These changes are indicated by the
 icon. Other changes (e.g., License, Sandboxes, E-mail, LDAP) are applied immediately and do not require a restart.
Using Setup
The Setup page consists of a menu with tabs on the left, a main configuration part in the middle, and a section with configuration status and additional information on the right side.
The main configuration part contains several buttons:
-
Save saves changes made to the configuration file. The changes in the configuration must be valid.
-
Save Anyway saves the configuration even if it is invalid. For example, a database connection is considered invalid if a required library is missing.
-
Validate validates the configuration on the current tab. If you see the Save button disabled, use Validate to validate the configuration first.
-
Discard Changes discards unsaved changes and returns to currently used values.
If an error/warning icon appears, a status message on the right side of the Setup GUI will provide relevant details.
The following decorators can appear in the Setup GUI:
| Icon | Description |
|---|---|
|
Configured tab |
|
Inactive tab |
|
Error |
|
Warning |
|
Restart required |
|
Pending changes which have not been saved yet |


Configuration File
The Configuration File tab displays the content of the configuration file. For basic settings, you do not have to edit the content of the file manually. Instead, use the particular Setup tab to configure the corresponding features.
If you want to add advanced configuration properties, see List of configuration properties.
|
Refer here for an example configuration file. |
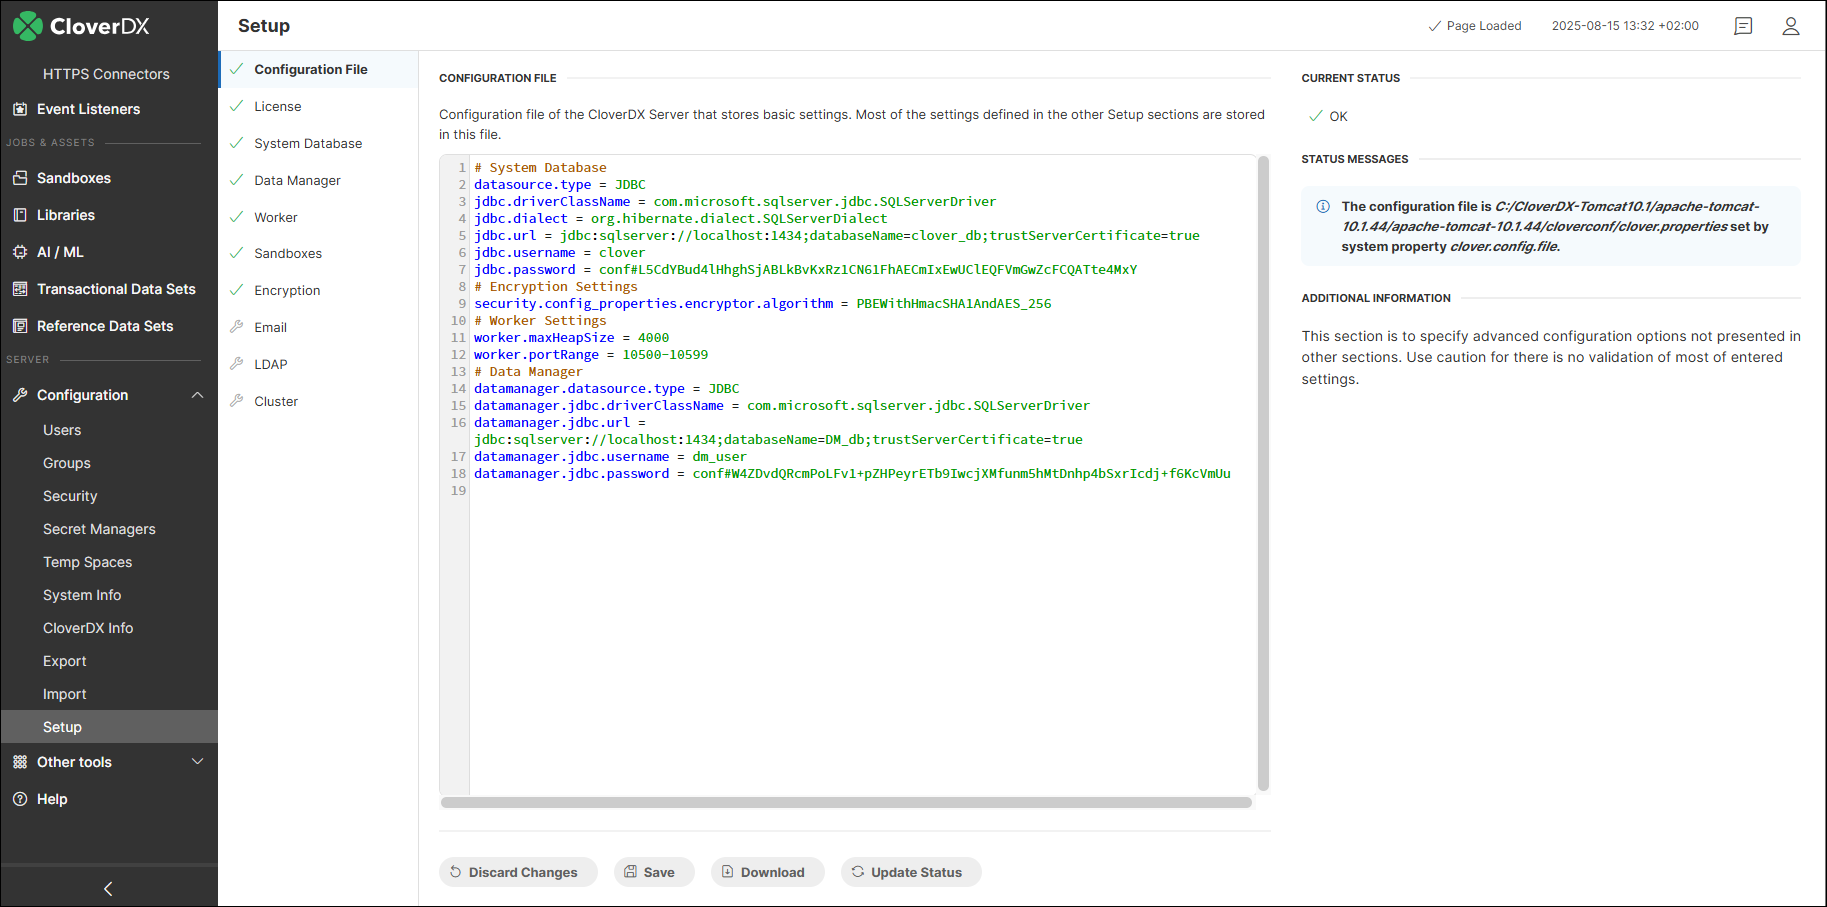
Figure 123. Example of the Server Configuration file
License
The License tab allows you to view the details of your currently loaded license(s) and to add or remove licenses as needed.
To see license details, click on the ![]() dropdown button.
dropdown button.
The panel on the right provides a summary of enabled features and their values (e.g., maximum number of CPU cores or Wrangler or Data Manager users) from all loaded licenses.
The license overview also displays the location of your licenses in the Location row:
-
Database: licenses loaded into Server’s system database display Database.
-
Directory: licenses loaded from a license file or license directory display full path to the license file, e.g.,
C:\Apache-Tomcat-10.1\Licenses\CLCSXCLOVE11927408SP. Seelicense.fileandlicense.dirconfiguration properties for more information on how to load licenses from files on a disk.
|
If you load your license into the system database, when the database changes (e.g., when switching from the default Derby database used for evaluation purposes to one of the recommended databases for commercial use), you will need to load the license again into the new database. |
Figure 124. The License tab
System database
If you used our cloud marketplace offerings to deploy your CloverDX Server environment, it already includes a pre-configured PostgreSQL system database.
For manual deployments, you need to create a database for CloverDX Server and add a user/role with appropriate rights before you set up the connection to the database in the server’s Setup GUI. Refer here for the list of supported databases and versions.
|
CloverDX Server requires a working database connection to store license information. Therefore, it allows you to access the Setup and configure the connection prior to the Server activation - simply log into the Server Console and click the Close button. Otherwise, you would have to activate the server again after switching from the default Derby database to a new system database. |
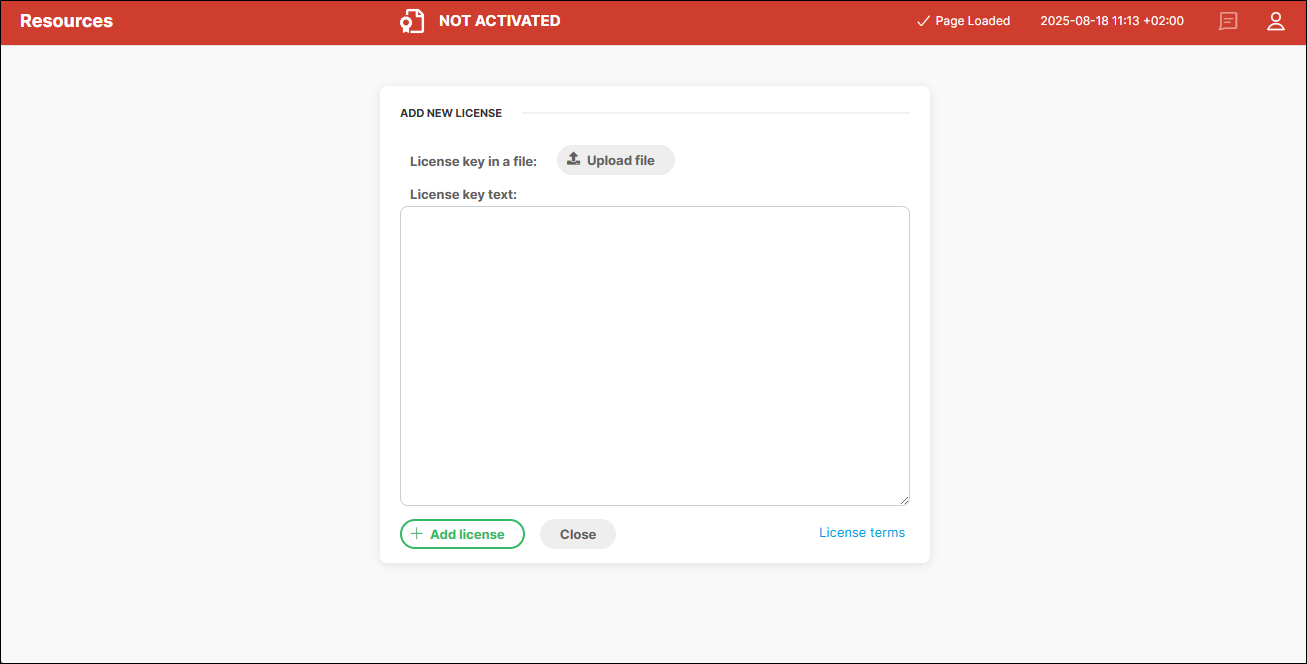
Figure 125. Server console without an active license
The Database tab lets you configure the connection to the database. You can connect via:
-
JDBC
Under JDBC connection, choose your Database platfrom from the first drop-down list. This will enable you to choose a Database URL template from the second drop-down list. In this template (e.g.,
jdbc:postgresql://host:5432/dbnamefor PostgreSQL), replace the host and dbname keywords with proper values.Next, enter the User name and Password for your database.
An Apache Derby JDBC 4-compliant driver is bundled with CloverDX Server. The Derby database is intended for for evaluation purposes only. For commercial use, switch to one of the supported databases. When switching, add the appropriate JDBC-4 compliant driver to the classpath (i.e., for Tomcat, place the driver in the <TOMCAT_INSTALL_DIR>/libdirectory) and restart the application server.
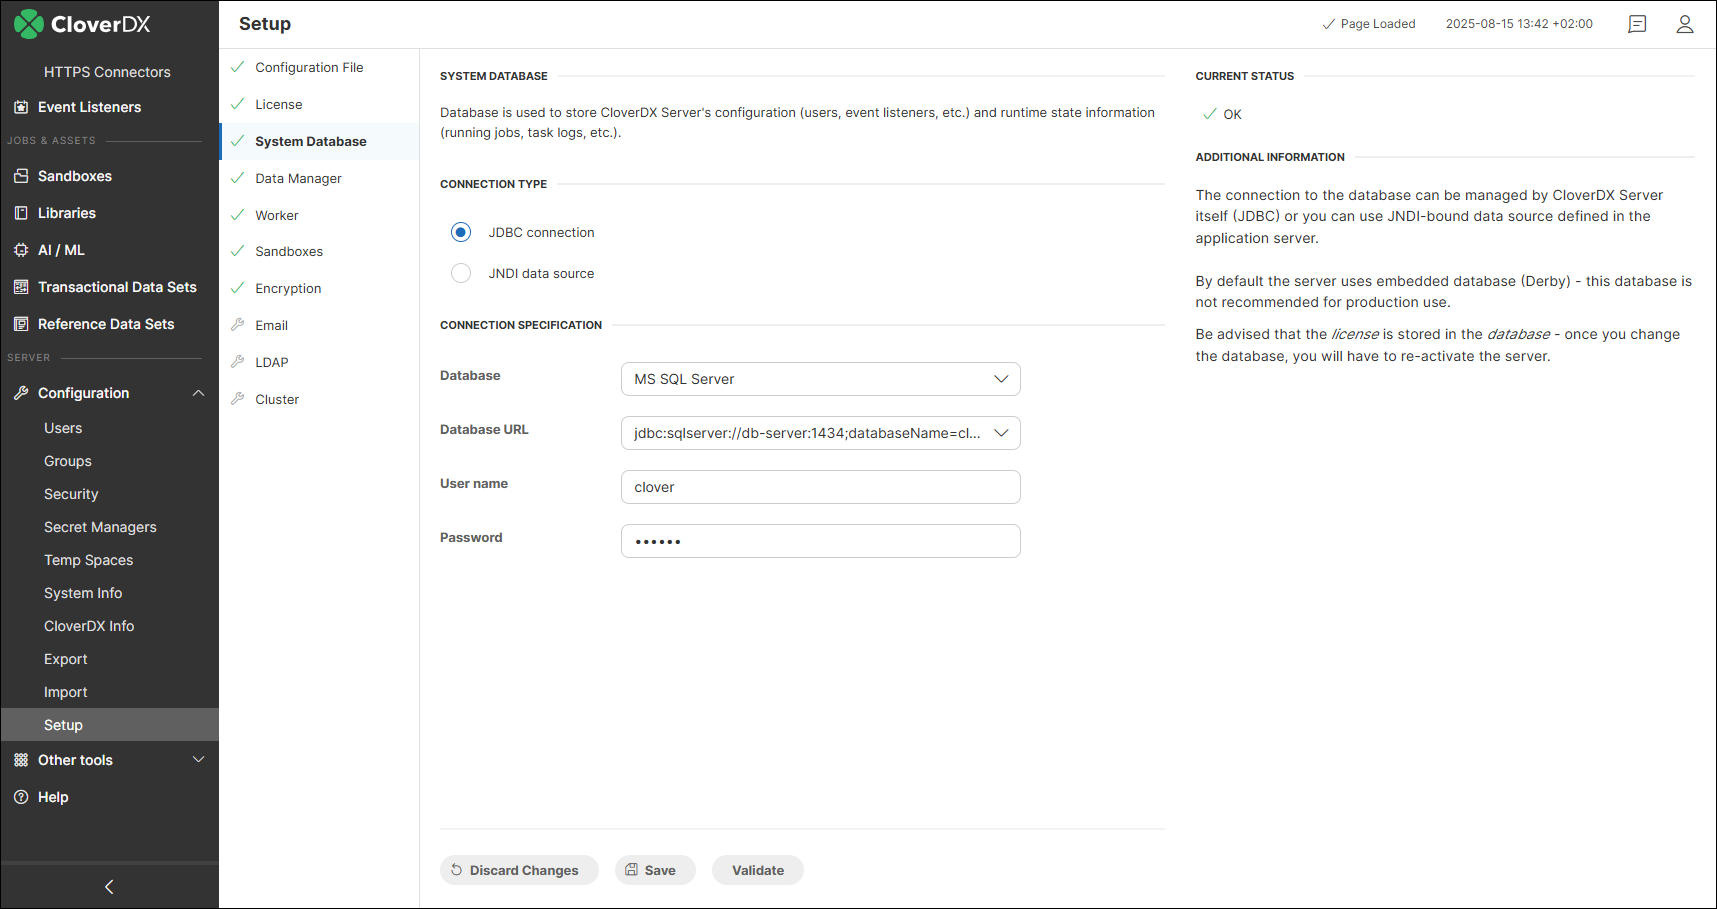
Figure 126. Database connection configuration for a JDBC connection
-
JNDI
With JNDI, you can access the datasource configured at the application server level. Select your Database platform and choose the suitable item from the JNDI tree. For more information on how to enable JNDI connections at the application server level, see JNDI DB Datasource.
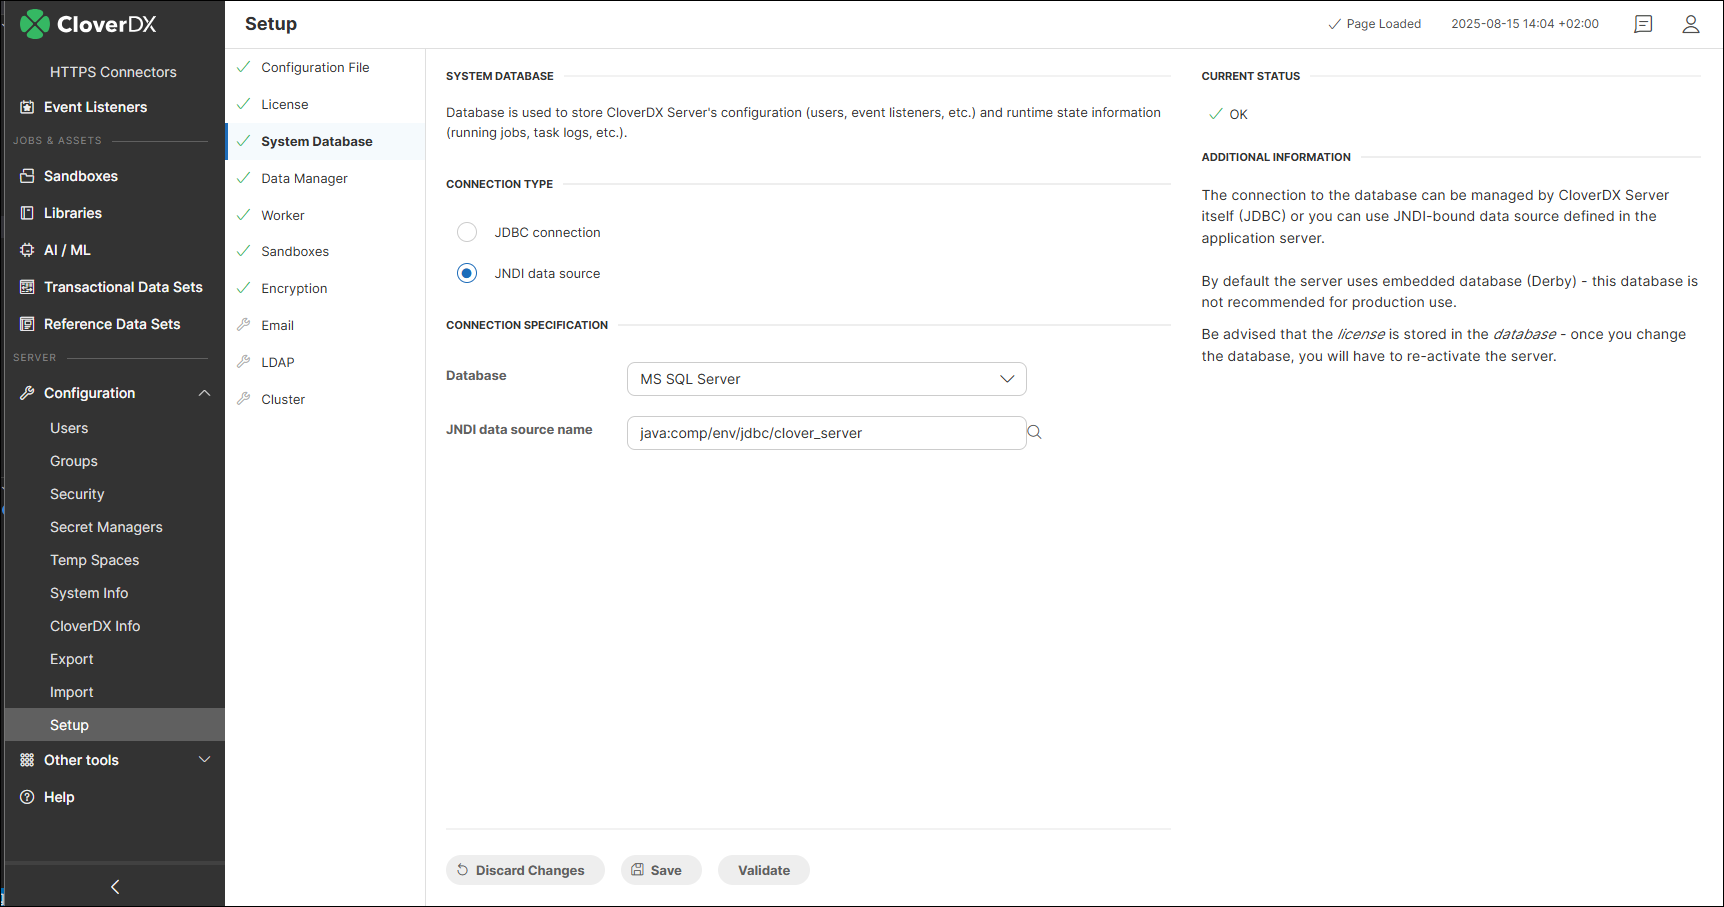
Figure 127. Database connection configuration for a JNDI connection
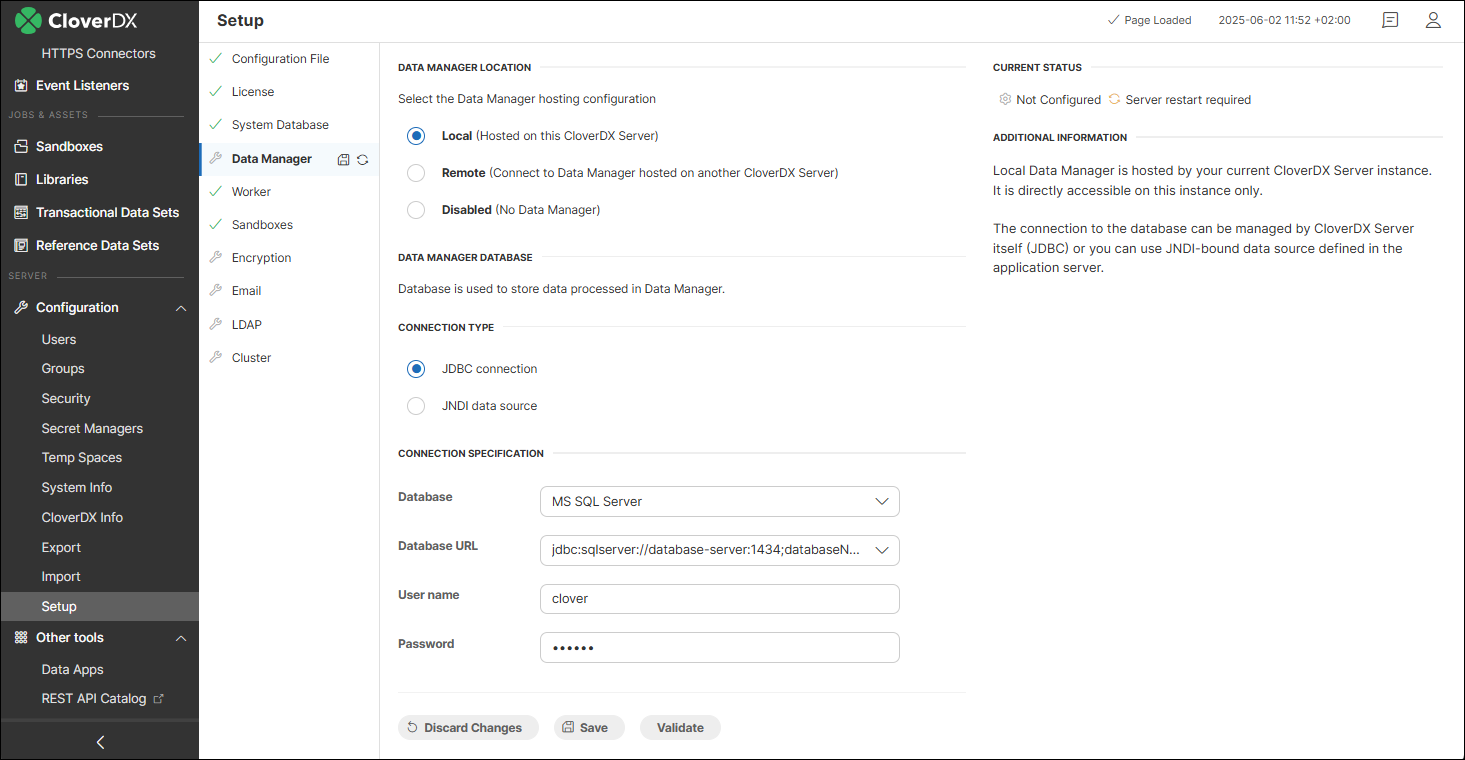
Data Manager
In this section, you can configure a Data Manager connection. For detailed instructions, see Data Manager configuration.
Worker
The Worker tab lets you configure properties for the Worker process. See CloverDX Server architecture for more information on the differences between the Server Core and Worker processes.
You can change the Initial and Maximum heap size for the Worker process, include additional JVM arguments, and set the Port range for Worker communication.
Changes in Worker configuration require a restart - click on Finish jobs & restart or Restart now to do so.
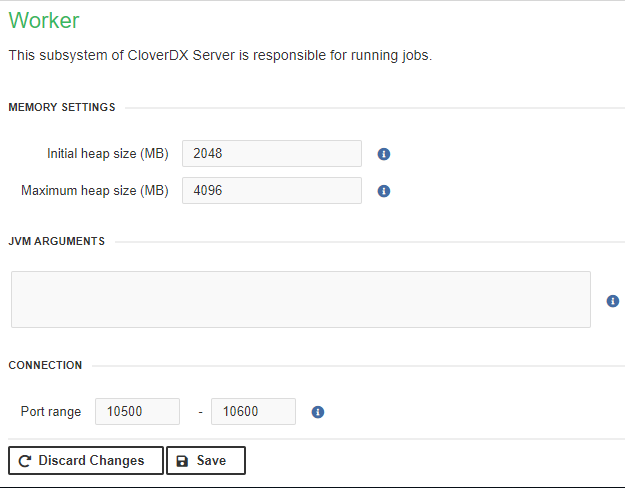
Figure 128. The Worker tab
Sandboxes
The Sandboxes tab lets you configure a path to a directory used to store sandbox data. In a cluster environment, you can configure paths to shared, local, and partitioned sandboxes.
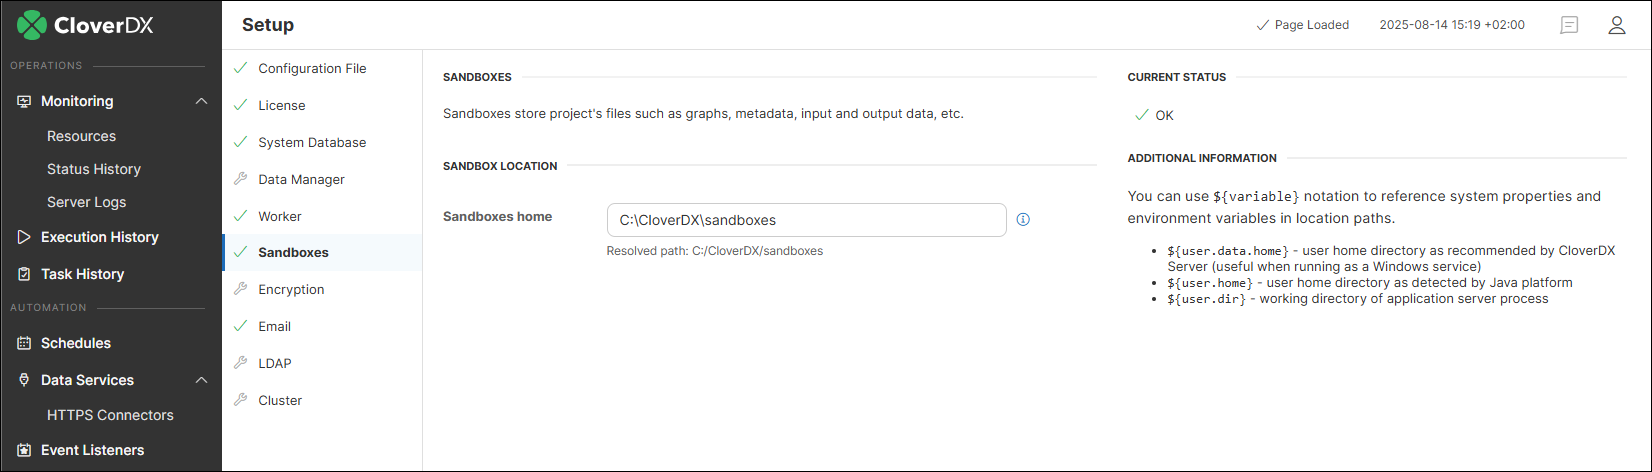
Figure 129. Sandbox path configuration in a standalone environment
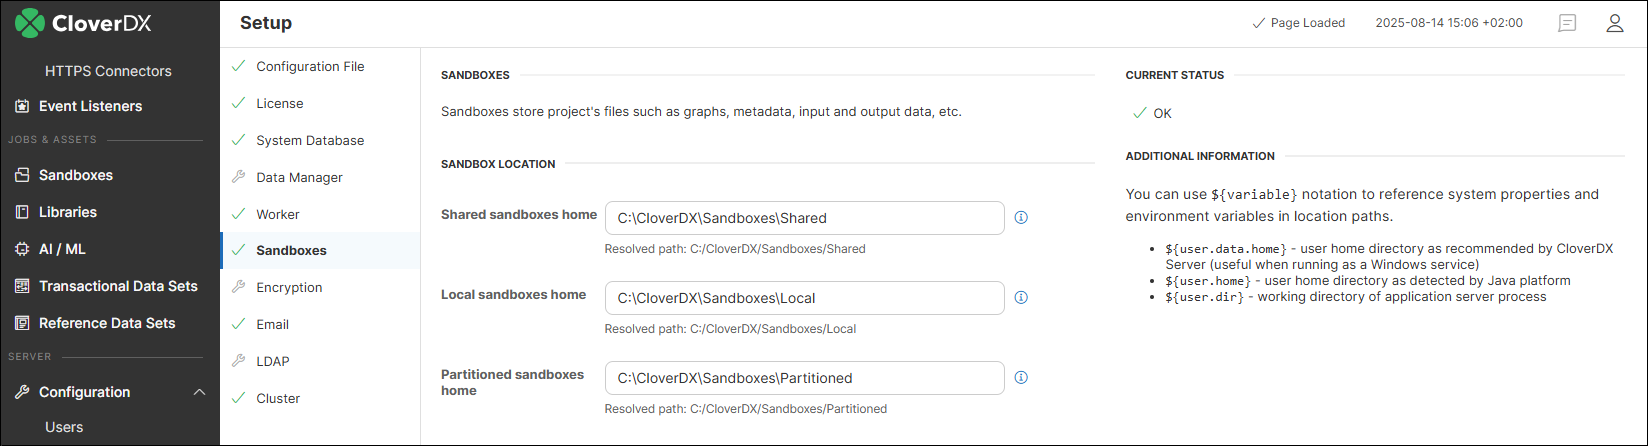
Figure 130. Sandbox path configuration in a cluster environment
Encryption
To secure sensitive information entered in other Setup tabs, you can use the Encryption feature. When enabled, passwords entered in sections like System Database or Email are automatically saved in an encrypted form in the configuration file.

Figure 131. Configuration file with an encrypted value in jdbc.password.
To enable encryption, select the Enable encryption check box and choose the desired Encryption provider (SunJCE or Custom) and Encryption algorithm. Among the default algorithms provided by SunJCE, PBEWithHmacSHA512AndAES_256 is the strongest one. To encrypt currently unencrypted passwords, use the Save & Encrypt button.
Since the default algorithms are generally weaker, we recommend using Bouncy Castle - a free custom JCE (Java Cryptography Extension) provider offering a higher strength of encryption.
|
If you want to use a custom provider, the related library has to be added to the appserver classpath. For Tomcat, this means adding the file to the |
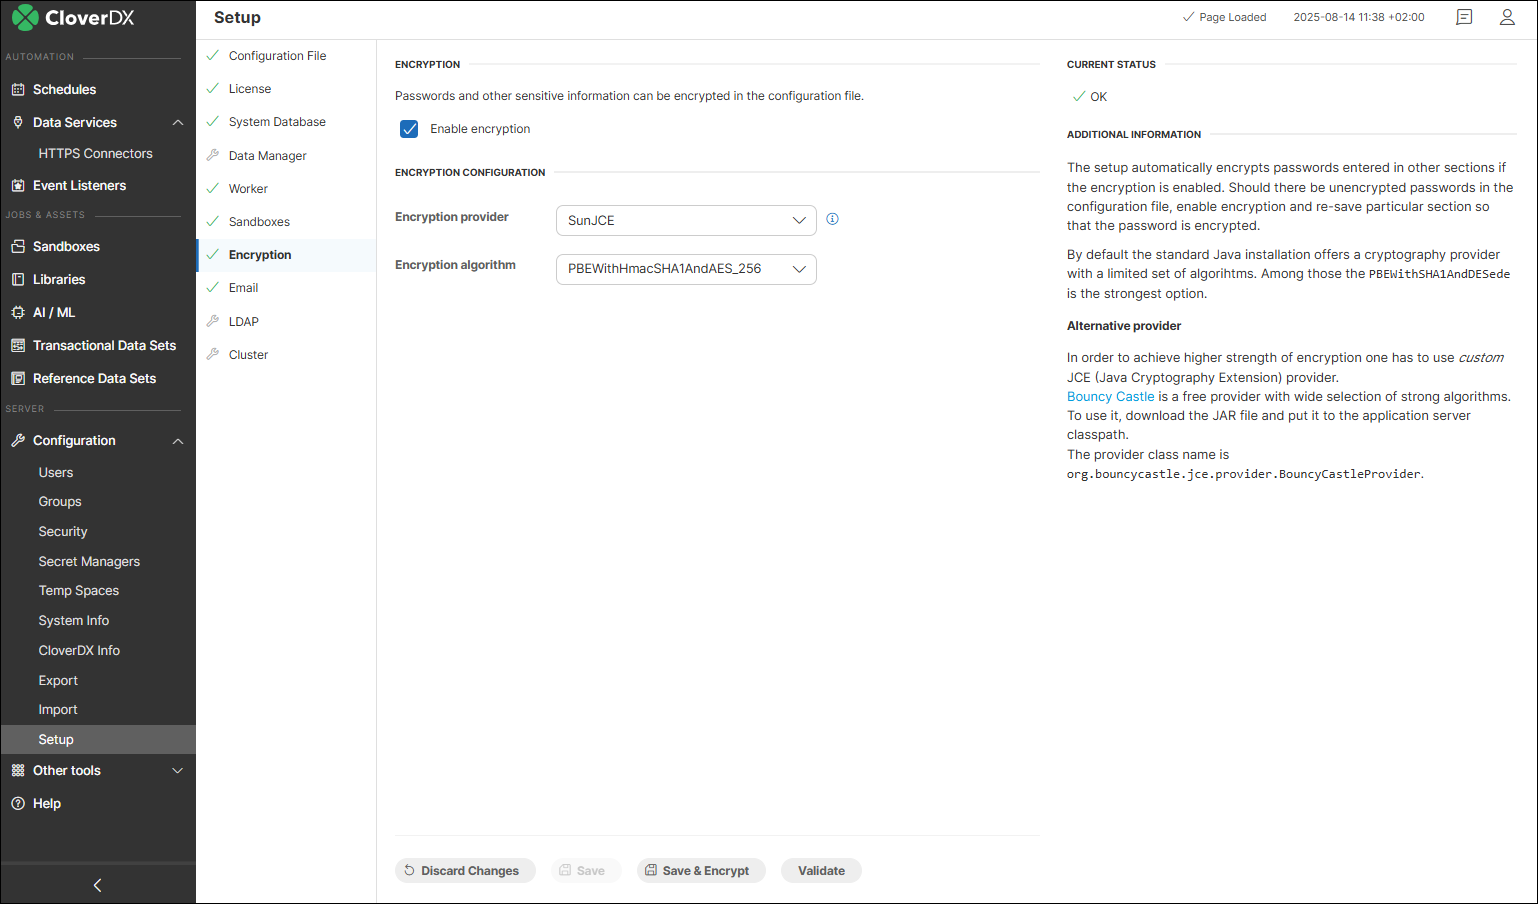
Figure 132. Encryption configuration
The E-mail tab lets you configure a connection to an SMTP server to allow CloverDX Server to send email reporting of the Server status or events on the Server, or send a notification to a newly created user.
You may authenticate the connection to an SMTP server via username and password or OAuth2. For OAuth2, you have to authorize the connection first by using the Authorize button.
If OAuth2 authentication is used in a cluster, all nodes must use an identical OAuth2 configuration. After the OAuth2 configuration is authorized by the Authorize button on any node, all cluster nodes will share the OAuth2 tokens automatically.
| You can set the default sender address by populating the Default sender field. |
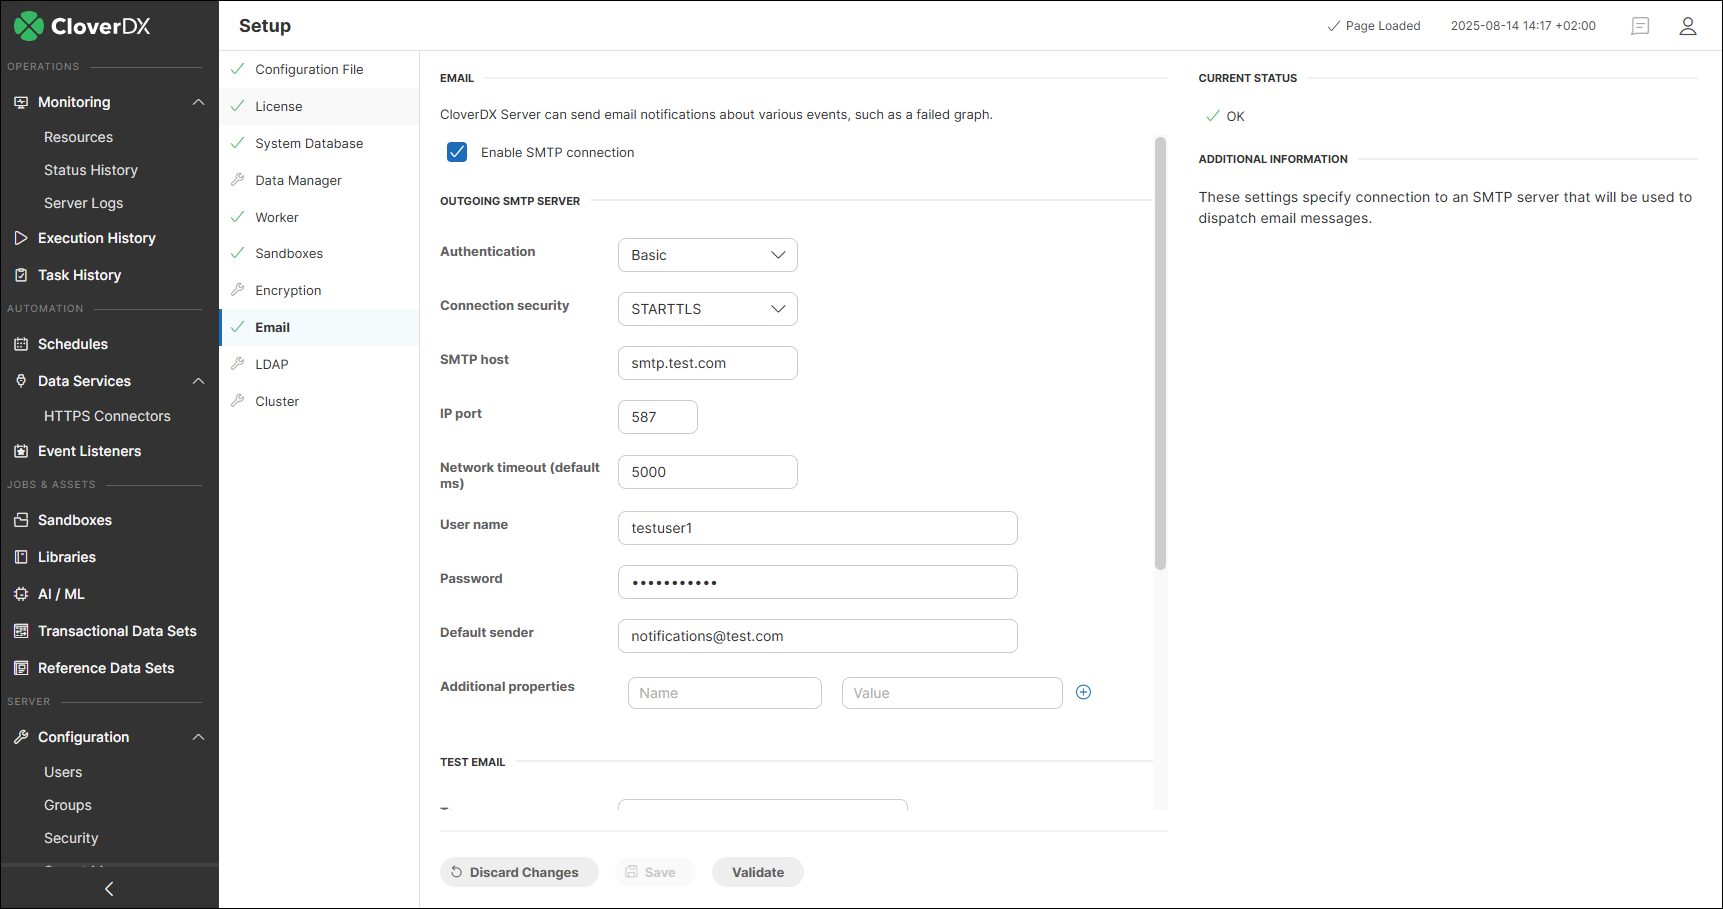
Figure 133. E-mail configuration
To make sure the configuration of the Outgoing SMTP Server is correct, you can send a test email from the Test email section at the bottom.
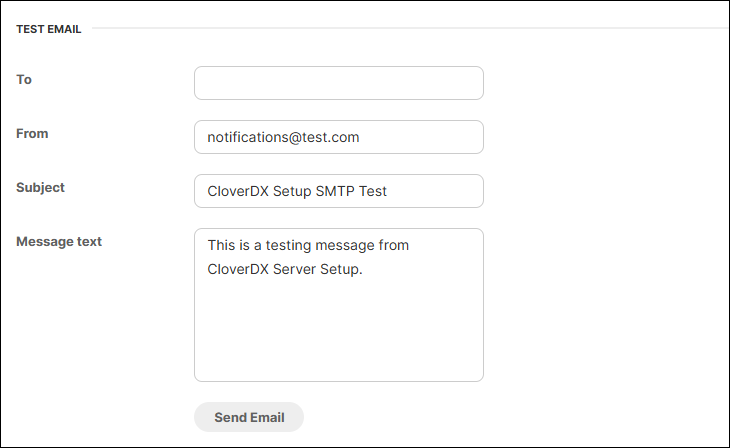
Figure 134. Test email section
LDAP
The LDAP tab lets you use an existing LDAP database for user authentication. For detailed information on how to set up an LDAP connection, see LDAP authentication.
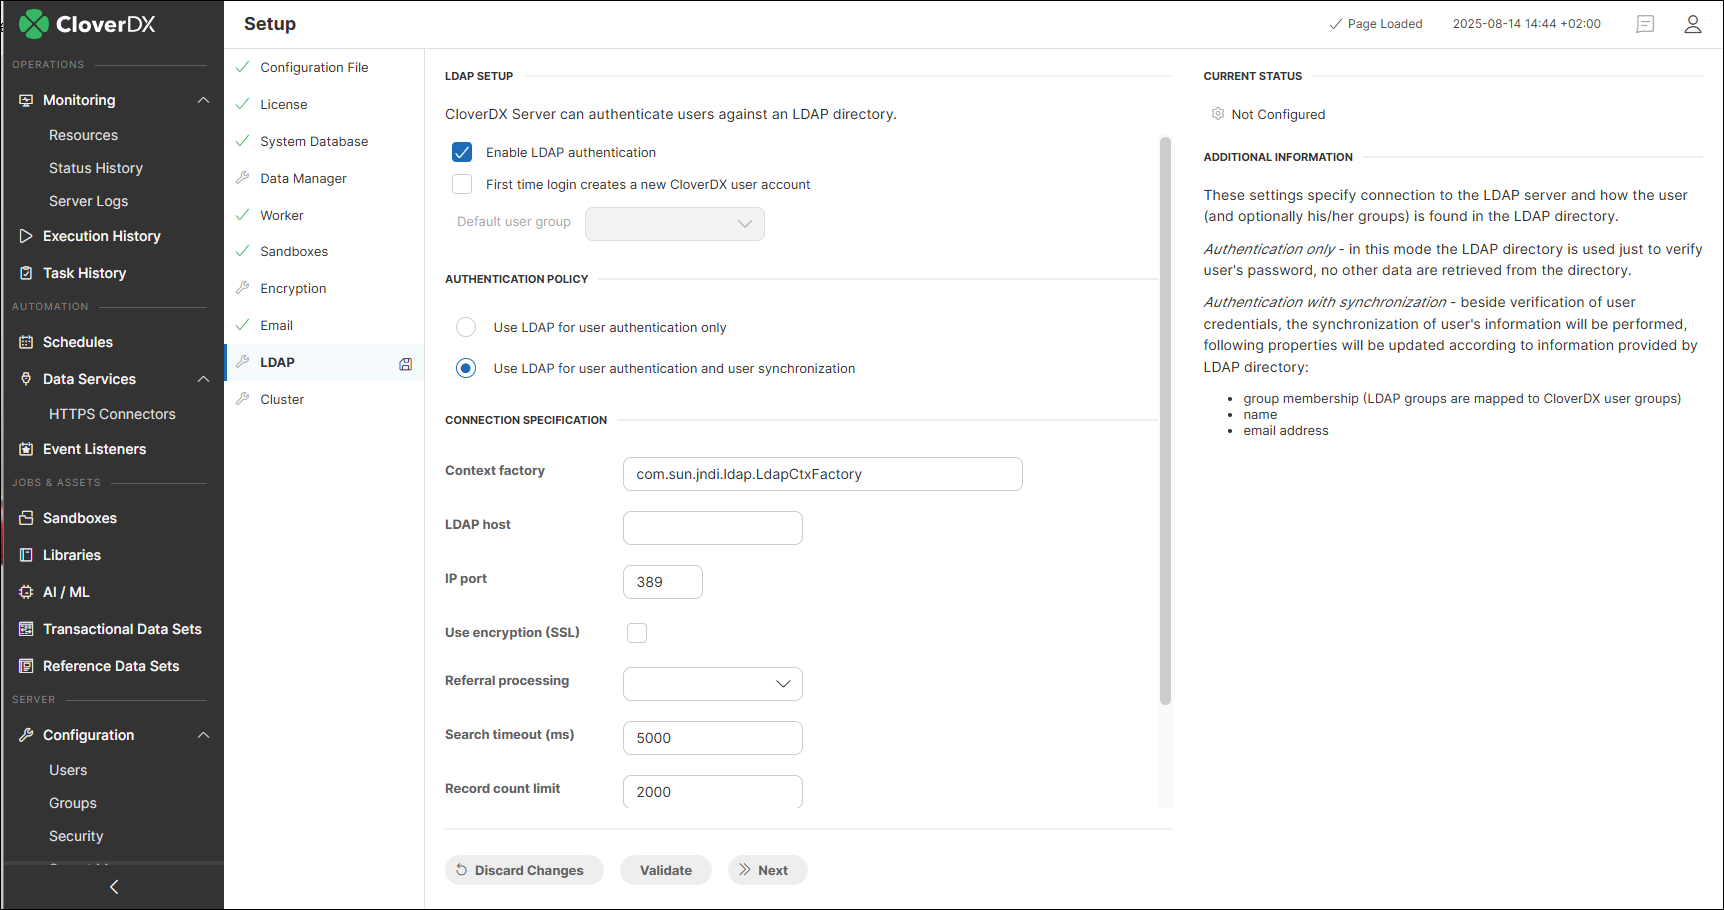
Figure 135. LDAP configuration
Cluster
The Cluster tab lets you configure clustering features. For more information on how to configure a cluster environment, see Server cluster setup and configuration.
In case your license does not allow clustering, the Enable clustering checkbox is grayed out, and the note The license does not allow clustering. appears at the top.
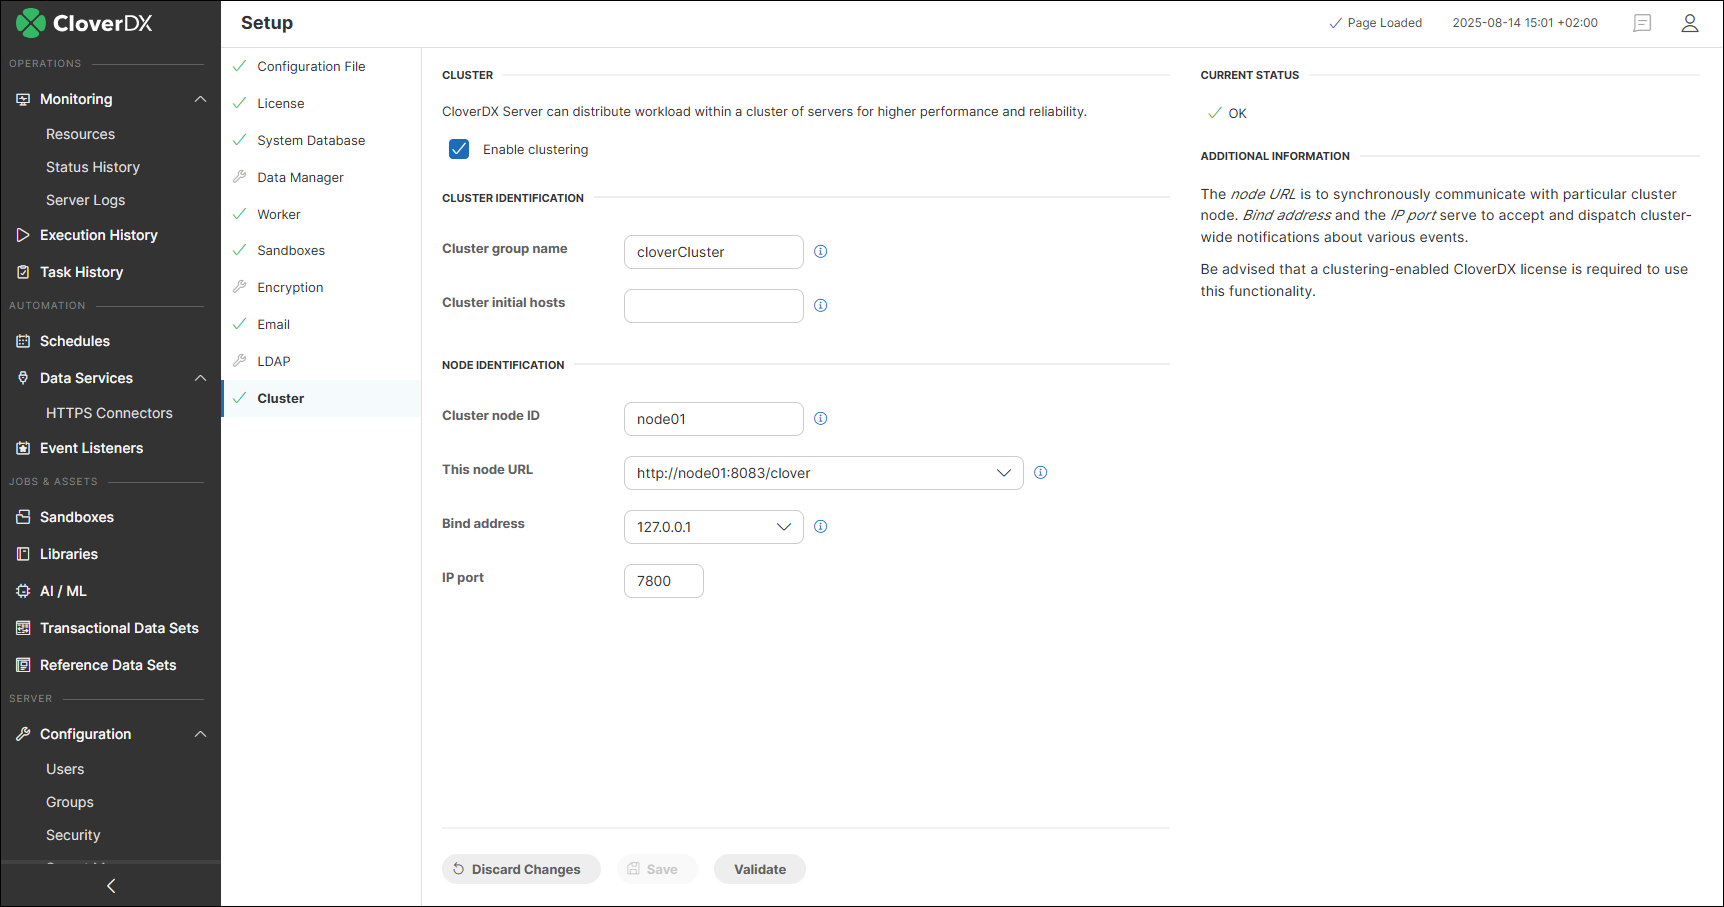
Figure 136. Cluster configuration
OAuth2 authentication
The OAuth2 authentication tab lets you configure OAuth2 authentication for REST API and Data services. This authentication depends on a third party Identity Provider and information entered here contains properties of a client application created at the provider. The REST API and Data services consume access tokens which are verified with the used Identity Provider.
For more information on how to configure an OAuth2 authentication see User OAuth2 authentication.
If you allow OAuth2 authentication the HTTP Basic authentication for REST API and Data services will be disabled.
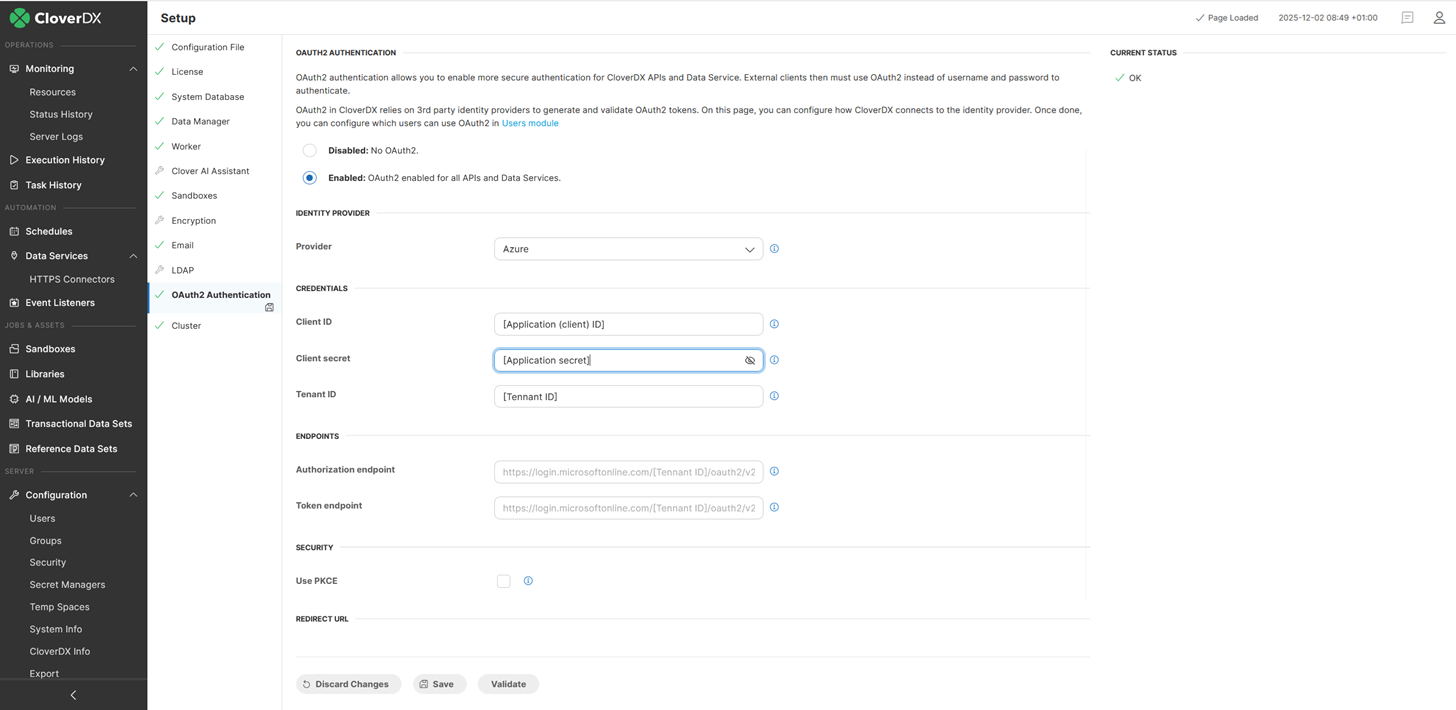
Figure 137. OAuth2 authentication