Version
8. Export
Export converts graphs (and jobflow) to formats independent of CloverDX Designer, or exports metadata or converts graphs to jobflow, jobflow or subgraphs to graphs.
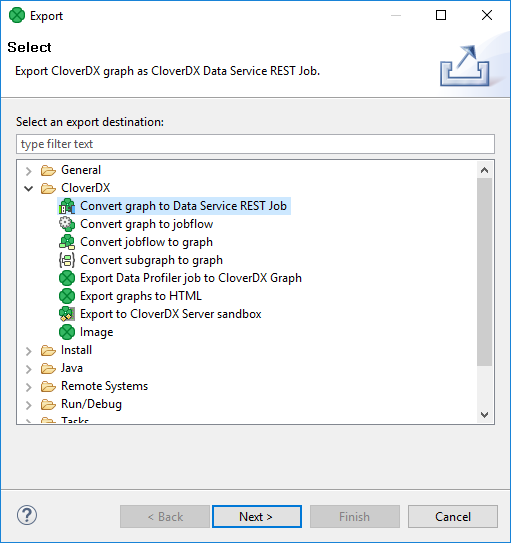
If you want to export something, you can either select from the main menu or right-click in the Project Explorer pane and select Export… from the context menu. After that, the Export wizard window opens. When you expand the CloverDX category, the window will look like this:
Figure 110. Export Options
Convert graph to jobflow
A graph can be converted to a jobflow. The wizard converting a graph to a jobflow creates a new jobflow in a user-defined directory. The original graph is left untouched.
You can convert only one graph at a time.
Right-click Outline and choose Export.
Select Convert Graph to Jobflow.
Select one graph to be converted to a jobflow.
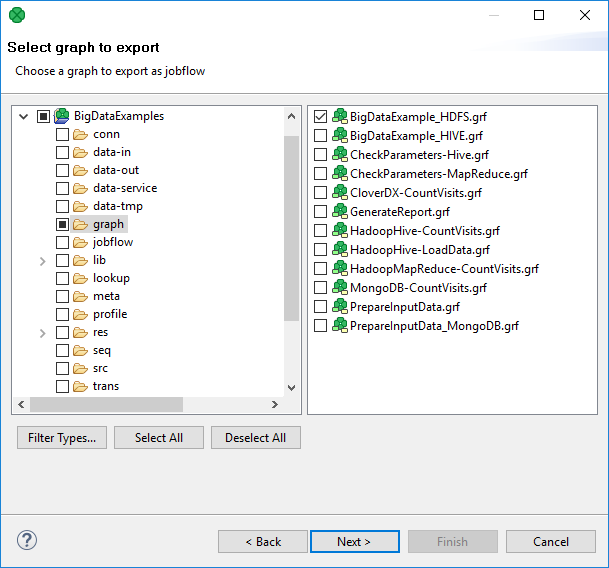
Figure 111. Converting graph to jobflow
Choose the file name and destination for the converted jobflow.
Convert jobflow to graph
A jobflow can be converted to a graph.
The wizard converting a jobflow to a graph creates a new CloverDX graph in a user-defined directory. The original jobflow is left untouched.
You can convert only one jobflow at a time.
Right-click the Outline and choose Export.
Select Convert Jobflow to Graph.
Select one jobflow to be converted to a graph.
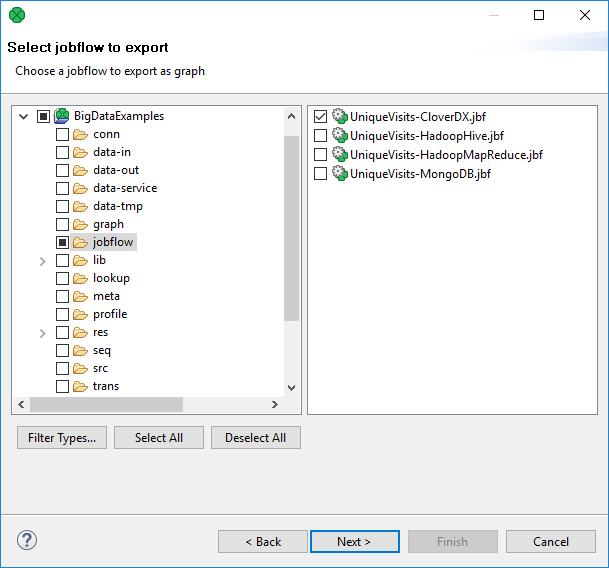
Figure 112. Converting jobflow to graph
Choose destination for the graph.
Convert subgraph to graph
Subgraphs can be converted to graphs.
The wizard converting a subgraph to a graph creates a new graph. The original subgraph is left untouched.
Conversion replaces the SubgraphInput and SubgraphOutput components with SimpleCopy. DebugInput and DebugOutput are preserved too.
Only one subgraph can be converted at a time.
Conversion of subgraph to graph in steps
Right-click the Outline and choose Export.
Select Convert Subgraph to Graph.
Select a subgraph to be converted to a graph and choose a directory and file name for the graph.
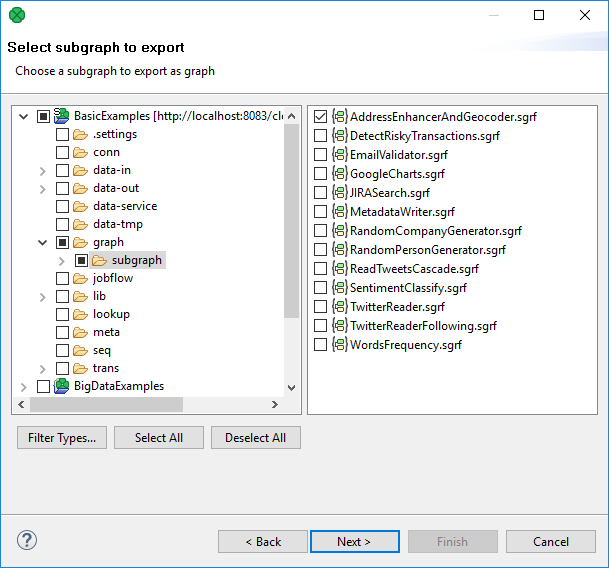
Figure 113. Converting subgraph to graph
Export graphs to HTML
If you select the Export graphs to HTML item, you can click the Next button and see the following window:

Figure 114. Export graphs to HTML
You must select the graph(s) and specify to which output directory the selected graph(s) should be exported. You can also generate index file of the exported pages and corresponding graphs and/or images of the selected graphs. By switching the radio buttons, you are selecting either the scale of the output images, or the width and the height of the images. You can decide whether antialiasing should be used.
Export to CloverDX Server sandbox
CloverDX Designer now allows you to export any part of your projects to CloverDX Server sandboxes. To export, select the Export to CloverDX Server sandbox option. After that, the following wizard will open:
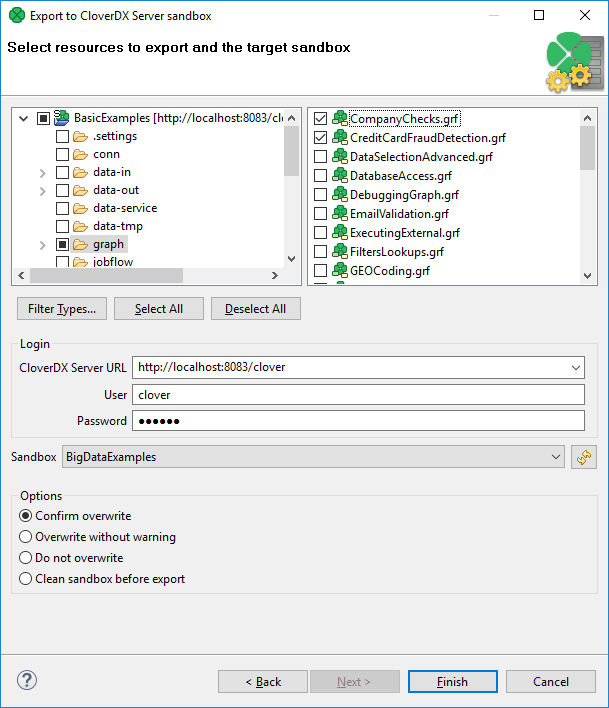
Figure 115. Export to CloverDX Server sandbox
Select the files and/or directories that should be exported and decide whether the files and/directories with identical names should be overwritten without warning or whether overwriting should be confirmed or whether the files and/or directories with identical names should not be overwritten at all, and also decide whether the sandbox should be cleaned before export.
Specify the following three items: CloverDX Server URL, your username and password. Then click Reload. After that, a list of sandboxes will be available in the Sandbox menu.
Select a sandbox. Then click Finish. Selected files and/or directories will be exported to the selected CloverDX Server sandbox.
|
Exporting to a partitioned sandbox is not supported. Since the sandbox location to be affected is not known in this case, the action returns errors. |
Export image
If you select the Export image item, you can click the Next button and you will see the following window:

Figure 116. Export image
This option allows you to export images of the selected graphs only.
You must select the graph(s) and specify to which output directory the selected graph(s) images should be exported.
You can also specify the format of output files - bmp, jpeg or png.
By switching the radio buttons, you are selecting either the scale of the output images, or the width and the height of the images.
You can decide whether antialiasing should be used.