export CATALINA_OPTS="$CATALINA_OPTS -XX:MaxMetaspaceSize=512m -Xms128m -Xmx1024m"
export CATALINA_OPTS="$CATALINA_OPTS -Dderby.system.home=$CATALINA_HOME/temp"
echo "Using CATALINA_OPTS: $CATALINA_OPTS"
Version
Installing Production Server
This section describes in detail the installation of CloverDX Server on various application containers and its subsequent configuration required for production environment. For simple evaluation of CloverDX Server features, use Evaluation Server (note that CloverDX Evaluation Server can also be configured for production use).
CloverDX Server for production environment is shipped as a Web application archive (WAR file) and uses an external, dedicated database, so standard methods for deploying a web application on your application server may be used. However, each application server has specific behavior and features. Detailed information about their installation and configuration can be found in the following chapters.
List of suitable containers
-
Red Hat JBoss Web Server 6.0
In the case of problems during the installation, see Troubleshooting.
|
Eclipse Temurin JDK 17 or JDK 21 (for Tomcat) or Red Hat OpenJDK 17 or OpenJDK 21 (for JBoss Web Server) is required. |
Installation and Configuration Procedure
To create a fully working instance of Production CloverDX Server, you should:
-
Install an application server
CloverDX Server is compatible with several application containers. Following subsections offer detailed instructions on installation of the respective application servers and their subsequent configuration.
-
Set up limits on a number of opened files, memory allocation and firewall exceptions
CloverDX Server's graph transformations and evaluations may require more memory than the default limit set in the database as well as higher number of simultaneously opened files. Moreover, some components require firewall exceptions to be set. These instructions provide recommendation on adjusting both the Memory settings and the Maximum number of open files, as well as Firewall exceptions.
-
Install CloverDX Server into the application server
CloverDX Server is provided as a web archive (
.war) file for an easy deployment. -
Create a database dedicated to CloverDX Server
Unlike the Evaluation Server, the Production Server requires that you have created a dedicated database for CloverDX Server. In the configuration phase of this manual, you will be guided to System database configuration with instructions on how to properly configure the properties file of various databases.
-
Set up a connection to the database
You can set up the connection to the database via Server’s GUI in . Alternatively, you can set up the connection in the properties file before starting CloverDX Server.
-
Install a license
To be able to execute graphs, you need to install a valid license. There are three options for Activation.
-
Perform additional Server configuration
-
Set up a master password for secure parameters
When handling sensitive information (e.g. passwords), it is advised to define secure graph parameters. This action requires a master password (see Secure parameters).
-
Set up SMTP server connection
CloverDX Server lets you configure an SMTP connection for reporting events on the Server via emails.
-
Configure temp space
CloverDX Server works with temporary directories and files. To ensure components work correctly, you should configure the
Temp spacelocation on the file system. For details, see Temp space management. -
Configure sandboxes
Lastly, you should set the content security and user’s permissions for sandboxes. For details and instructions, see Sandboxes.
-
Apache Tomcat
|
Before installation, check the software requirements, currently supported Apache Tomcat version and required Java version in the Software requirements section. If you encounter any problems during the installation, see Troubleshooting for a possible solution. |
-
Download the binary distribution: Tomcat 10.1.
-
Extract the downloaded archive (
ziportar.gz). -
Set up
JAVA_HOMEto point to the correct Java version:-
Unix-like systems:
Setup the path in
/etc/profileor/etc/bash.bashrc:export JAVA_HOME=/path/to/JDK -
Windows system:
Under System Variables in Advanced System Settings, create a new variable named
JAVA_HOME. The value should contain the path to the JDK installation directory.
-
-
Run Tomcat:
-
Unix-like systems:
Run the
[Tomcat_home]/bin/startup.shfile. -
Windows system:
Run the
[Tomcat_home]\bin\startup.batfile.
-
Continue with: Installation of CloverDX Server.
-
Download the 64-bit Windows Service Installer file in the Binary Distributions section on the Tomcat 10.1 download page.
-
Use the standard installation wizard to install Apache Tomcat.
-
When Tomcat is installed as a Windows service, CloverDX is configured by one of the following options:
-
Graphical configuration utility
-
Run the
[Tomcat_home]\bin\Tomcat10w.exefile. -
In the Apache Tomcat Properties dialog box, select the Java tab and set the initial and maximum heap size in Initial memory pool and Maximum memory pool fields to 512MB and 1024MB respectively. Other configuration parameters can be defined in Java Options field, being separated by new line.
-
Click on Apply and restart the service.
The Java tab allows you to use alternative JVM by setup of path to jvm.dllfile.
-
-
Command Prompt tool
-
Run the
[Tomcat_home]\bin\Tomcat10.exefile. -
If Tomcat is running, navigate to
[Tomcat_home]\binand stop the service by typing:.\Tomcat10.exe //SS//Tomcat10in the Command Prompt. (When using different version of Tomcat, change the number in the command to reflect the installed version.)
-
Configure the service by typing the command:
.\Tomcat10.exe //US//Tomcat10 --JvmMs=512 --JvmMx=1024 --JvmOptions=-Dclover.config.file=C:\path\to\clover-config.properties#-XX:MaxMetaspaceSize=256mThe parameter JvmMs is the initial and JvmMx is the maximum heap size in MB;
JvmOptionsare separated by '#' or ';'. -
Start the service from Windows administration console or by typing the following command in the Command Prompt:
.\Tomcat10.exe //TS//Tomcat10
-
-
|
By default, when Apache Tomcat is run as a Windows service, it is not available for Java process monitoring tools (e.g., JConsole or JVisualVM). However, these tools can still connect to the process via JMX. See JMX Configuration for more information. |
More information about running Java applications as Windows Service can be found at Apache Commons.
Continue with: Installation of CloverDX Server.
-
Check if you meet the prerequisites:
-
Eclipse Temurin JDK 17 or JDK 21 is installed (See Supported stacks for required Java version.)
-
JAVA_HOMEenvironment variable is set (see Setting up JAVA_HOME). -
A supported version of Apache Tomcat is installed.
-
-
It is strongly recommended to adjust the default limits for Memory allocation (see the Memory settings section).
You can set the initial and maximum memory heap size by adjusting the Xms and Xmx JVM parameters:
-
Unix-like systems:
-
Create the
[Tomcat_home]/bin/setenv.shfile. -
Type or paste in the following lines:
-
-
Windows systems:
-
Create the
[Tomcat_home]\bin\setenv.batfile. -
Type or paste in the following lines:
set "CATALINA_OPTS=%CATALINA_OPTS% -XX:MaxMetaspaceSize=512m -Xms128m -Xmx1024m"
set "CATALINA_OPTS=%CATALINA_OPTS% -Dderby.system.home=%CATALINA_HOME%/temp"
echo "Using CATALINA_OPTS: %CATALINA_OPTS%"
-
-
-
Go to the download section of your CloverDX account and download the
clover.war(web archive) file containing CloverDX Server for Apache Tomcat. -
Copy
clover.warto the[Tomcat_home]/webappsdirectory. -
Tomcat should automatically detect and deploy the
clover.warfile. -
Check whether CloverDX Server is running:
-
Run Tomcat.
-
Open a new tab in your browser and type
http://localhost:8080/clover/in the address bar. -
Use the default administrator credentials to access the web GUI:
username: clover
password: clover
-
Continue with: Configuration of CloverDX Server on Apache Tomcat
|
Default installation (without any configuration) is only recommended for evaluation purposes. For production use, at least a dedicated, system database and SMTP server configuration is recommended. |
For easy configuration of CloverDX Server, use Setup GUI, where you can configure various properties including the connection to the database, username and password, path to the license file, private properties, Clusters and much more (see List of configuration properties and Cluster configuration). We recommend you place the file in a specified location and define the path to the file with a system property.
The content of such a file (an example with a PostgreSQL database):
jdbc.driverClassName=org.postgresql.Driver
jdbc.url=jdbc:postgresql://127.0.0.1/clover_db?charSet=UTF-8
jdbc.username=yourUsername
jdbc.password=yourPassword
jdbc.dialect=org.hibernate.dialect.PostgreSQLDialectThe properties file is loaded from a location specified by a system property or by an environment variable clover_config_file or clover.config.file.
-
Create the
cloverServer.propertiesfile in a directory readable by Apache Tomcat. (If you need an example of connection to any of the supported database systems, see System database configuration.) -
Edit the
[Tomcat_home]/bin/setenv.shfile (if it does not exist, you can create it). -
Set the system property by adding the following line into the file:
JAVA_OPTS="$JAVA_OPTS -Dclover_config_file=/path/to/cloverServer.properties"
|
|
Activation
To be able to execute graphs, CloverDX Server requires a valid license. You can install and run CloverDX Server without any license, but no graph will be executed.
There are three ways of installing the license. They work on all application servers and can be used at the same time, but only the most recent valid license is used.
We recommend using the first and easiest option (for other options, see CloverDX Server activation alternatives):
CloverDX Server Activation using Web Form
If the CloverDX Server has been started without assigning any license, click the Activate server link on the welcome page. You will be redirected to the Add New License form where you can upload the license file using the Browse button, or simply copy the license from the file and paste it into the License key text field.
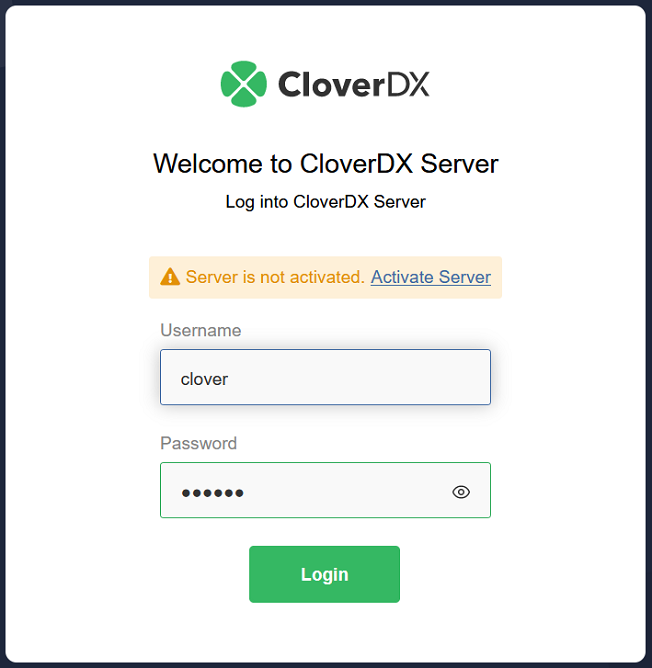
Figure 34. Login page of CloverDX Server without license
After clicking the Update button, the license is validated and saved to the database. If the license is valid, a table with license’s description appears. To proceed to CloverDX Server console click Continue to server console.
You can skip adding a license by clicking the Cancel button.

Figure 35. Add new license form
Add CloverDX Server License in the Configuration Section
If the license has been already installed, you can still change it or add a new one by using form in the Server web GUI.
-
Go to
-
Click Add license
You can paste a license text into a License key text area or use the Browse button to search for a license file in the filesystem. To skip adding a license, click the Cancel button.
After clicking the Add license button, the license is saved to the database and all licenses are reloaded.
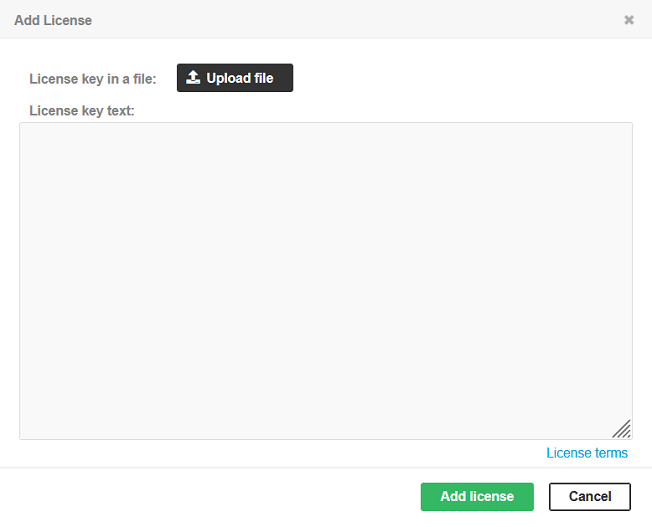
Figure 36. Update license form
Remove CloverDX Server License in the Configuration Section
License can be removed from CloverDX Server if its stored in the server database.
-
Go to
-
Remove unwanted license by clicking on trash tray icon under the detail of the license.
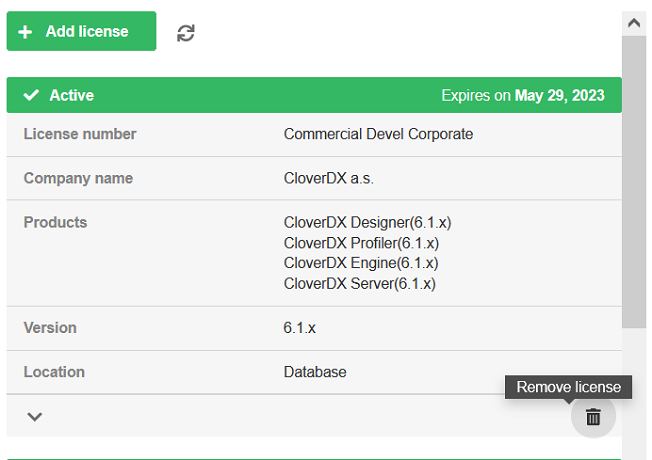
Figure 37. Remove license
|
The CloverDX license can be changed at any time by replacing
|
|
The license in the database is common for all nodes in the Cluster. Reloading of the license occurs on each node in the Cluster.
|
CloverDX Server Activation Alternatives
If, for any reason, you decide to not use the recommended way of installing the server license, you can choose one of the following options:
-
Download the
license.datfile. -
Set the CloverDX Server
license.fileparameter to the full path of thelicense.datfile.For list of properties, see List of configuration properties.
-
Restart the application server.
-
Download the
license.datfile(s). -
Set the CloverDX Server
license.dirparameter to the full path of a directory.For list of properties, see List of configuration properties.
-
Copy the
license.datfile(s) to the directory. -
Restart the application server.
|
|