
Version
Sandbox Content and Options
A sandbox should contain jobflows, graphs, metadata, external connection and all related files. Files, especially graph or jobflow files, are identified by a relative path from sandbox root. Thus you need two values to identify a specific job file: sandbox and path in sandbox. The path to the Jobflow or graph is often referred to as Job file.
Although the web GUI section sandboxes is not a file-manager, it offers some useful features for sandbox management:
Figure 107. GUI - Sandboxes context menu
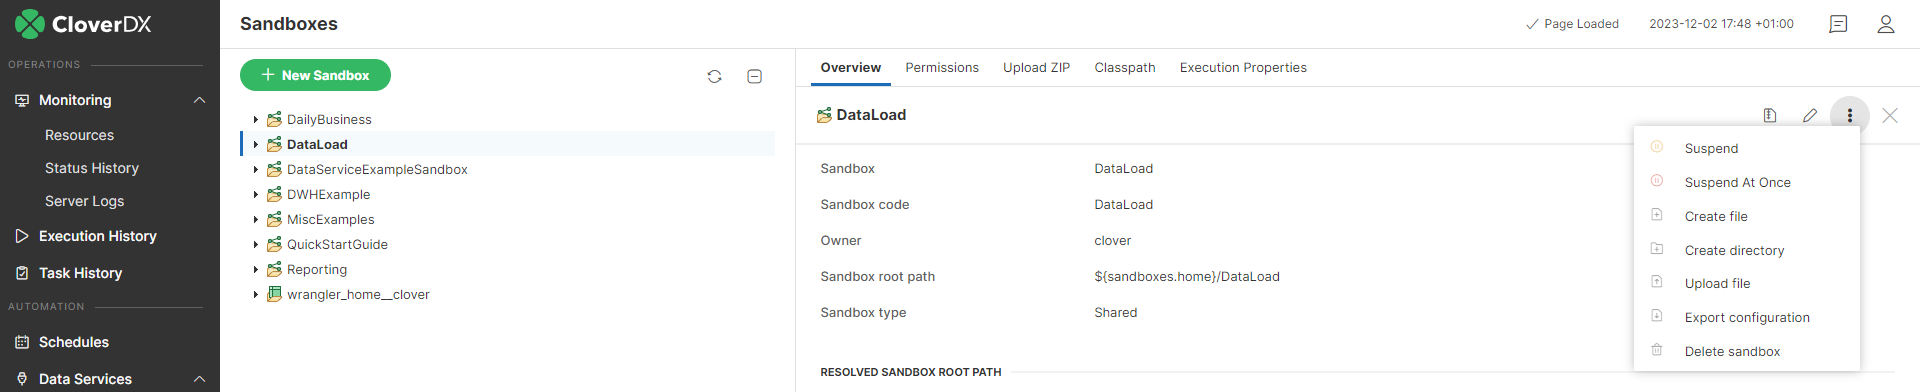
Figure 108. GUI - Sandboxes options menu
Download sandbox as ZIP
Select a sandbox in the left panel, then the web GUI displays the Download sandbox as ZIP button in the tool bar on the right side.
Created ZIP contains all readable sandbox files in the same hierarchy as on the file system. You can use this ZIP file to upload files to the same sandbox, or another sandbox on a different Server instance.
Upload ZIP to sandbox
Select a sandbox in the left panel. You must have the write permission for the selected sandbox. Then select the Upload ZIP tab in the right panel. Upload of a ZIP is parametrized by couple of switches, which are described below. Click the + Upload ZIP button, to open a common file browser dialog. When you choose a ZIP file, it is immediately uploaded to the Server and a result message is displayed. Each row of the result message contains a description of one single file upload. Depending on selected options, the file may be skipped, updated, created or deleted.
| Label | Description |
|---|---|
Encoding of packed file names |
File names which contain special characters (non ASCII) are encoded. In the drop-down list, you choose the right encoding, so filenames are decoded properly. |
Overwrite existing files |
If this checkbox is checked, the existing file is overwritten by a new one, if both of them are stored in the same path in the sandbox and both of them have the same name. |
Delete folders and files missing in uploaded zip file |
If this option is enabled, all files which are missing in uploaded ZIP file, but they exist in destination sandbox, will be deleted. This option might cause a loss of data, so the user must have the May delete files missing in uploaded ZIP permission to enable it. |
Download file in ZIP
Select a file in the left pane, then the web GUI displays the Download file as ZIP button in the tool bar on the right side.
Created ZIP contains just the selected file. This feature is useful for large files (i.e. input or output file) which cannot be displayed directly in the web GUI, so the user can download it.
Download file HTTP API
It is possible to download/view the sandbox file accessing "download servlet" by a simple HTTP GET request:
http://[host]:[port]/[Clover Context]/downloadFile?[Parameters]
The Server requires BASIC HTTP Authentication. Thus with Linux command line HTTP client "wget" it would look like this:
wget --user=clover --password=clover
    http://localhost:8080/clover/downloadFile?sandbox=default\&file=data-out/data.dat
Please note, that the ampersand character is escaped by a back-slash. Otherwise, it would be interpreted as command-line system operator, which forks processes.
URL Parameters
-
sandbox - Sandbox code. Mandatory parameter.
-
file - Path to the file relative from sandbox root. Mandatory parameter.
-
zip - If set to
true, the file is returned as ZIP and the response content type isapplication/x-zip-compressed. By default it isfalse, so the response is the content of the file.
Create File
You can create a file in a sandbox by selecting the sandbox and clicking the Options (three dots) button on the top of the right pane, or by right-clicking the sandbox in the tree pane on the left and selecting the Create file option.
After that, a popup dialog is opened where you can enter the name of the file to be created. The file creation fails if there is already a file with the same name.
Create Directory
You can create a directory in a sandbox by selecting the sandbox and clicking the Options (three dots) button on the top of the right pane, or by right-clicking the sandbox in the tree pane on the left and selecting the Create directory option.
After that, a popup dialog is opened where you can enter the name of the directory to be created. The directory creation fails if there is already a file with the same name.
Upload File
You can upload a file into a sandbox by selecting the sandbox and clicking the Options (three dots) button on the top of the right pane, or by right-clicking the sandbox in the tree pane on the left and then selecting the Upload file option.
After that, a file browser is opened where you can select a file to be uploaded. The upload will fail if a file with the same name already exists.
You can also simply drag and drop a file into a sandbox or directory.
Export Sandbox Configuration
You can export sandbox-related configuration by selecting the sandbox and clicking the Export configuration button on the top of the right pane, or by right-clicking the sandbox in the tree pane on the left and selecting the Export configuration option.
This action creates sandbox_configuration.xml file that can be imported by Sandbox Configuration Import.
Delete Sandbox
You can delete a sandbox by selecting the sandbox and clicking the Delete sandbox button on the top of the right pane, or by right-clicking the sandbox in the tree pane on the left and selecting the Delete sandbox option.
After that, a confirmation dialog opens where you can choose to delete sandbox files on disk, as well.