Version
25. Export Project as Library
|
See the Libraries section for more information on CloverDX libraries and libraries development best practices and recommendations. |
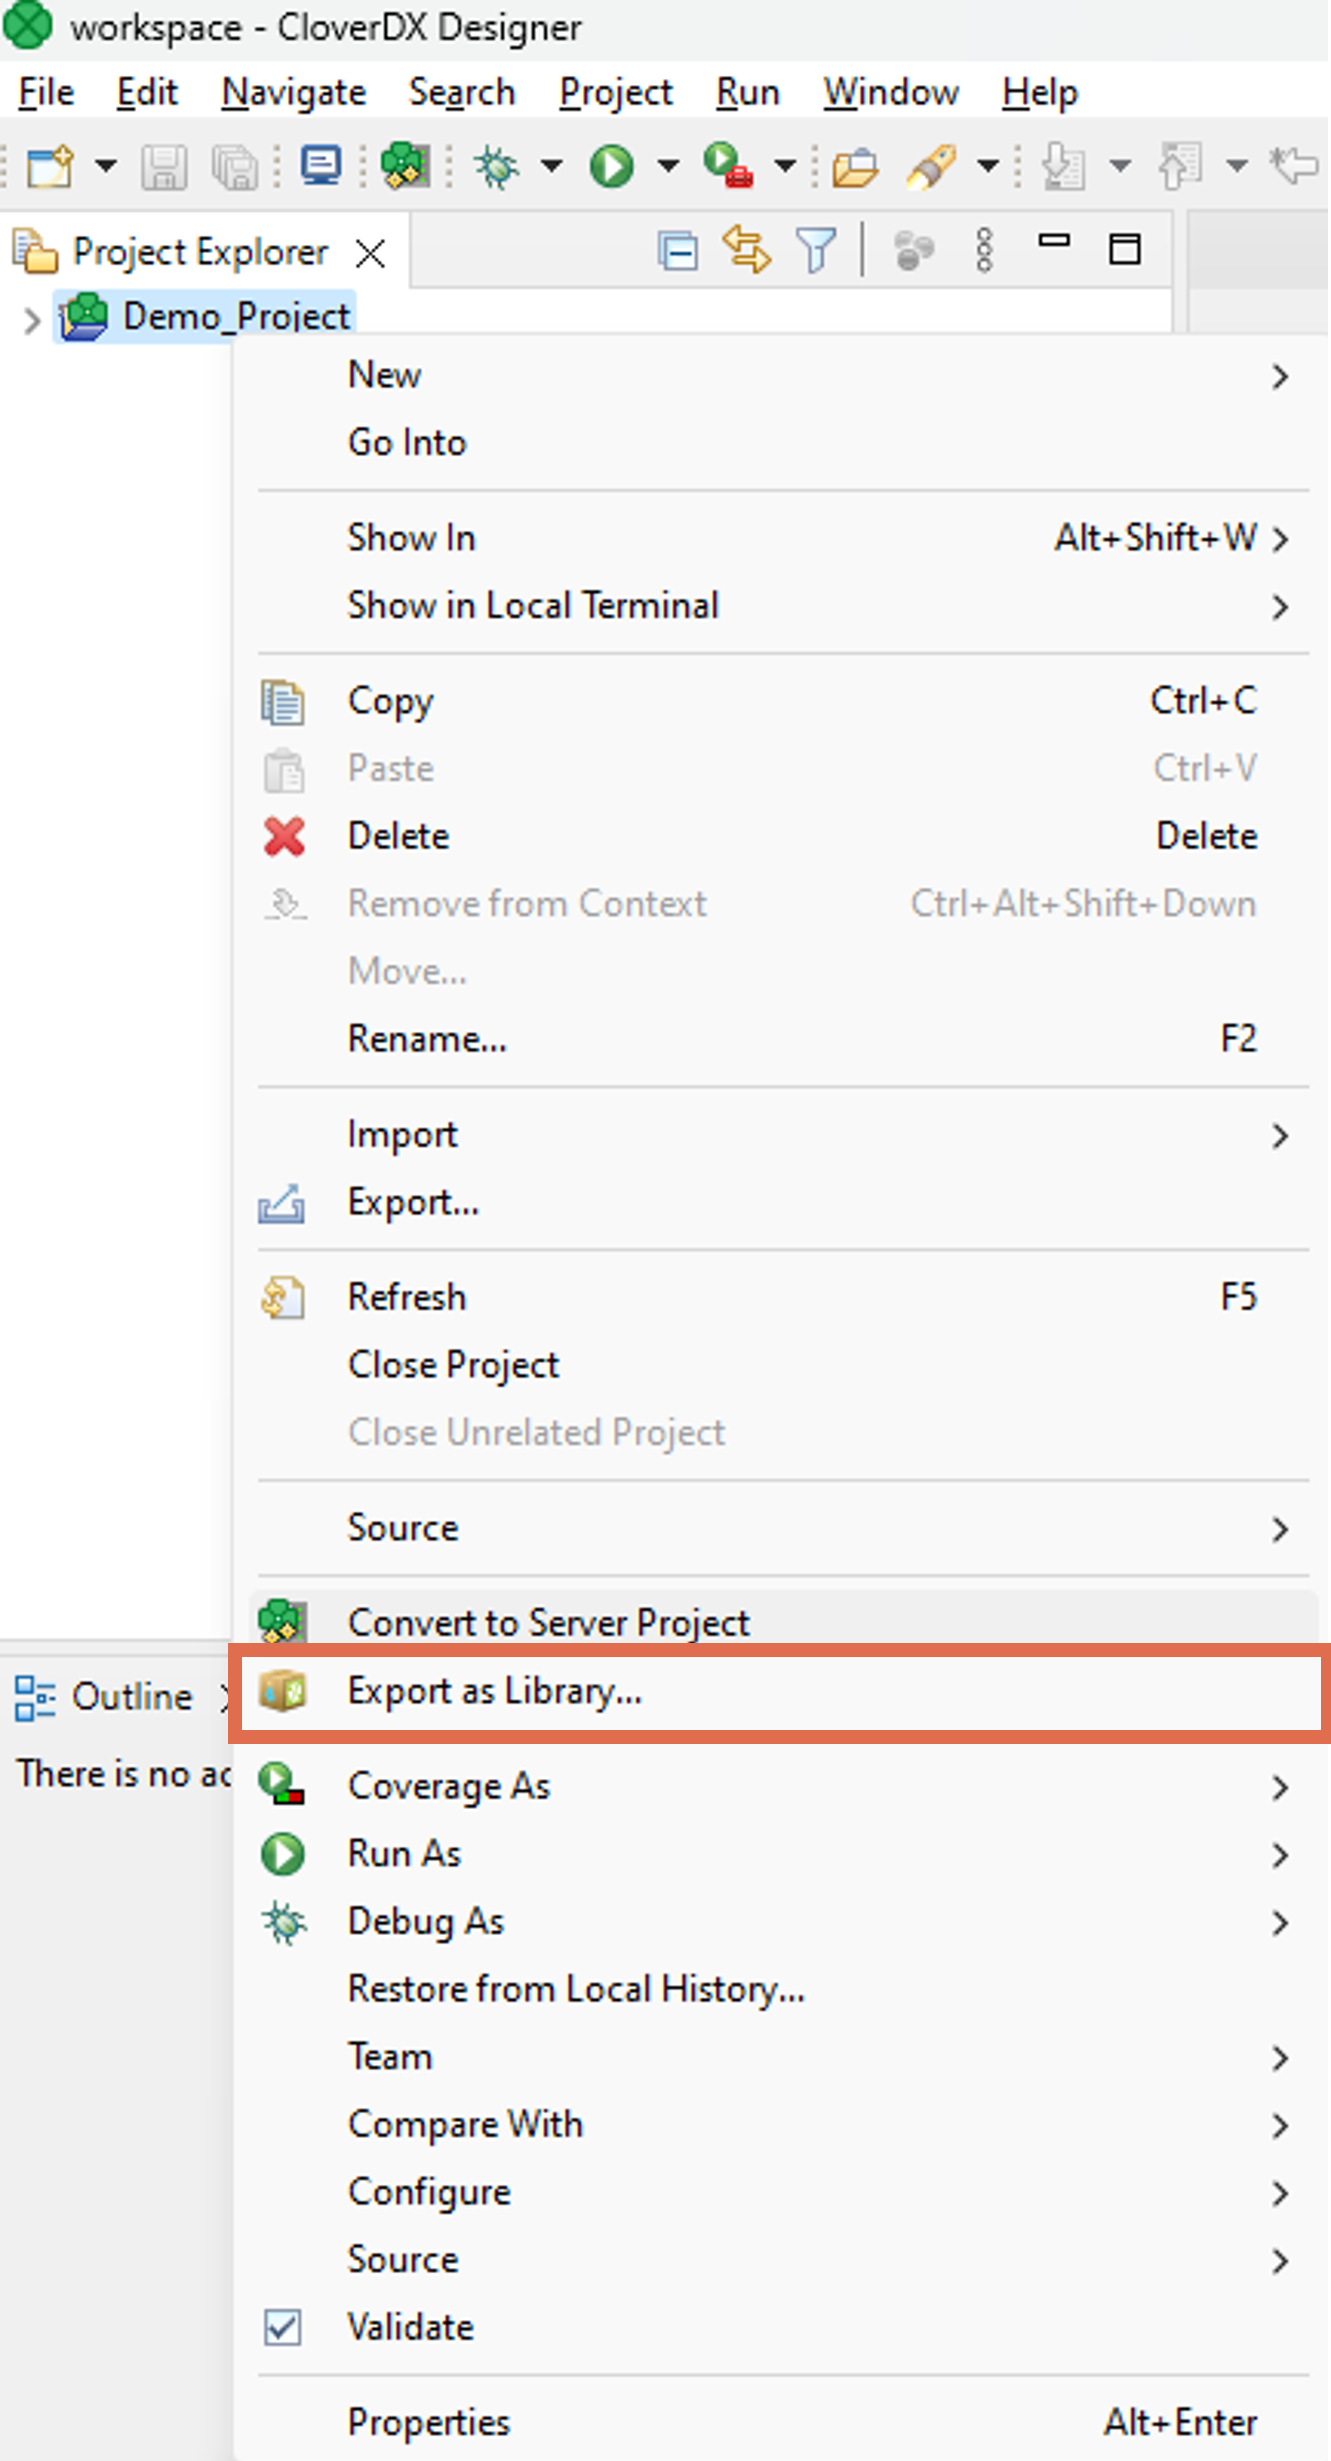
To export a project into a CloverDX library file, right-click on it and select Export as Library…
Figure 125. Export project as library
The action will open a wizard. On the first page of the wizard, you can select which elements should be public – visible to other users. Other elements will also be included in the package, but they will be hidden. These internal elements may be used as sub-routines in the public ones.

Figure 126. Export as library – selecting public resources
On the second wizard page, you can select data source connectors. For more information, see Requirements for Data Source Connectors.

Figure 127. Export as library – selecting data source connectors
On the third wizard page, you can select data target connectors. For more information, see Requirements for Data Target Connectors.
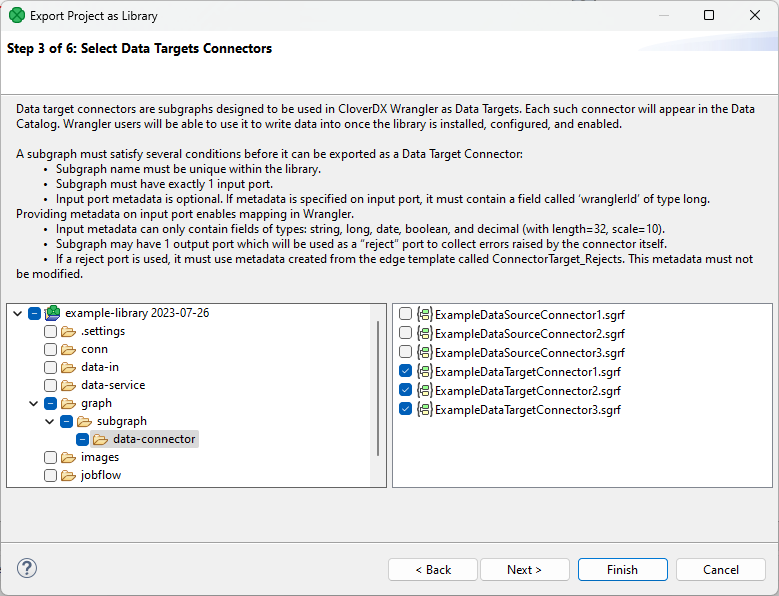
Figure 128. Export as library – selecting data target connectors
On the fourth wizard page, you can select one job (graph, subgraph, jobflow) which you may use as an initialization job for your library after you successfully install it on CloverDX Server. Note that an initialization job must not include required parameters. For more information, see Initialization Jobs (pre-generating metadata).
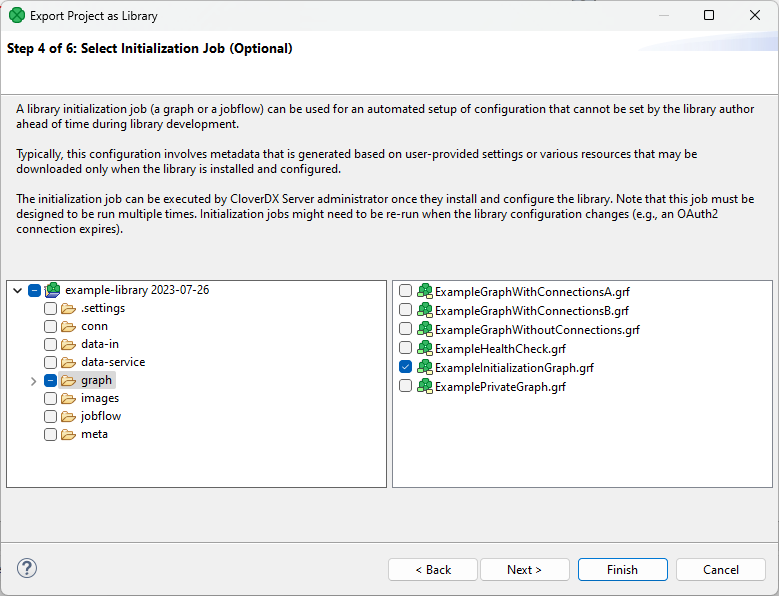
Figure 129. Export as library – selecting an initialization job
On the fifth page, you can select a Health Check job which will be used to monitor health of your library. Note that a Health Check job must not include required parameters.
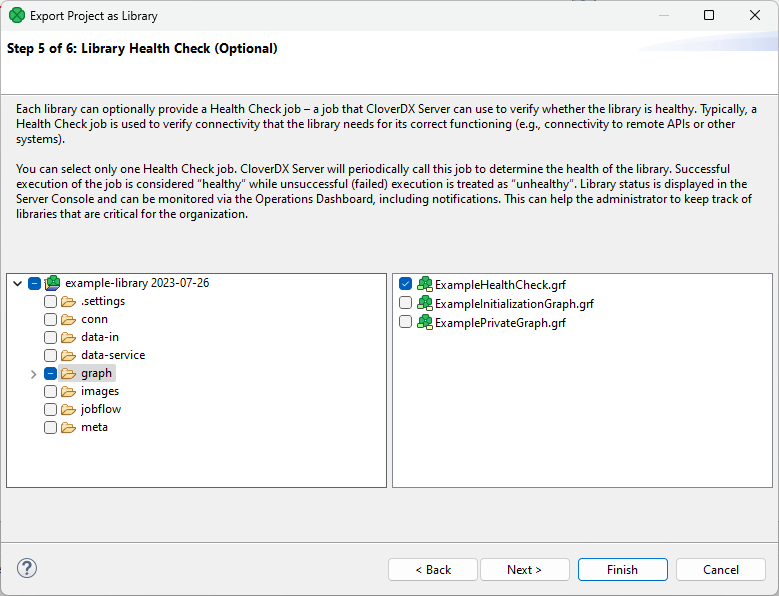
Figure 130. Export as library – selecting a Health Check job
On the last wizard page, you can give your library a custom Name, Author, Version. These fields are mandatory.
Minimum and Maximum product version, and Description are optional.
The Minimum and Maximum product specify minimum and maximum CloverDX versions, for which the library is supported in CloverDX Server. This information is a crucial indicator for CloverDX administrators. These fields highlight potential compatibility issues when installing the library on a server version outside the specified range. For more information refer to the Server documenation here.
Finally, you need to select the output file path.
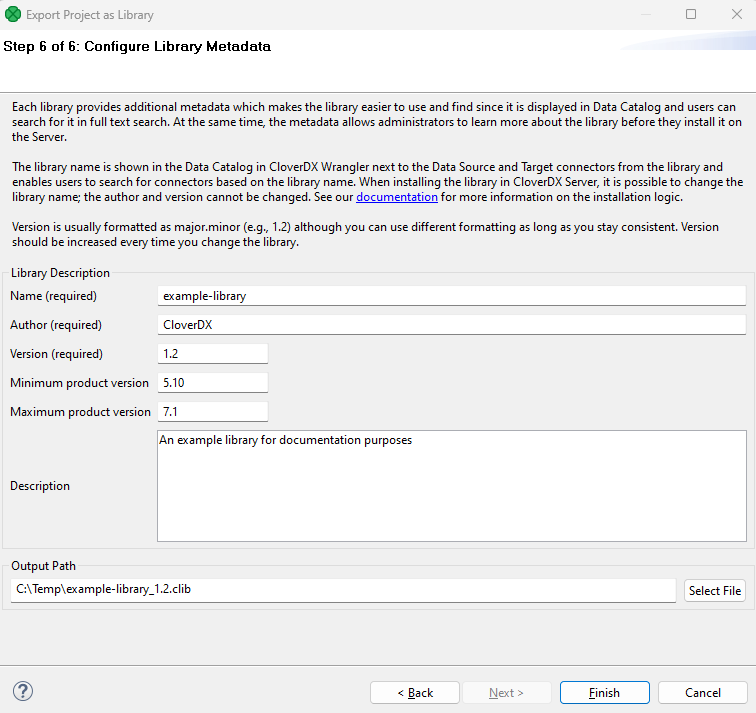
Figure 131. Export as library – configuring metadata
After pressing Finish, the wizard will package the project (excluding data-out and data-tmp directories) into a file with the “.clib” extension. An administrator can install the file to CloverDX Server in the Libraries section.