Extracting Metadata from a Flat File
When you want to create metadata by extracting them from a flat file, right click Metadata in Outline and select . After that, the Flat file wizard opens.
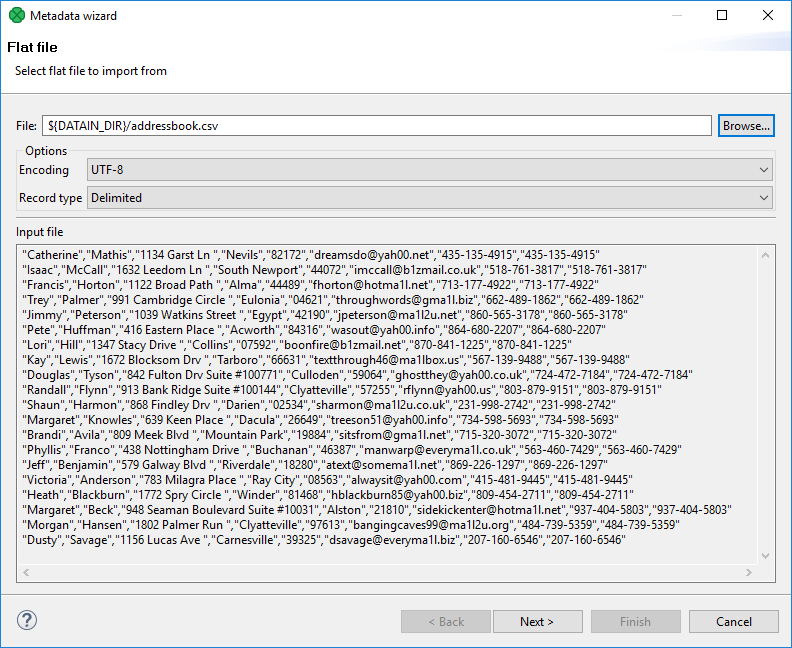
In the wizard, type the file name or locate it using the Browse… button.
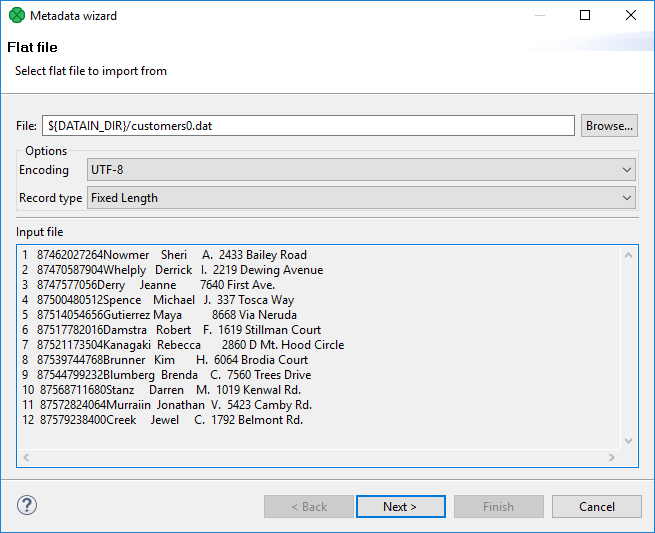
Once you have selected the file, you can specify the Encoding and Record type options as well.
The default Encoding is UTF-8 and the default Record type is delimited.
If the fields of records are separated from each other by some delimiters, you may agree with the default Delimited as the Record type option. If the fields are of some defined sizes, you need to switch to the Fixed Length option.
After selecting the file, its contents will be displayed in the Input file pane. See below:


Extracted Metadata Preview
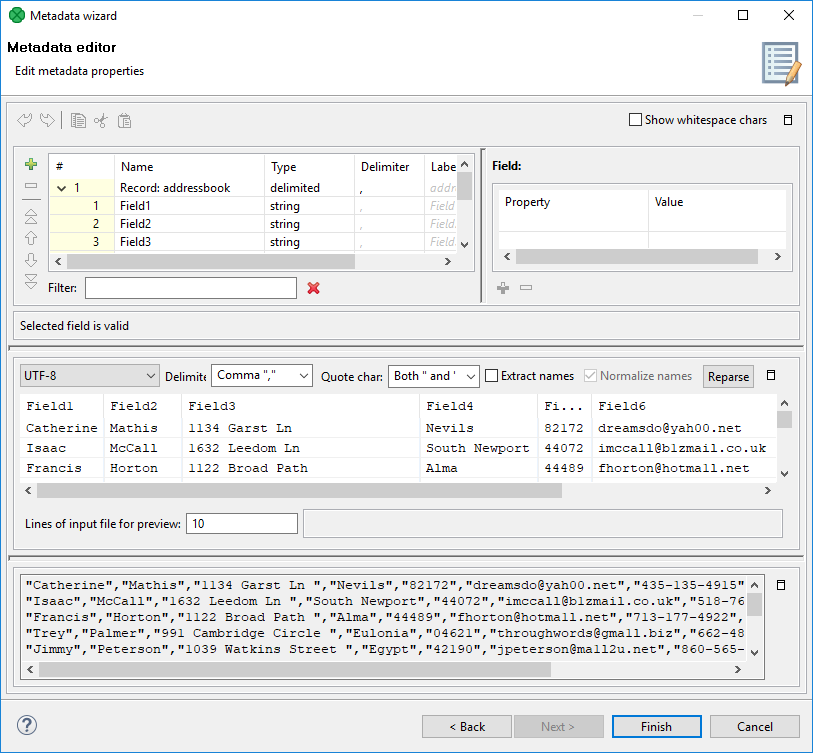
After clicking Next, you can see more detailed information about the content of the input file and the delimiters in the Metadata dialog. It consists of four panes. The first two are at the upper part of the window, the third is at the middle, the fourth is at the bottom. Each pane can be expanded to the whole window by clicking the corresponding symbol in its upper right corner.
The first two panes at the top are the panes described in Metadata Editor. If you want to set up the metadata, you can do it in the way explained in more details in the mentioned section. You can click the symbol in the upper right corner of the pane after which the two panes expand to the whole window. The left and the right panes can be called the Record and the Details panes, respectively. In the Record pane, there are displayed either Delimiters (for delimited metadata), or Sizes (for fixed length metadata) of the fields or both (for mixed metadata only).
After clicking any of the fields in the Record pane, detailed information about the selected field or the whole record will be displayed in the Details pane.
Some Properties have default values, whereas others have not.
In this pane, you can see the Basic properties (Name of the field, Type of the field, Delimiter after the field, Size of the field, Nullable, Default value of the field, Skip source rows, Description) and Advanced properties (Format, Locale, Autofilling, Shift, EOF as delimiter). For more details on how you can change the metadata structure, see Metadata Editor.
You can change some metadata settings in the third pane.
You can specify whether the first line of the file contains the names of the record fields.
If so, you need to check the Extract names checkbox.
If you want, you can also click some column header and decide whether you want to change the name of the field (Rename) or the data type of the field (Retype). If there are no field names in the file, CloverDX Designer gives them the names Field# as the default names of the fields.
By default, the type of all record fields is set to string.
You can change this data type for any other type by selecting the right option from the presented list.
These options are as follows: boolean, byte, cbyte, date, decimal, integer, long, number, string.
For more detailed description, see Data Types in Metadata.
This third pane is different between Delimited and Fixed Length files. See:
At the bottom of the wizard, the fourth pane displays the contents of the file.
In case you are creating internal metadata, click the Finish button.
If you are creating external (shared) metadata, click the offered Next button, then select the folder (meta) and name of metadata and click Finish.
The extension .fmt will be added to the metadata file automatically.
Extracting Metadata from Delimited Files
If you expand the pane in the middle to the whole wizard window, you will see the following:

You may need to specify which delimiter is used in the file (Delimiter). The delimiter can be a comma, colon, semicolon, space, tabulator, or a sequence of characters. You need to select the right option.
Finally, click the Reparse button, after which you will see the file as it has been parsed in the pane below.
The Normalize names option allows you to get rid of invalid characters in fields. They will be replaced with the underscore character (_). This is available only with Extract names checked.
Alternatively, use the Quote char combo box to select which kind of quotation marks should be removed from string fields. Do not forget to click Reparse after you have selected one of the options: " or ' or Both " and '. Quotation marks have to form a pair and selecting one kind of Quote char results in ignoring the other one (e.g. if you select " then they will be removed from each field while all ' characters are treated as common strings). If you need to retain the actual quote character in the field, it has to be escaped, e.g. "" - this will be extracted as a single ". Delimiters (selected in Delimiter) surrounded by quotes are ignored. Moreover, you can enter your own delimiter into the combo box as a single character, e.g. the pipe - type only | (no quotes around).
Examples:
"person" - will be extracted as person (Quote char set to " or Both " and ').
"address"1 - will not be extracted and the field will show an error; the reason is the delimiter is expected right after the quotes ("address"; would be fine with ; as the delimiter).
first"Name" - will be extracted as first"Name" - if there is no quotation mark at the beginning of the field, the whole field is regarded as a common string.
"'doubleQuotes'" (Quote char set to " or Both " and ') - will be extracted as 'doubleQuotes' as only the outer quotation marks are always removed and the rest of the field is left untouched.
"unpaired - will not be extracted as quotation marks have be in pair; this would be an error
'delimiter;' (with Quote char set to ' or Both " and ' and Delimiter set to ;) - will be extracted as delimiter; as the delimiter inside quotation marks is ignored.
Extracting Metadata from Fixed Length Files
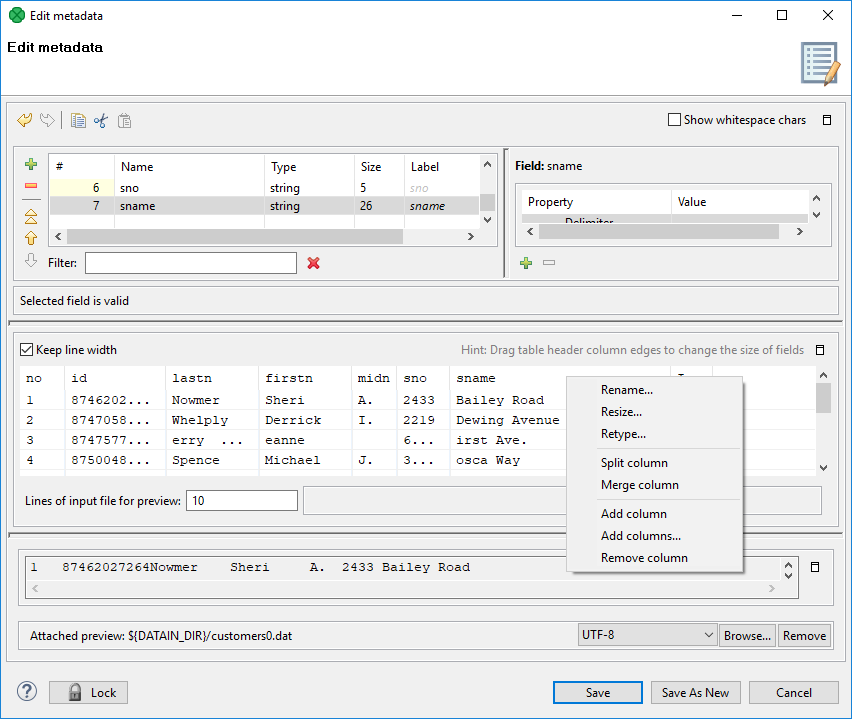
If you expand the pane in the middle to the whole wizard window, you will see the following:

You must specify the sizes of each field (Resize). You may also want to split any column, merge columns, add one or more columns, remove columns. You can change the sizes by moving the borders of the columns.
