Version
CloverDX Project
From the CloverDX perspective, select .
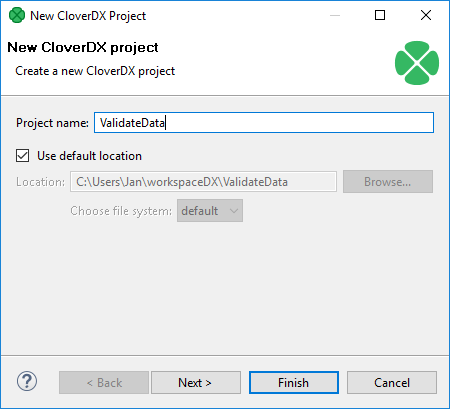
The following wizard will open and you will be asked to name your project:
Figure 51. Naming a CloverDX Project
In the next step, you can set up names of particular project subdirectories. We suggest to use the default values.
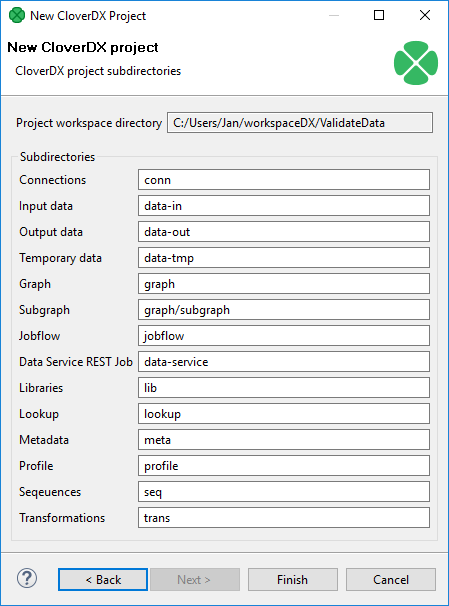
Figure 52. CloverDX Project subdirectories
Click Finish to create the selected local CloverDX project with the specified name.