IBM WebSphere
| Installation of CloverDX Server on IBM WebSphere |
| Configuration of CloverDX Server on IBM WebSphere |
![[Important]](../figures/important.png) | Important |
|---|---|
Before installation, check the software requirements, currently supported IBM WebSphere version and required Java version in the Software Requirements section. If you encounter any problems during the installation, see Chapter 10, Troubleshooting for a possible solution. |
Installation of CloverDX Server on IBM WebSphere
Download and install IBM WebSphere from the official download page.
Note: During installation, make sure the IBM WebSphere profile name does not contain the keyword clover, otherwise the CloverDX Server won't start properly.
It is strongly recommended to adjust the default limits for Memory allocation (see the Memory Settings section).
You can set the limits in IBM WebSphere's Integrated Solutions Console (default URL:
http://localhost:9060/ibm/console/).Go to → → → → → →
Change the value in the Maximum heap size field to 2048 MB. The default value (256 MB) is insufficient for ETL transformations.
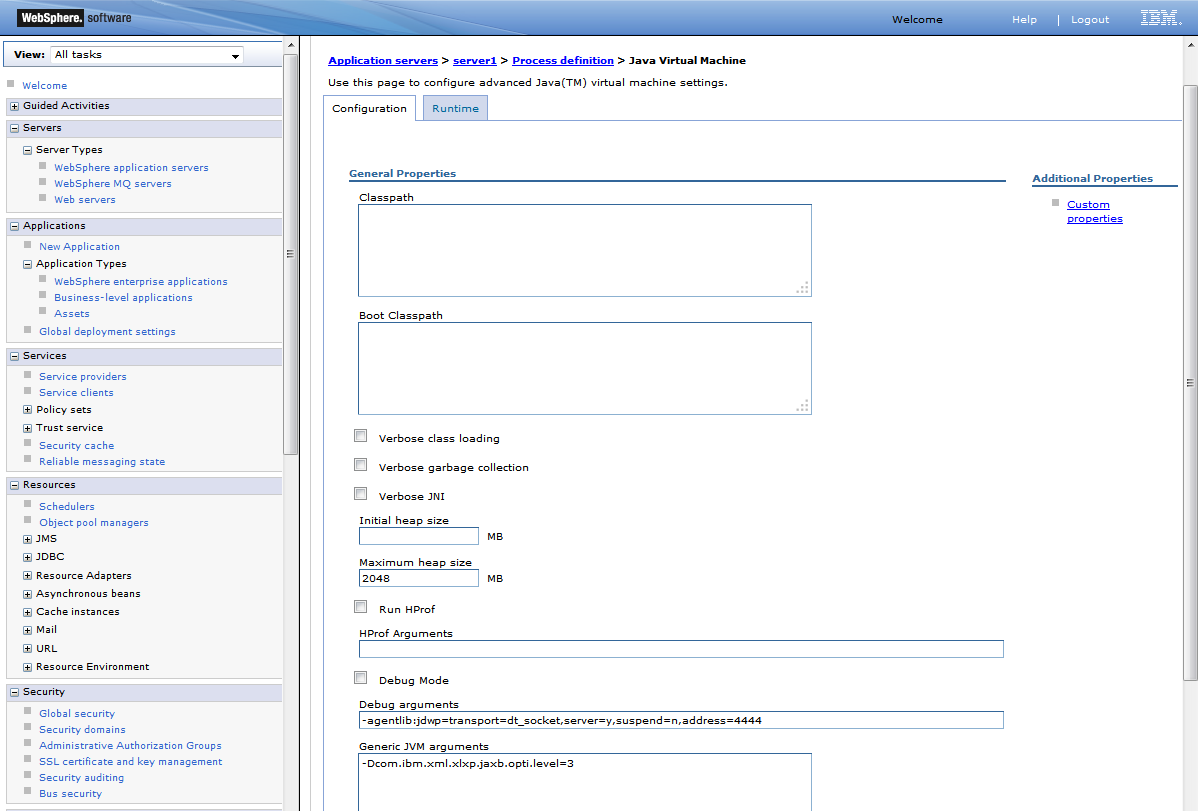
Figure 7.3. Adjusting Maximum heap size limit
Add the following parameters into the Generic JVM arguments field to set the perm space limit and direct memory limit:
-XX:MaxPermSize=512M-XX:MaxDirectMemorySize=512MJava runtime settings:
Go to → → → → and select version 1.8 as the default SDK.
Save the changes to configuration and restart the Server so that they take effect.
Go to the download section of your CloverDX account and download the
clover.war(web archive) file containing CloverDX Server for WebSphere.Deploy the
clover.warfile.Go to Integrated Solutions Console (default URL:
http://localhost:9060/ibm/console/).Go to → → , select the CloverDX Server WAR archive and deploy it to the application server, but do not start it yet.
Configure application class loading.
Go to → → → → and under Class loading mode select Classes loaded with local class loader first (parent last).
Save the changes to the Server configuration and start the clover_war application.
Log in CloverDX Server.
Provided you set
clover.waras the application running with "clover" context path, use the following URL (notice the port number has changed):http://localhost:9080/cloverActivate the CloverDX Server.
Use the default administrator credentials to access the web GUI:
Username: clover
Password: clover
![[Note]](../figures/note.png) | Note |
|---|---|
When uploading a large number of files in quick succession,
the server may return HTTP Status Code 408 Request Timeout.
To fix it, set the Some CloverDX features using third party libraries do not work properly on IBM WebSphere.
|
Configuration of CloverDX Server on IBM WebSphere
![[Tip]](../figures/tip.png) | Tip |
|---|---|
Default installation (without any configuration) is only recommended for evaluation purposes. For production use, at least a dedicated, system database and SMTP server configuration is recommended. |
For easy configuration of CloverDX Server, use a Setup GUI in which you can configure various properties, including the connection to the database, username and password, path to the license file, private properties, Clusters and much more (see Chapter 15, List of Configuration Properties and Chapter 42, Cluster Configuration). We recommend you place the file in a specified location and specify the path to the file with a system property.
The content of such a file (an example with a PostgreSQL database):
jdbc.driverClassName=org.postgresql.Driver
jdbc.url=jdbc:postgresql://127.0.0.1/clover_db?charSet=UTF-8
jdbc.username=yourUsername
jdbc.password=yourPassword
jdbc.dialect=org.hibernate.dialect.PostgreSQLDialect
Properties File in Specified Location
The properties file is loaded from a location which is specified by the
environment/system property clover_config_file or clover.config.file.
Create the
cloverServer.propertiesfile in a directory readable by IBM WebSphere. (If you need an example of connection to any of the supported database systems, see Chapter 14, System Database Configuration.)Set a system property (or environment variable)
clover_config_filepointing to the properties file.Go to Integrated Solutions Console (default URL:
http://localhost:9060/ibm/console/).Go to → → → → → → .
Create a system property named
clover_config_filewhose value is a full path to the properties file (e.g.cloverServer.properties) on your file system.
Restart IBM WebSphere for changes to take effect.
| Note |
|---|---|
|