Auto-propagated Metadata
| Introduction to Auto-propagated Metadata |
| Sources of Auto-Propagated Metadata |
| Explicitly Propagated Metadata |
| Priorities of Metadata |
| Jobflow |
Introduction to Auto-propagated Metadata
In many cases, CloverDX is able to detect metadata on edges automatically via metadata propagation. Metadata propagation is a process which propagates metadata through the graph based on a set of rules. The metadata to propagate is taken from sources such as edges with manually assigned metadata and from components that can inject metadata into the graph.

Figure 32.1. Metadata propagation: metadata is propagated from the first edge on the left side to all connected edges.
You do not have to assign metadata manually to each edge in graph as metadata is propagated by default. You can override metadata on edges by manually selecting propagated metadata or by user-defined metadata.
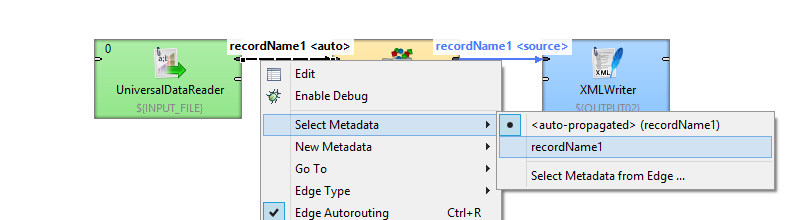
Figure 32.2. Changing auto-propagated metadata to user-defined.
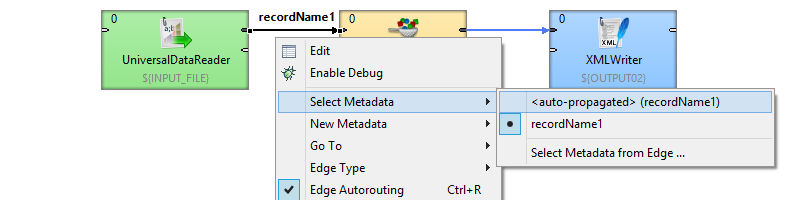
Figure 32.3. Changing user-defined metadata to auto-propagated.
Principles of Propagation
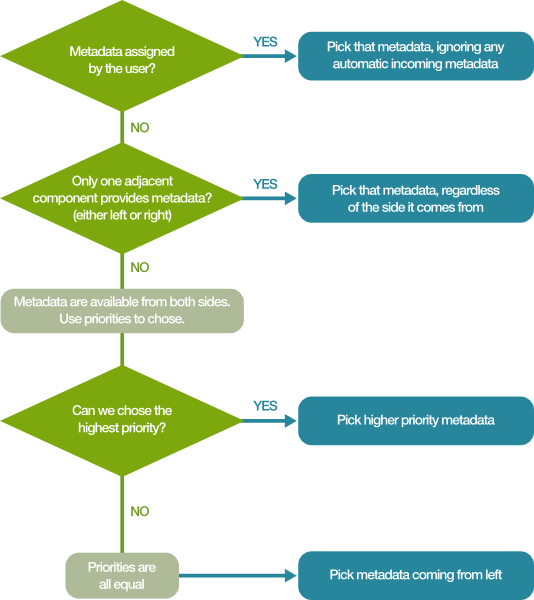
Metadata propagation depends on a graph layout, priorities of metadata propagation of particular component and manually assigned metadata. Metadata is propagated through directly or indirectly connected components and edges. To propagate metadata to an edge in a separated part of graph, an action from the user is needed.
Components may have different priorities of metadata propagation from both sides or can propagate one way only (e.g. Reformat).

Figure 32.4. Different priorities of metadata propagation
At least some metadata must be known: assigned by the user or propagated from a template on a port of a component.
Sources of Auto-Propagated Metadata
| Component |
| Edge |
Component
Some components have metadata templates assigned to their ports. The metadata from templates propagates from the component to the connected edge.
For example, metadata for error records are auto-propagated on the second output port of SpreadsheetDataReader. Another example of component having metadata assigned on port is ListFiles. Subgraph component can propagate metadata from itself too.
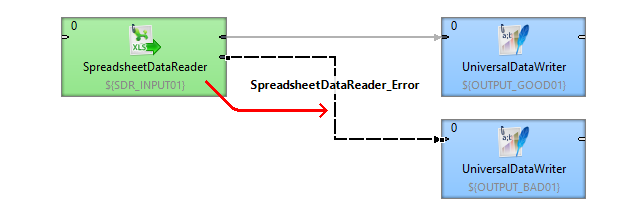
Figure 32.5. Metadata propagated from the component
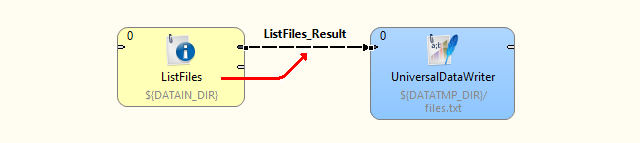
Figure 32.6. Metadata propagated from the component II.
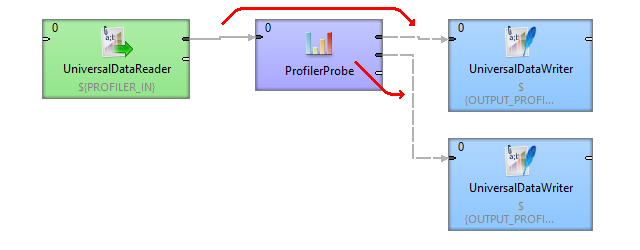
Figure 32.7. Metadata propagated from the component, metadata template is defined within the component.
Edge
Some components (e.g. SimpleCopy) propagate metadata from input to output ports. Thus metadata can be auto-propagated on an edge as coming from a different edge, even several components away.
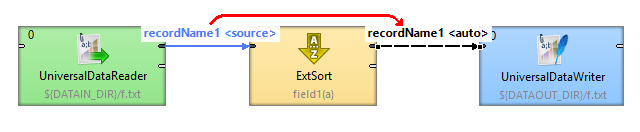
Figure 32.8. Metadata propagated from the another edge
Figure 32.9. Metadata propagated from a distant edge
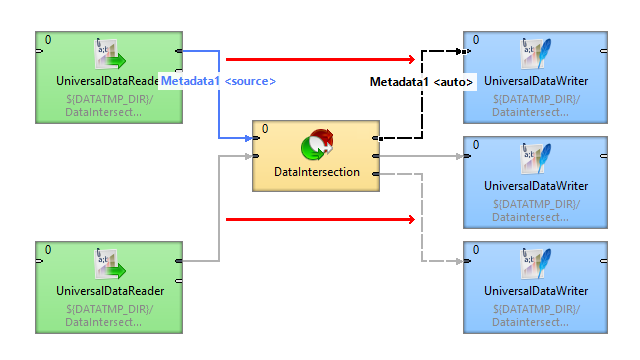
Figure 32.10. Advanced metadata propagation - DataIntersection
Metadata can be propagated from left to right or from right to left. Some components can propagate metadata between ports at the same side of the component using the port on the other side. Components not changing metadata structure (e.g. Filter, SimpleCopy, etc.) usually propagate metadata from both sides.
The component-specific metadata propagation details can be found in the reference of particular components.

Figure 32.11. Overview of directions of metadata propagation
Explicitly Propagated Metadata
An edge can have explicitly assigned metadata of another edge of the graph. Both edges do not have to be connected through any other components and edges. The user has to define an edge from which the metadata is propagated.
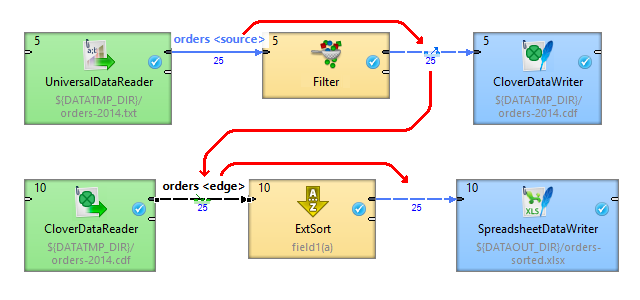
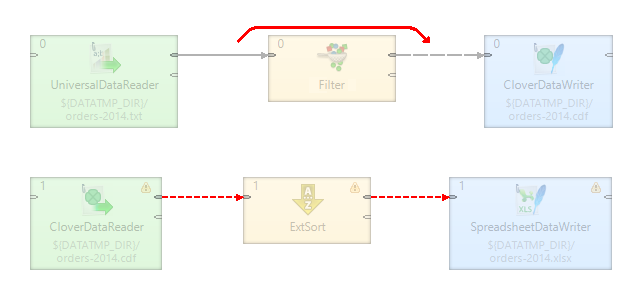
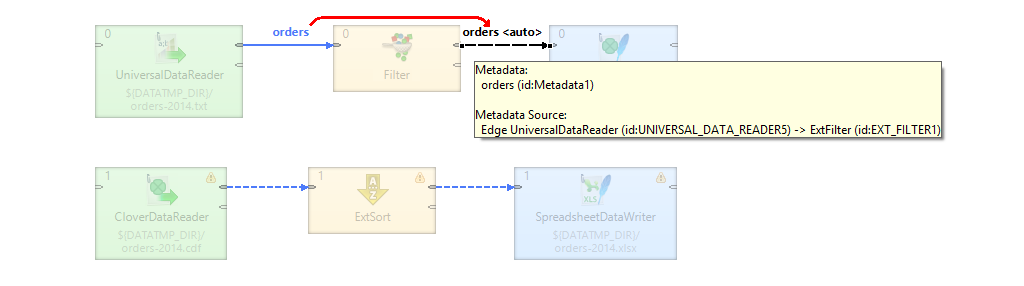
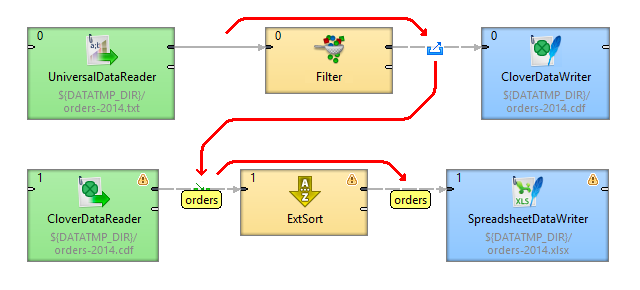
Figure 32.12. Metadata propagated from an unconnected distant edge
Let us explain the figure above: the metadata orders assigned to the edge between FlatFileReader and Filter are propagated through Filter.
We need the same metadata to read records using CloverDataReader as CloverDataWriter uses; therefore, we define that the edge between CloverDataReader and ExtSort takes metadata (see the green symbol) from the edge (the blue symbol) between Filter and CloverDataWriter.
Assigning Explicitly Propagated Metadata
Right click the edge to which you need to assign metadata and choose →
The message informs you about activation of a selection tool.
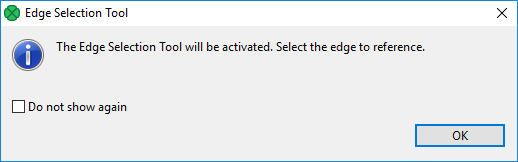
The cursor has changed and the graph editor pane is now transparent.
Click the edge you need to take metadata from.
The metadata has been propagated. The blue symbol denotes the source edge of metadata, the green one denotes the target edge.
Priorities of Metadata
Auto-propagated metadata has lower priority than explicitly defined metadata. You are free to override metadata assigned to the edge with different metadata. The auto-propagated metadata can be overridden in the same way as assigning new metadata to the edge: either by dragging and dropping from outline or by right clicking on the edge and choosing Select Metadata or New metadata.
Propagation of SQL Query Metadata
SQL query metadata can be propagated; however, editing is done in the editor for user defined metadata and any changes must be saved as a new non-SQL query metadata. This limitation also applies to editing SQL query metadata in Transformation editor output (e.g. Reformat).
Jobflow
Auto-propagated metadata work also with jobflow components.
Figure 32.13. Metadata propagated from the another edge
![[Note]](../figures/note.png) | COMPATIBILITY NOTICE |
|---|---|
Auto-propagated metadata is available since version 4.0.0. To propagate metadata, you must also open the context menu by right-clicking the edge, then selecting the item. The metadata will be propagated until it reaches a component in which metadata can be changed (e.g. Reformat, Joiners, etc.). |