Version
1. Designer installation
System requirements
Hardware
This section outlines the hardware resources needed to run CloverDX Designer. The listed specifications provide a baseline for functionality, with recommendations for optimal performance.
| Resource | Requirements |
|---|---|
RAM |
4 GB; 8 GB or more for optimal performance |
Processors |
Dual-core CPU; quad core CPU for optimal performance |
Disk space (installation) |
1 GB |
Disk space (data) |
1 GB (minimum; depending on data) |
Screen resolution |
Best on Full HD |
Software
This section details the operating systems and Java versions supported by CloverDX Designer.
| Operating system | Note |
|---|---|
Microsoft Windows |
MS Windows 10 or 11, 64-bit. |
macOS |
macOS 13 (Ventura) or newer, running on Apple Silicon (M1, M2 or M3 CPUs) or Intel CPUs. Apple Silicon is recommended - a native build is provided since CloverDX 6.4. |
Linux |
Linux 64-bit with GTK+ 3.22.0 or newer. While we primarily test on Ubuntu, the Designer should work on all modern Linux distributions. |
| Java | Notes |
|---|---|
Eclipse Temurin JDK[1] |
Eclipse Temurin JDK 17, 64-bit (formerly AdoptOpenJDK), which can be downloaded from the following site: https://adoptium.net. |
|
Windows and macOS installers include all the needed dependencies. When installing the Designer on a Linux OS, Eclipse Temurin JDK 17 needs to be downloaded separately, and the JAVA_HOME path set to point to it. |
Downloading
To download CloverDX Designer perform the following steps:
-
Log into your account in our CloverDX Customer Portal.
-
Click on Product Downloads.
-
In the CloverDX Designer section click on one of the download links based on the desired operating system (Windows, Linux or macOS). The download process should start automatically.
Continue with: Installing
Installing
Windows
The installation of CloverDX Designer is done using an installation wizard.
The installation wizard helps you to set up the directory to which CloverDX will be installed and to choose the instance of Java that will be used.
Installation steps
-
Allow installer to run by clicking on Yes to the question: Do you want to allow this app to make changes to your device?
-
On the welcome page of the CloverDX Designer installation, click on Next.
-
Accept license agreement using the I Agree button.
-
Choose an installation location and continue using the Next button.
-
Modify CloverDX Designer settings if needed:
-
Choose the desired Java Development Kit - use one of the following options:
-
Recommended: Install separate Eclipse Temurin OpenJDK 17 with CloverDX
-
Use an existing Eclipse Temurin OpenJDK 17 installation
-
-
Choose an installation location for shortcuts: Create desktop shortcut or Do not create shortcut.
-
-
Accept the Java Development Kit License agreement by clicking on I Agree.
-
Choose a Start menu folder and click on Install.
-
Installation of the program is done. Close the wizard by clicking on Finish.
Mac OS
Install the program in the same way as other .dmg applications.
Installation steps
-
Double click the downloaded
.dmgfile. -
Agree with the license.
-
Drag and drop the CloverDX Designer to Application or to the place you would like to place it.
Linux
The CloverDX Designer for Linux is distributed as a .tar.gz file.
Installation steps
Extract the archive.
tar xvzf cloverdx-designer-linux-gtk-x86_64.tar.gz
The executable to run is CloverDXDesigner/CloverDXDesigner.
|
For more comfortable running, add the binary to the |
|
We recommend you install On rpm-based distributions, run
On deb-based distributions, run
|
Continue with: Starting
Starting
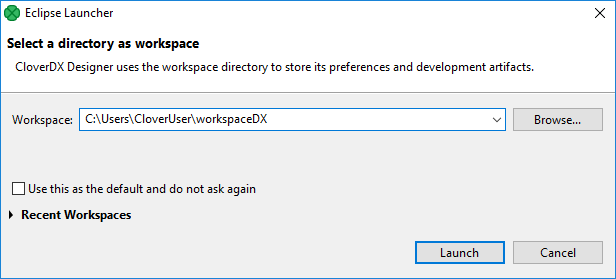
The first thing you will be prompted to define after the CloverDX Designer launches, is the workspace folder. Workspace is a place your projects will be stored at; usually a folder in the user’s home directory (e.g., C:\Users\your_name\workspace or /home/your_name/CloverDX/workspace )
Figure 1. Workspace Selection Dialog
Note that the workspace can be located anywhere. Make sure you have proper permissions to the location. If a non-existing folder is specified, it will be created.
When the workspace is set, the welcome screen is displayed.
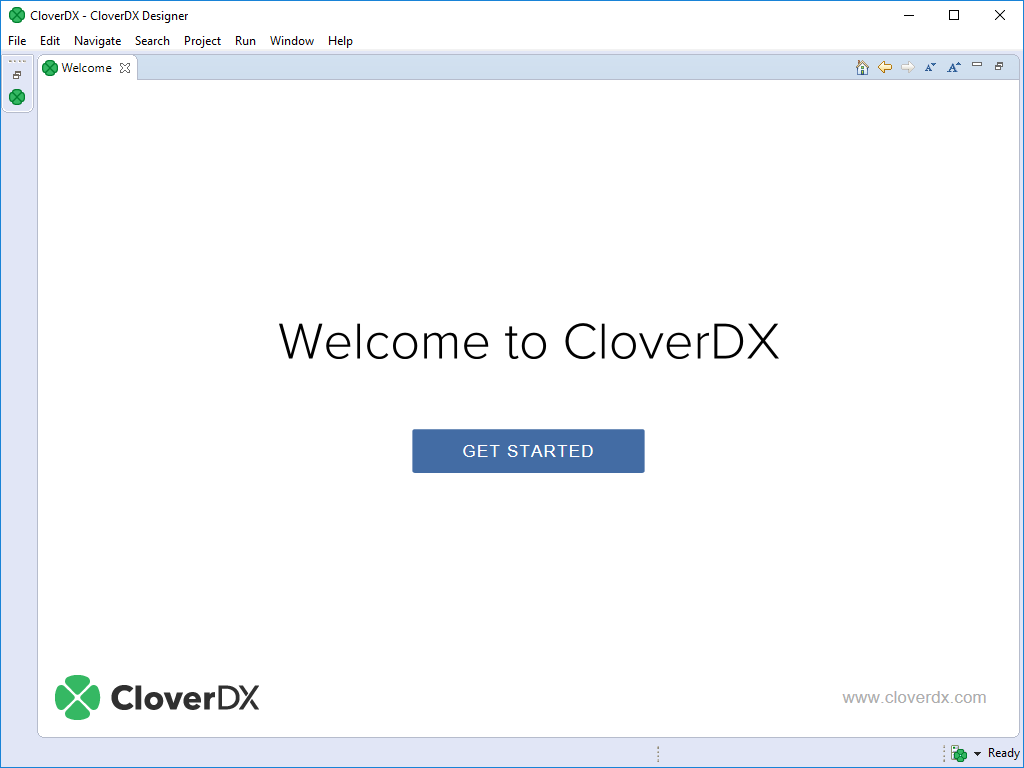
Figure 2. CloverDX Designer Introductory Screen
When you have started for the first time, you are asked to activate the product.
The first steps with CloverDX Designer are described in Creating CloverDX projects.
The documentation is accessible from the main menu under .
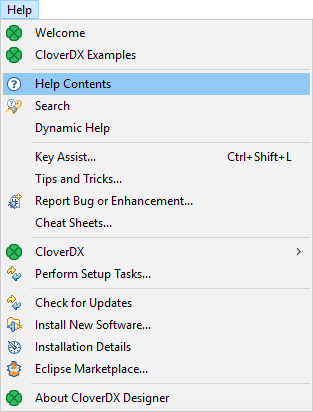
Figure 3. CloverDX Help
|
Eclipse secure storage
Eclipse secure storage stores passwords used in Eclipse. If you have a clean installation of Eclipse, the first time you enter a password, you will be prompted to specify a master password for Eclipse secure storage. You can specify secure storage options in . For more information about secure storage, see Eclipse User Guide. |
Activating
CloverDX Designer needs activating before you can use it. If Designer without a valid license starts, you are instructed to activate it.
Click Activate using license key to activate the Designer.
If you do not have a license key, the I need a license key button opens a web page where you can get a trial license.
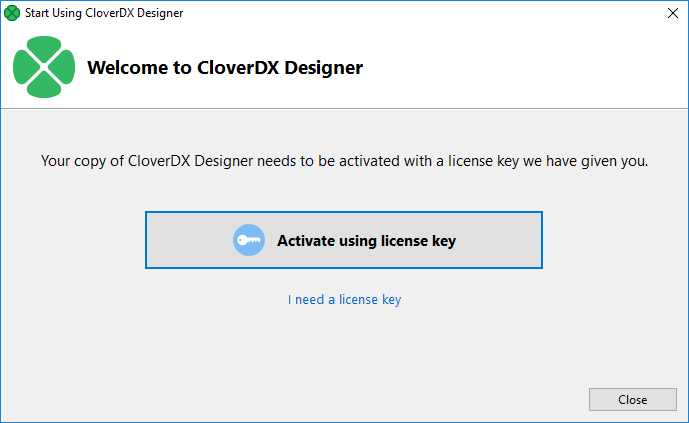
Figure 4. Choose licensing
Activation using license key
The license can be activated using a license key. Internet connection isn’t necessary for this choice. Following pictures illustrates the process of new license activation.
Copy and paste the license text, or specify the path to the license file with Load from File button.
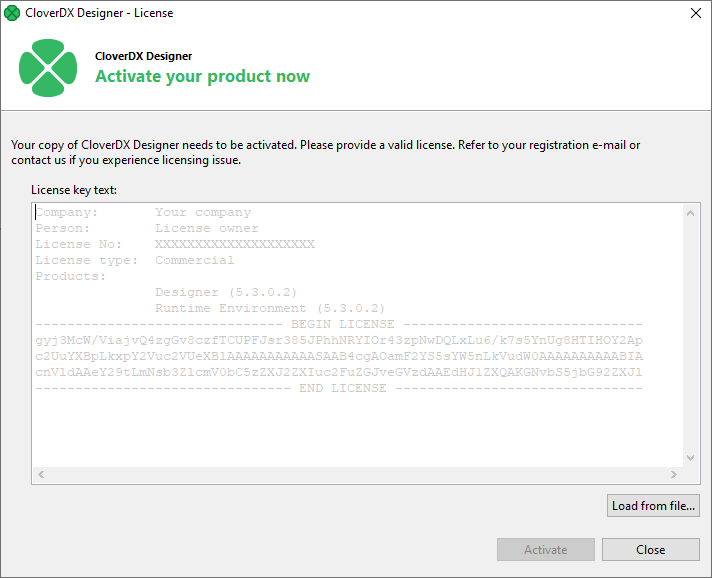
Figure 5. Dialog for specifying license
Confirm you accept the license agreement and click Finish button.
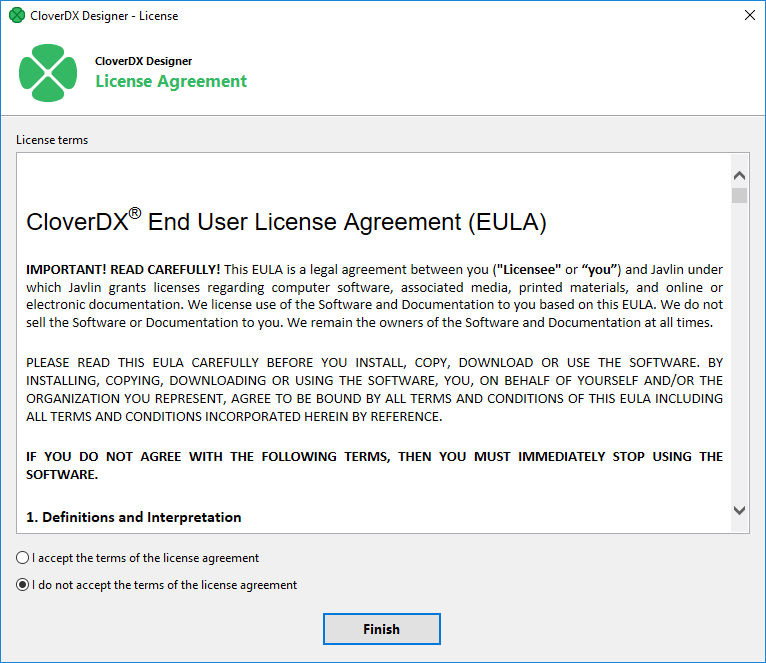
Figure 6. License agreement
The license has been applied, the CloverDX Designer has been activated.
Already activated license can be deleted with the help of License Manager.
|
You should have received the license key by an email. If you are installing a trial version of CloverDX Designer you got the license key after the registration. The license key can be also acquired on your CloverDX Account: log in at www.cloverdx.com/login and under the section Download you see a View license key button. |
License manager
This chapter describes how you can add or remove licenses at CloverDX Designer.
License Manager is designed to easily add new licenses and remove or view existing licenses. The manager is accessible in the main menu - select .
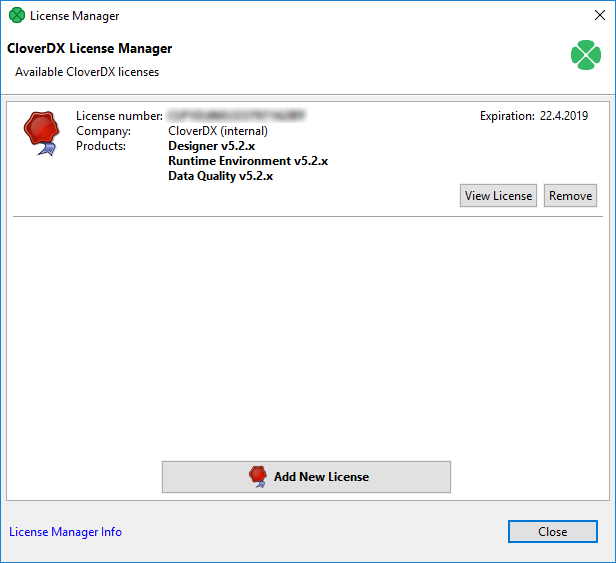
Figure 7. License Manager showing installed licenses.
License manager allows you to:
-
Browse all available licenses and it’s details:
-
License number - number of installed license.
-
Company
-
Products - list of licensed products.
-
Expiration - expiration date of the license.
-
-
Open CloverDX License dialog to view all available information about the license.
-
Check available license sources. The license sources are shown after clicking on License Manager Info.
-
Open Add New License dialog. New license can be added with the help of this wizard. Click Add New License button to start the process of license activation. See Activating.
-
Delete existing license. Remove button is shown if it is possible to remove activated license. Confirmation is required when deleting license.
CloverDX license dialog
CloverDX License dialog shows all available information about the license. License terms are available from this place. It can be opened from License Manager (License Manager)
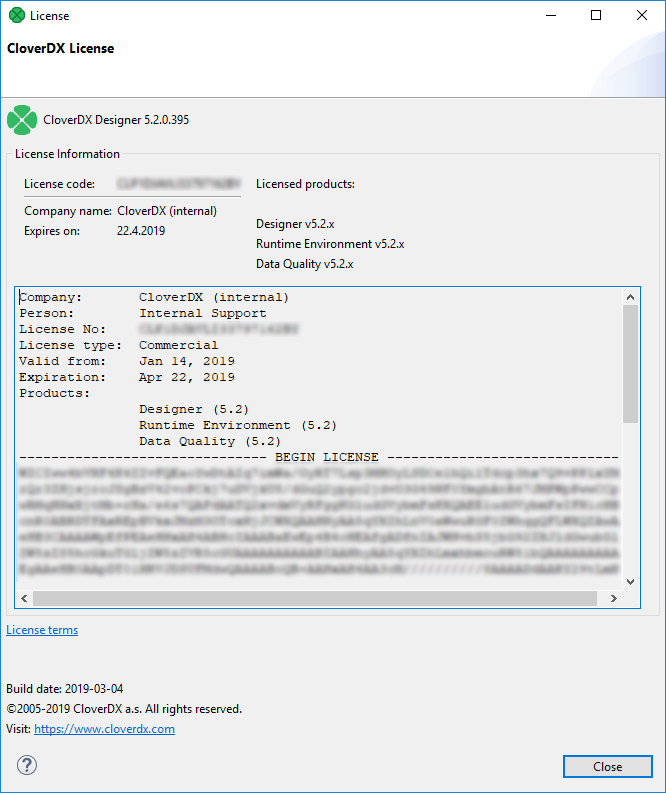
Figure 8. CloverDX License dialog
|
License Terms needn’t to be accessible for some licenses. |
Troubleshooting
This chapter contains some infrequent errors you may encounter and solutions to them.
Windows
Windows SmartScreen
In the case of installation of CloverDX Designer on Microsoft Windows 8 the installer may be prevented from starting by SmartScreen.
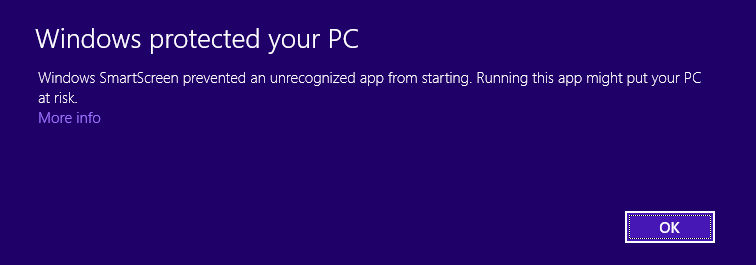
Figure 9. SmartScreen warning
To start the CloverDX Designer installer, click on More info, check that the publisher is CloverDX a.s. and then click on Run anyway.
More information about SmartScreen:
User account control
On Microsoft Windows, the User Account Control can prevent the installer of CloverDX Designer from running. Click YES to allow the installer to run.
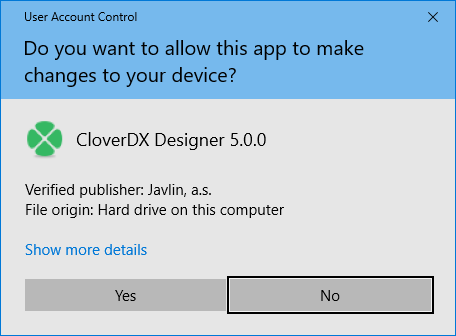
Figure 10. User Account Control Preventing the Installation
Windows 10 firewall
Windows 10 shows security warning when Designer’s Runtime is starting.
CloverDX Designer application starts as two processes: CloverDX Designer GUI and CloverDX Runtime. These processes need to communicate with each other over TCP protocol. You should allow the mutual communication with Allow access button.
Linux
Designer stops responding
Due to bug in Linux/GTK+, Designer runs out of number of open files as the backend opens the file /etc/cups/client.cont many times.
As workaround, you can configure the printers in /etc/cups/client.conf file, or add -Dorg.eclipse.swt.internal.gtk.disablePrinting to CloverDX.ini file.
See https://wiki.eclipse.org/IRC_FAQ#Why_does_Eclipse_hang_for_an_extended_period_of_time_after_opening_an_editor_in_Linux.2Fgtk.2B.3F, https://bugs.eclipse.org/bugs/show_bug.cgi?id=215234 or https://bugzilla.gnome.org/show_bug.cgi?id=346903.
Welcome page not displayed
Welcome page requires webkitgtk library to be present on your system.
Install webkitgtk version 1.
Hints on edges have no content
If hints on edges contain only the frame but no content, you should install webkitgtk.
Component editor not working
In older Linux versions (e.g. Ubuntu 16.04 MATE or Linux Mint 18 Cinnamon), Eclipse platform may experience some problems related to the system’s GTK version. For example, when using GTK 2, the component editor in CloverDX Designer may not work properly.
In such a case, add the following parameter to CloverDXDesigner.ini located in the root folder of your CloverDX Designer installation:
--launcher.GTK_version
2
This parameter forces CloverDX Designer to run using GTK 2 which may fix the problem.
Note: do not use the parameter on systems using GTK 3 (e.g. Manjaro with KDE Plasma 5), as it may cause other problems (e.g. non-functional tooltips in the graph editor).
Others
Subclipse
If you use CloverDX Designer with Subclipse plugin, and perform the following steps: In a project, create a directory aaa, create a file bbb, delete the directory aaa, and rename file bbb to aaa; you may encounter the message:
An exception has been caught while processing the refactoring 'Rename resource'.
Reason:
Problems encountered while moving resources.

Error deleting markers for resource bbb.
Resource aaa does not exist.
This problem is caused by caching resources by the Subclipse plugin and is not related to CloverDX.
If this message appears, refresh the project in Project Explorer.
Online activity
CloverDX Designer by default accesses the following internet addresses:
-
Eclipse (198.41.30.198, 198.41.30.200) - automated check for Eclipse updates.
Designer is fully functional when used offline.
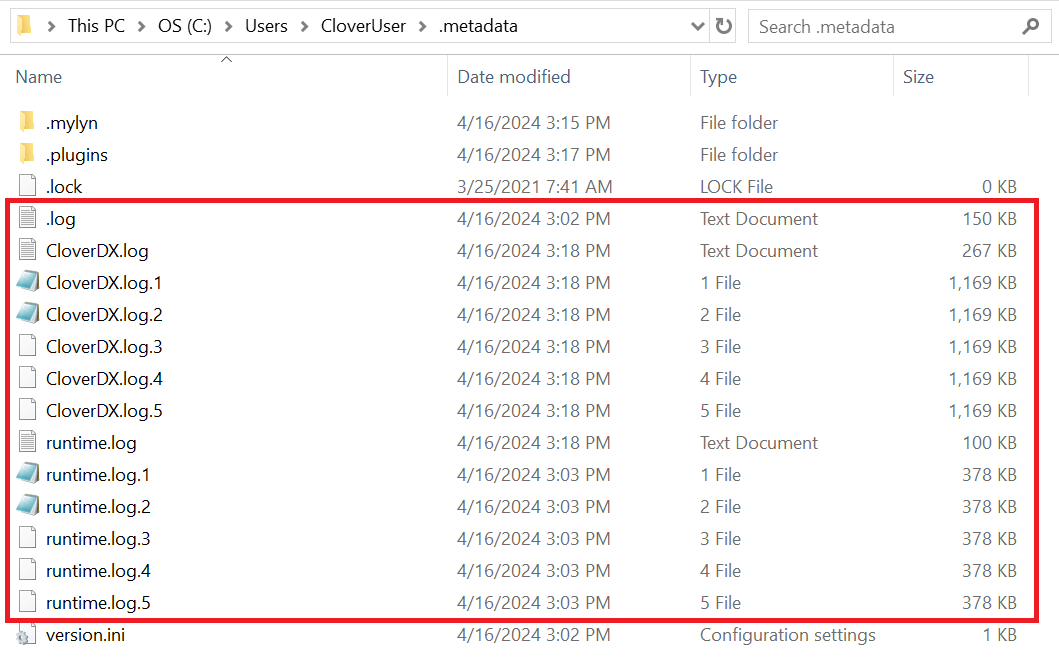
Logs
CloverDX Designer logs provide valuable information for troubleshooting purposes. These logs are stored in your workspace directory > .metadata folder. To find your current workspace directory go to File > Switch Workspace > Other…. The displayed path is your current workspace directory.
Within the .metadata folder, you’ll find three log files:
-
.log: This file contains messages related to the underlying Eclipse platform that CloverDX Designer is built upon.
-
CloverDX.log files: These files capture all messages specific to CloverDX Designer’s functionality, including transformation execution and application events.
-
runtime.log files: These files capture all messages specific to CloverDX Designer Runtime’s functionality, including Runtime configuration.
|
Including all sets of logs will provide a comprehensive view of your CloverDX Designer session and aid the CloverDX Support team in pinpointing the root cause of the issue. |
IBM InfoSphere MDM plugin installation
CloverDX IBM InfoSphere MDM Components is an extension of CloverDX for connectivity to IBM InfoSphere MDM technology. The extension can be installed and used with CloverDX Designer and CloverDX Server. For installation steps into CloverDX Server, refer here.
CloverDX supports IBM InfoSphere MDM 11.6 and 12.0 since version 5.11.0.
Downloading
IBM InfoSphere MDM Components for CloverDX Designer are downloaded and installed from an online update-site. The update site is used in Eclipse (or Designer) to install the extension, see Installation into Designer for details.
The update site locations are:
-
https://download.cloverdx.com/ibm-mdm-11-6-update for IBM InfoSphere MDM 11.6
-
https://download.cloverdx.com/ibm-mdm-12-0-update for IBM InfoSphere MDM 12.0
|
In case you need an older version, add the slash and the version number to the end of the URL, for example a link for version 5.11.0 is: |
Installation
The following steps are needed to install IBM InfoSphere MDM Components into CloverDX Designer:
-
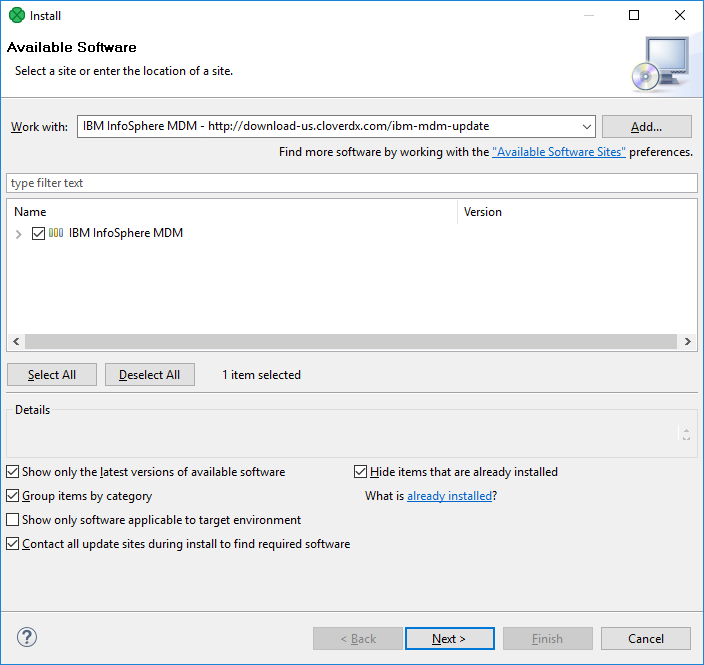
Start Designer and open the Install wizard via the Help > Install New Software menu.
-
In the Work with: text box, enter the update site location for IBM InfoSphere MDM Components, e.g. https://download.cloverdx.com/ibm-mdm-12-0-update. See Downloading for update site locations.
-
Select all IBM InfoSphere MDM Components plugins by enabling the checkbox to the left of IBM InfoSphere MDM xx.y, click on Next button and proceed with the wizard.
-
After finishing the Install wizard and installing the plugins, you will be asked to restart Eclipse. After restarting, the IBM InfoSphere MDM Components are available for use.
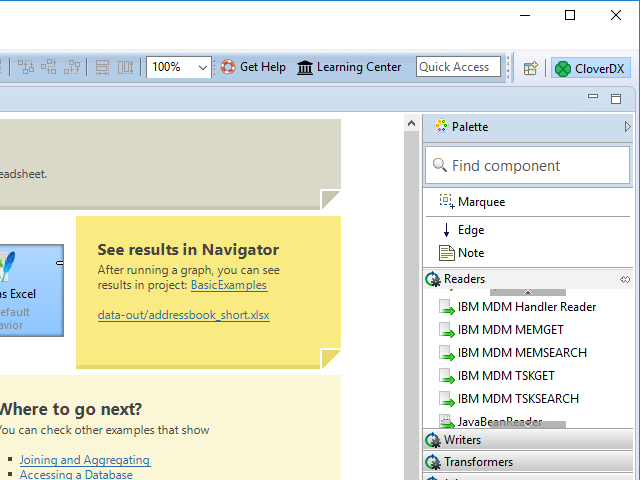
To verify that IBM InfoSphere MDM Components plugin was successfully installed, you can look into the Palette of an opened CloverDX graph and see IBM InfoSphere MDM components:
|
If the Designer is reinstalled then it’s necessary also to reinstall the IBM InfoSphere MDM plugin. It is not possible to install multiple versions of IBM InfoSphere MDM plugin into one CloverDX Designer. |
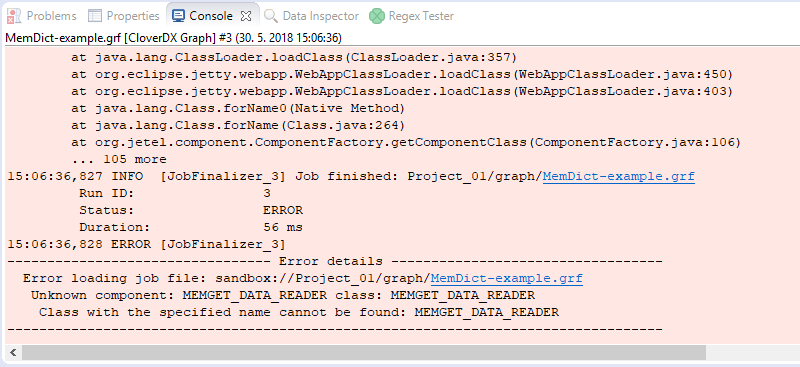
Troubleshooting
If you get an Unknown component or Unknown connection error when running a graph with IBM InfoSphere MDM components, it means that the IBM InfoSphere MDM Components plugin was not installed successfully.
Please check the above steps to install the plugin.
Example of the error: