Chapter 36. Scheduling
The scheduling module allows you to create a time schedule for operations you need to trigger in a repetitive or timely manner.
Similar to cron from Unix systems, each schedule represents a separate time schedule definition and a task to perform.
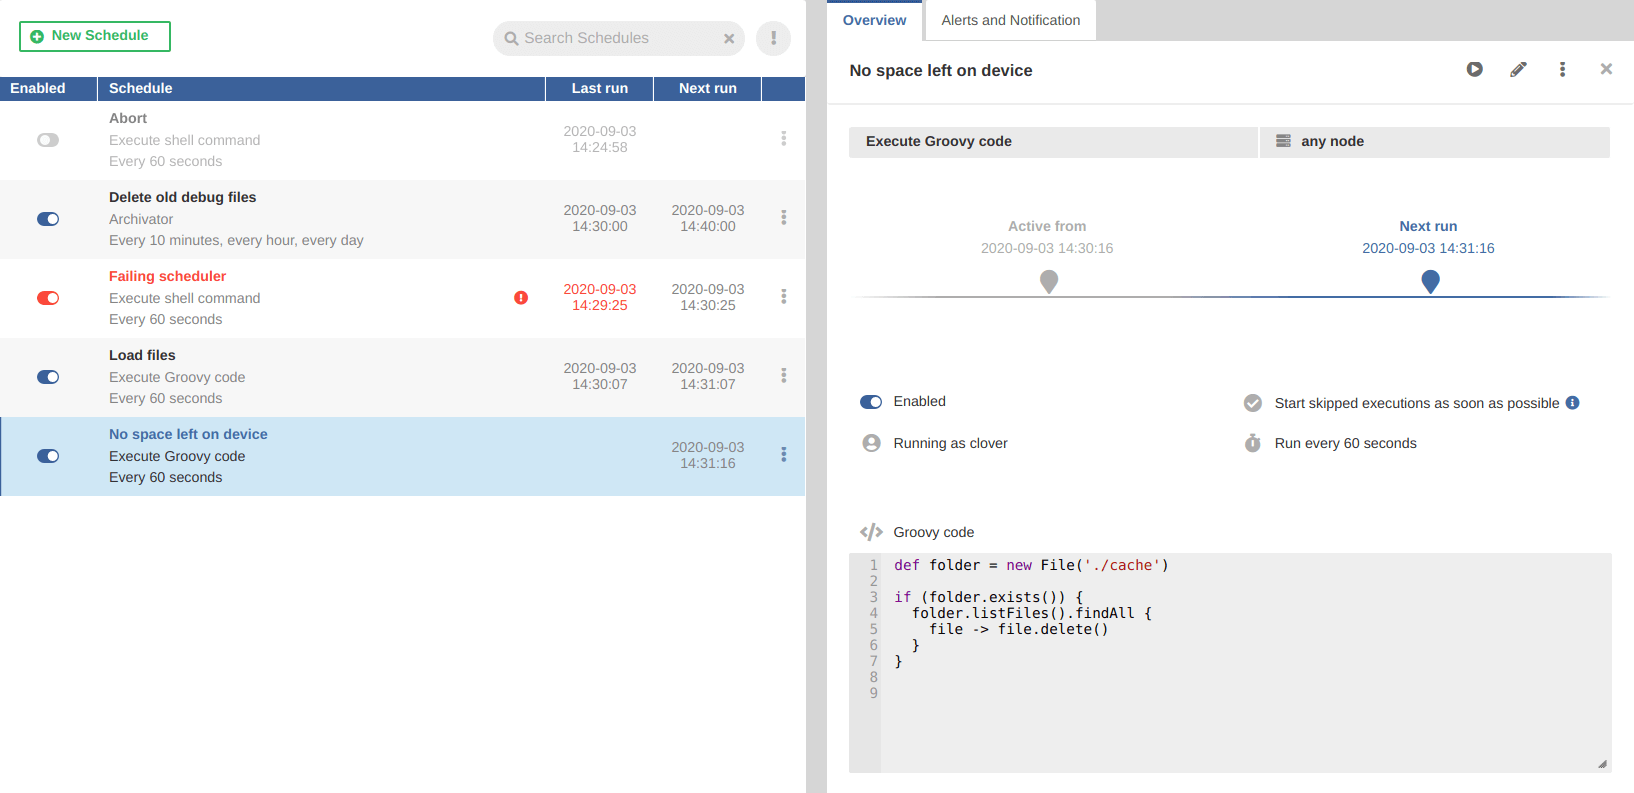
In the left pane of the Scheduler GUI, you can see the status of schedules, details, date and time of last/next run and three-dot button with actions: Run Now, Edit, Show in the Task History, Disable and Delete. The right pane shows time line and details of the selected schedule.
Note that if a schedule is failing, you can see the error message in the right pane and there is an additional action available: Clear Failure Indication. When selecting this action, the schedule is no longer indicated as failing. It acts as if it were never run, but its timeline is still visible in the detail pane. This function is useful when you fix a failing schedule with a long interval between runs and by resetting the state, you mark the schedule as OK. This way, it doesn't cause distraction by being shown as failing until its status is refreshed in the next run.
 |
Figure 36.1. Web GUI - Scheduling
Tasks you can schedule are described in Chapter 34, Tasks.
| Send an Email |
| Execute Shell Command |
| Start a Graph |
| Start a Jobflow |
| Start a Profiler Job |
| Abort job |
| Archive Records |
| Send a JMS Message |
| Execute Groovy Code |
