Version
Export Project as Library
A Library is a package containing reusable graphs, subgraphs, jobflows, data services or metadata installed on CloverdDX Server.
Libraries are developed in CloverDX Designer as regular projects with graphs, subgraphs, jobflows, data services or metadata. When the development is finished, you can export the project into a package by selecting Export as Library… from the project context menu in Project Explorer.
|
If you want your library to have public configurable parameters, add a |
|
All OAuth2 connections, with the exception of unused connections, can be reviewed, updated, authorized, or re-authorized in CloverDX Server after installation. Note that OAuth2 connections are always exported as unauthorized, even when they were authorized during the develelopment process. See Library OAuth2 Connections for more information. |
|
If you want to add a documentation page, which will be visible when browsing through libraries in a library repository, or when reviewing installed libraries in the Libraries section in the CloverDX Server console, the documentation must be in a separate file placed in the root of the source project before exporting the library. We support three file names (case-insensitive, in the preferred order):
|
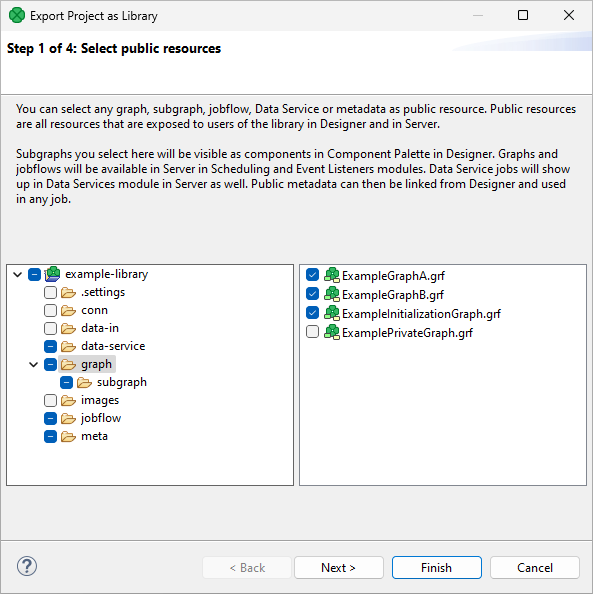
The action will open a wizard. On the first page of the wizard, you can select which elements are public – visible to other users. Other elements will also be included in the package, but they will be hidden. These internal elements may be used as sub-routines in the public ones.
Figure 115. Export as library – selecting public resources
On the second wizard page, you can select data source connectors – special subgraphs that must meet the following conditions:
-
Must have exactly one output port.
-
Must not have any input port.
-
Must publish metadata.
-
Cannot have byte, cbyte, variant, list, map in metadata.
-
There must exist a parameter named NUM_OF_PREVIEW_RECORDS. It can be inside the parameters file.
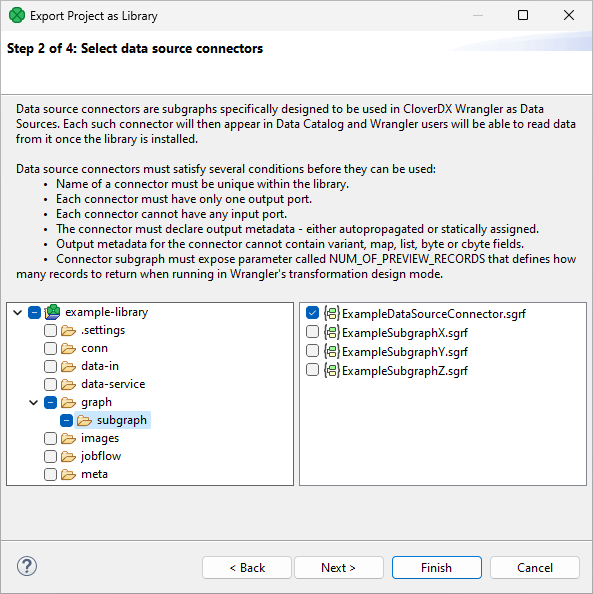
Figure 116. Export as library – selecting data source connectors
On the third wizard page, you can select one job (graph, subgraph, jobflow) which you may use as an initialization job for your library after you successfully install it on the CloverDX Server.
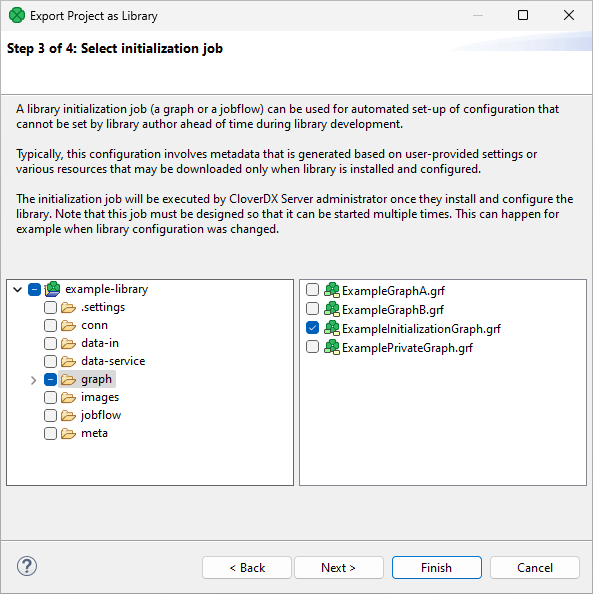
Figure 117. Export as library – selecting the initialization job
On the fourth wizard page, you can give your library a custom Name, add a Description and other details. Finally, you need to select the output file path.
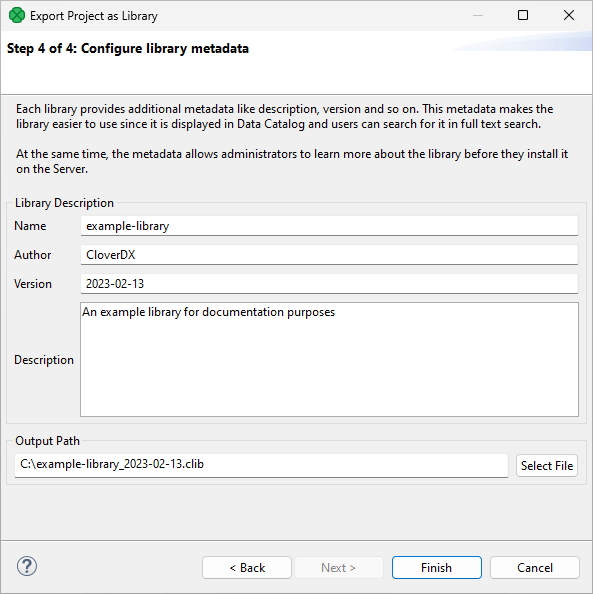
Figure 118. Export as library – configuring metadata
After pressing Finish, the wizard will package the project (excluding data-out and data-tmp directories) into a file with “.clib” extension. An administrator can install the file to CloverDX Server in the Libraries section.
Once installed, all users may use public subgraphs from the library when developing new jobs in a Server Project.