Version
3. Reading data in Wrangler
CloverDX Wrangler allows you to read data from many different locations called data sources.
Data sources are provided by connectors - either built-in (like CSV connector) or custom (which are provided by CloverDX libraries you install).
By default, Wrangler implements CSV connector which allows you to work with CSV files uploaded to your Wrangler workspace. You can then add any number of additional connectors by installing libraries via CloverDX Server Console > Libraries module. Libraries can either be downloaded for free from CloverDX Marketplace or you can build them using CloverDX Designer.
CSV data source
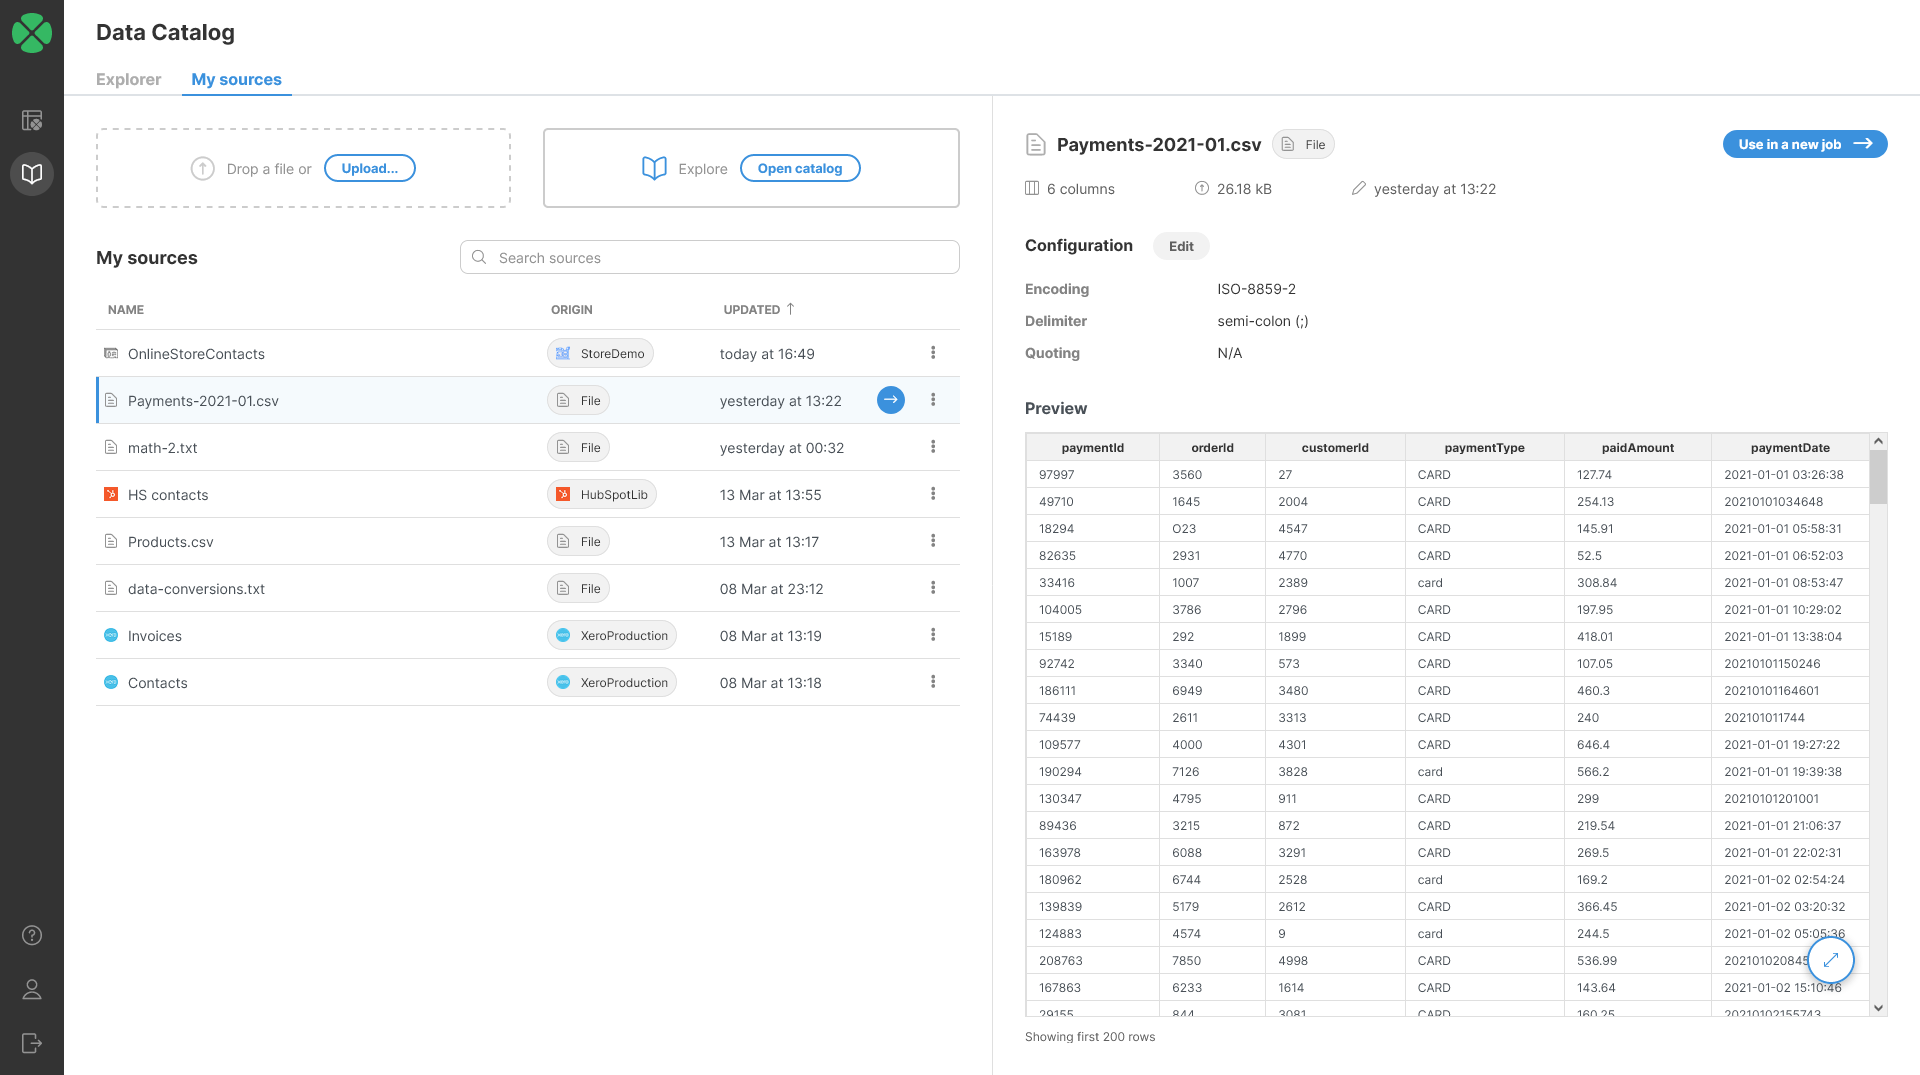
CSV data source allows you to read data from CSV files uploaded to your Wrangler workspace. When you want to create a new CSV data source, you can do so either from My sources screen in Data Catalog or directly from Create a new job screen. In both cases you can simply upload a file by drag & drop or by selecting the file on your computer.
Once a file is uploaded, CSV connector will scan your data and will automatically determine the structure of your data. The algorithm looks at sample of data at the beginning of the file to determine the columns and their data types.
You will be able to see the preview of your data to verify that automatically determined file structure matches your expectations. You can read more about data types available in Wrangler in Data types section.
Configuring CSV data source
If the automatically determined structure of the date does not match your expectations, you can configure connector parameters via Edit action:
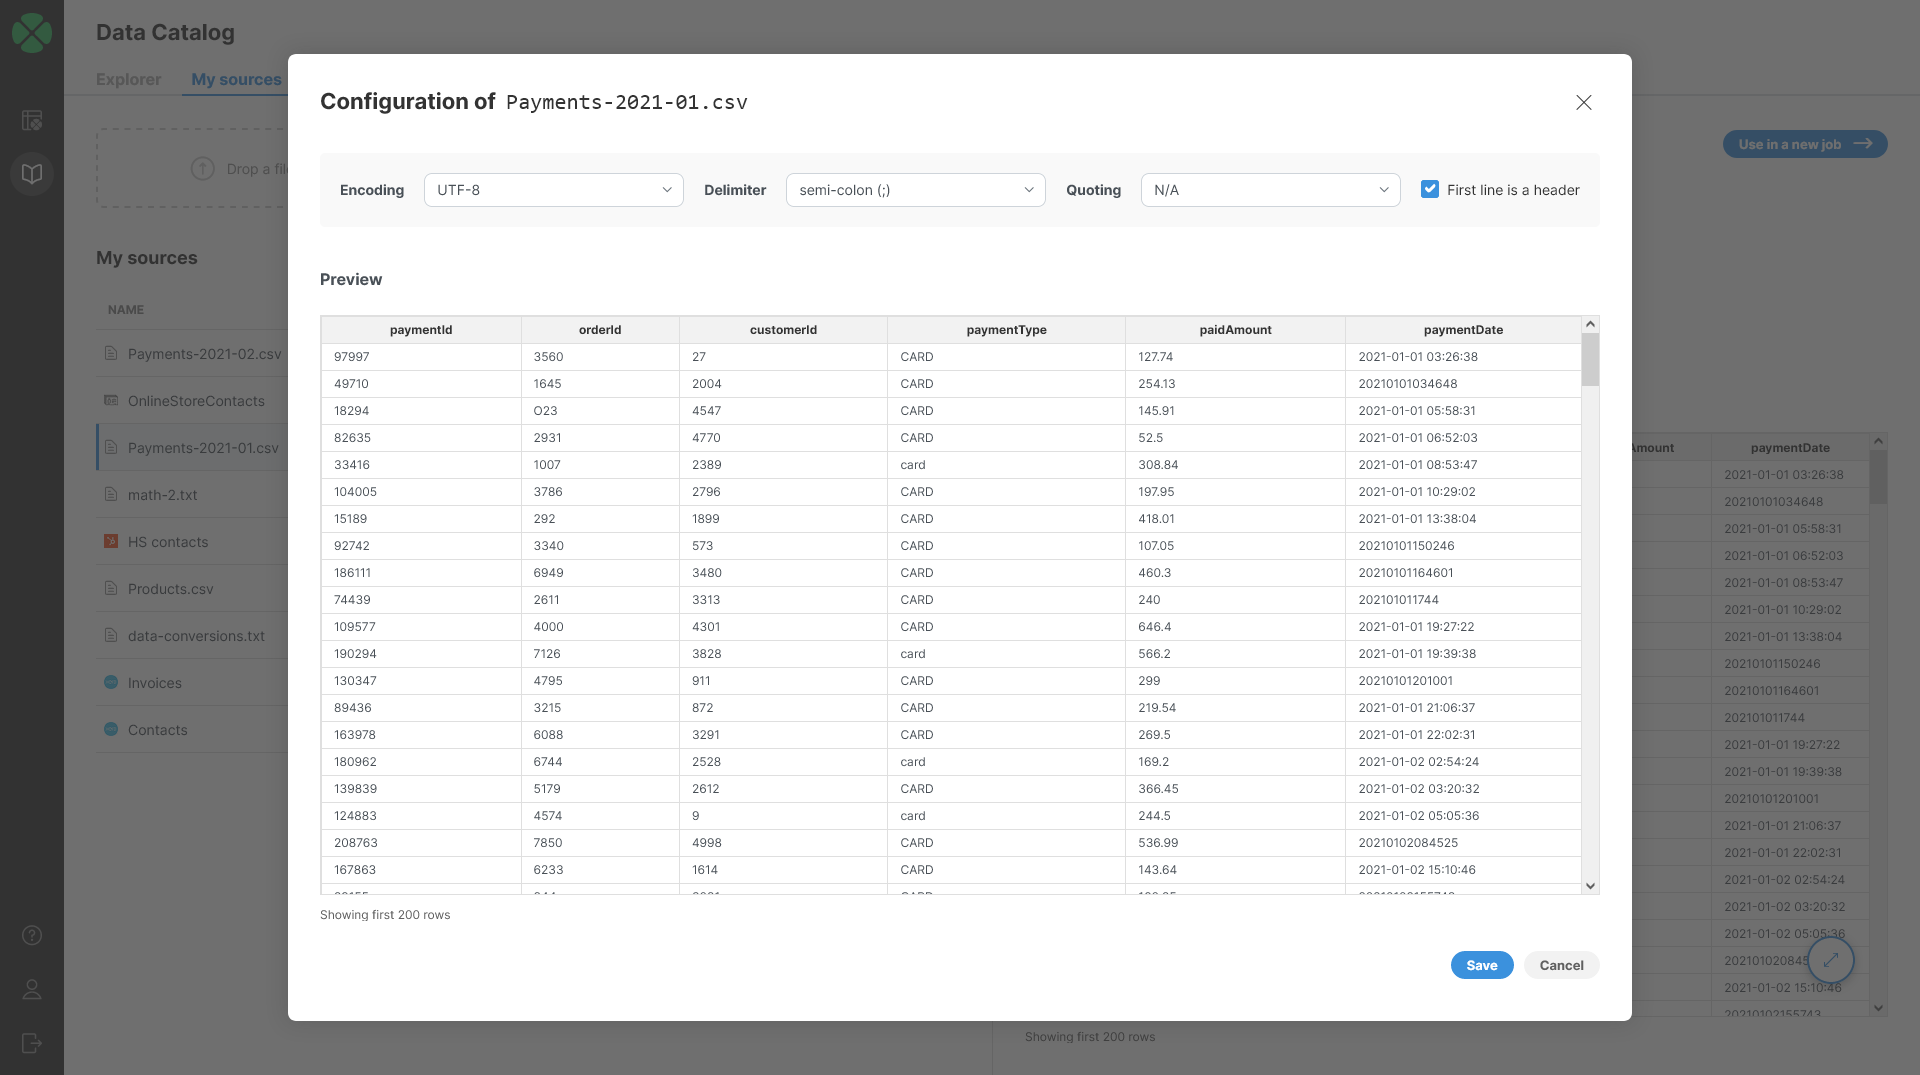
Following options are available in the configuration dialog:
-
Encoding: pick data encoding for your file. Encoding determines how characters are stored in text files and picking incorrect encoding can result in incorrectly read data (for example, some accented letters may show incorrectly). Most common encodings are UTF-8 (universal encoding that can handle any characters), windows-1252 (US English encoding commonly used for files created on Windows) or ISO-8859-1 (US ASCII encoding).
-
Delimiter: allows you to select column delimiter. Column delimiter is a single character that serves as a separator between columns in the file. Most common delimiters are comma (",") and tab. You can also type your own delimiter if none of the default delimiters work for you. Setting correct delimiter ensures that all columns are read from the file as expected.
-
Quoting: determines whether values in your source file are enclosed in quotes or not. You can select from three options - double quotes, single quotes or N/A (no quotes).
-
First line is a header: tell the CSV connector that it should interpret first line of the data as header and read names of columns from it. If this is unchecked, columns in your data set will have sequentially generated names like
field1,field2, and so on.
Where are my CSV files?
The files you upload to Wrangler are stored in your workspace. Only you (and your IT administrator) have access to those files. Other Wrangler users cannot see or manipulate the files in your workspace.
If you have access to CloverDX Server Console, you can find these files via Sandboxes module by browsing to your Wrangler workspace and then into the data-in folder.
Limitations of the CSV data source
CSV data source can handle most common data layouts but it does have some limitations. It can handle following:
-
Files of any size. There is no limit of the total number of rows in your file. Note that by default only the first 1000 rows are shown in the preview. To ensure the whole file is processed, run the job once you are finished building the transformation.
-
Files with any number of columns. While there is no technical limitation to how many columns can you files have, Wrangler implements a soft limit set to 1000 columns by default to help you prevent cases where your browser may not be able to handle display of too large of a sample. You can change this limit by contacting your IT and asking them to increase value of
Wrangler.MAX_NUMBER_OF_COLUMNSproperty. -
Files with varying number of columns on different rows. You files do not have to have the same number of columns on each rows. However, this feature works correctly only when the header or one of the sample rows is the longest row in the file. For example, the connector will work fine if your header contains 20 columns but some of the rows in your file contain fewer than 20 columns. By default, connector will read the first 512 kB of your data or first 1000 rows whichever comes first to determine how many columns does your data have. You can work with your IT team to increase these limits by setting
CSVAnalyzer.BYTES_TO_ANALYZEandCSVAnalyzer.LINES_TO_ANALYZEsettings (see more here).
The connector does not support:
-
Files in which the longest row (a row with the largest number of columns) does not appear within the analyzed sample. For example, if you have a file that has a header with 20 columns and much later in the file (after first 1000 rows) you have a record with more than 20 columns. See above for more details about increasing sampling limits.
-
It does not support files with multiple different types of column delimiters. If you have such a file, you will need to pick one of the delimiters and then split the columns using the other delimiter in your Wrangler job using Calculate formula step.
Library data sources
Wrangler allows you to use any other data source connectors that have been created in CloverDX Designer. Connectors are built as CloverDX libraries and can be either built by your IT team in CloverDX Designer or downloaded for free from CloverDX Marketplace.
Adding new connectors
New connectors can only be added by CloverDX administrators via CloverDX Server Console and its Libraries module. Consult the linked documentation to learn more about the process.

Figure 8. Libraries module showing HubSpot connectors available from HubSpot library.
Using library connectors
To learn more about how to use connectors provided by libraries, please read Data Catalog section in this documentation.