13. Runtime Configuration
CloverDX Runtime is one of architectural layers of CloverDX Designer. It takes care of running graphs and subgraphs.
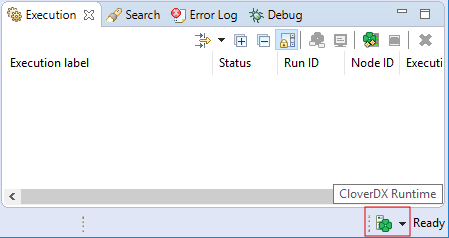
Current state of CloverDX Runtime can be seen in the right bottom corner of the perspective.
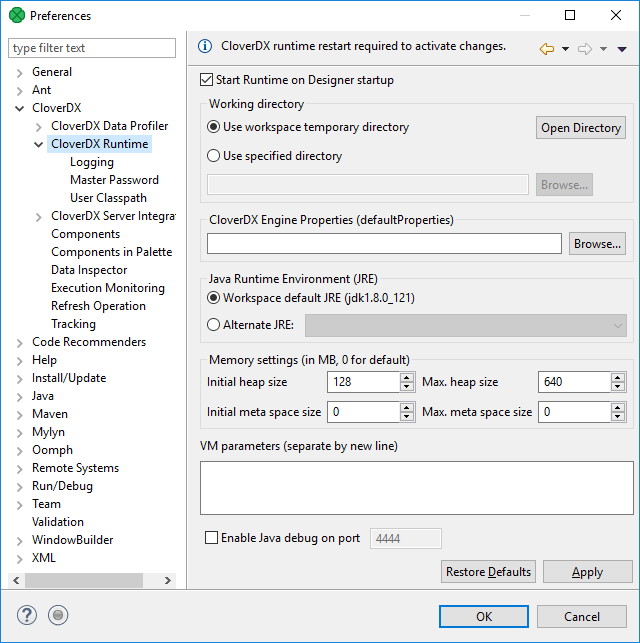
CloverDX Runtime is configured in the Preferences dialog: open and choose .
The CloverDX Runtime Configuration serves to set up:
Temporary Disk Space Settings
The temporary disk space is necessary for debug files. You can store temporary files either into a temporary directory within the workspace directory or into a user-defined directory.
Engine Configuration
Change max record size, etc. See Engine Configuration.
Java Runtime Environment to be Used
You may define an alternative JRE to be used. Note that CloverDX Designer supports Eclipse Temurin JDK 17 only.
Amount of Memory for Java Heap Size
It is important to define some memory size, because Java Virtual Machine requires memory to run graphs.
Additional Virtual Machine Parameters
Additional libraries can be added to the classpath.

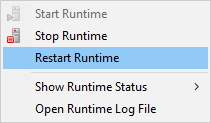
To take effect of the changes in runtime configuration, restart of CloverDX Runtime is needed. The runtime menu is accessible in the right bottom corner of CloverDX window.
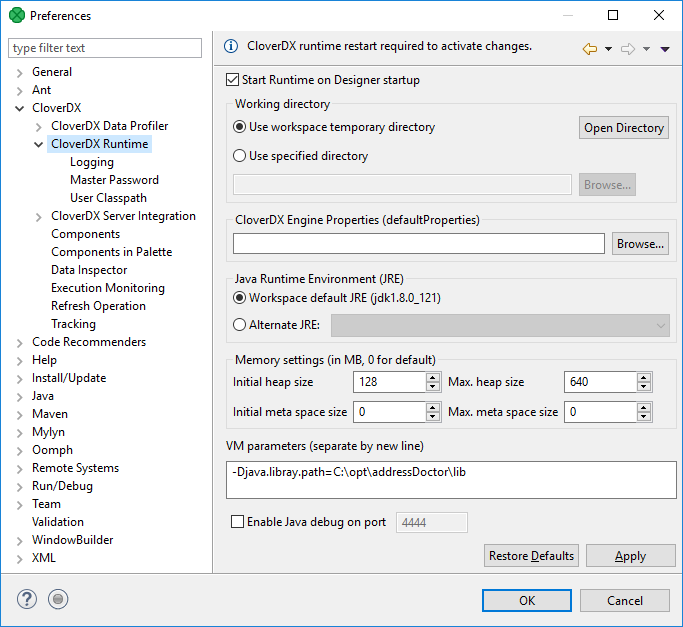
To add an external library to the CloverDX runtime's classpath, the -Djava.library.path=path/to/library option should be used.
To add libraries located in C:/path/to/lib, type -Djava.library.path=C:\path\to\lib into the VM parameters field.
Additional VM Parameter
Server mode (-server)
There are two flavors of JVM: client and server. The client system (default) is optimal for applications which need fast start-up times or small footprints. Switching to server mode is advantageous to long-running applications for which reaching the maximum program execution speed is generally more important than having the fastest possible start-up time. To run the server system, Java Development Kit (JDK) needs to be downloaded.
Logging
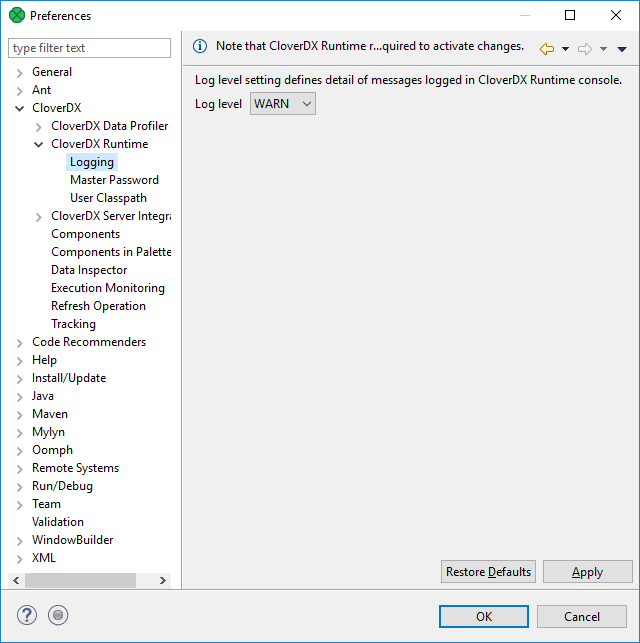
CloverDX Runtime writes its logs into Console tab.
Here you can set up messages of which severity are written down. If you set up a particular level, you can see messages of the specified level and more severe ones. For example, if you set up level to INFO, messages of INFO and WARN levels are logged.
Do not forget to restart the CloverDX Engine to take effect of the change.
Master Password
Master Password serves for encryption and decryption of Secure Graph Parameters.
You need to set up the Master Password to be able to use the Secure parameters on CloverDX Designer.
The maximum length of the master password is 255 characters; there are no other restrictions or complexity requirements.
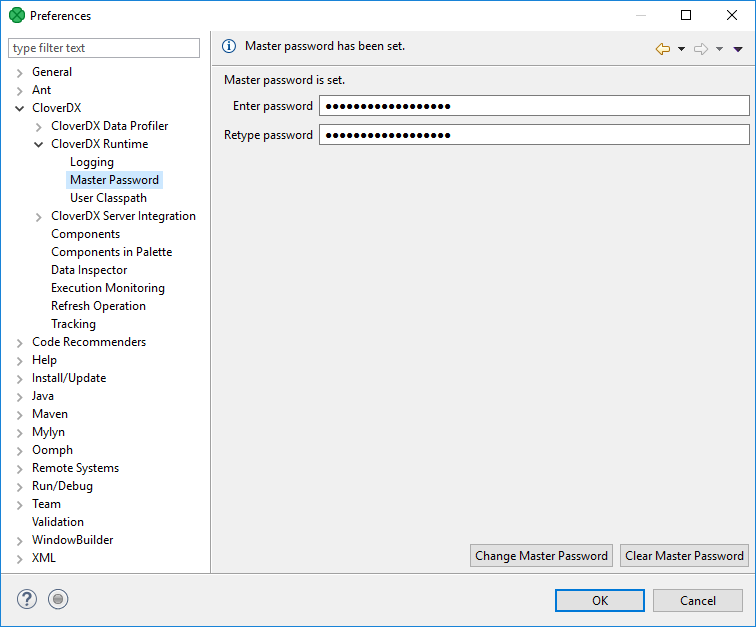
If you use the Clear Master Password button, restart of CloverDX Runtime is required.
User Classpath
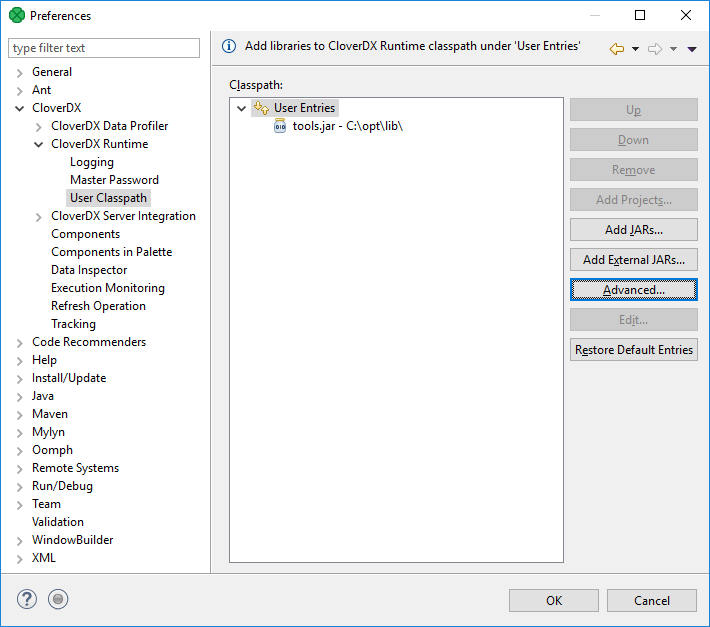
You can add your own libraries to the CloverDX Runtime classpath.
User Entries
Add your libraries under User Entries.
Add Projects
Add Project adds the source code of a project and all libraries of the project which are marked as exported to the classpath.
Note: Libraries can be marked as exported using in context menu of corresponding project.
Add JARs
Adds .jar file(s). The files have to be within the workspace.
Add External JARs
Adds .jar file(s). The files do not have to be within the workspace, they may be placed within an arbitrary directory on the file system.
Advanced
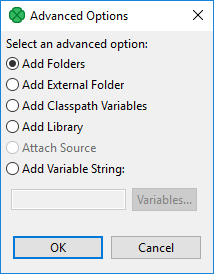
The Advanced button opens an additional dialog to choose not frequently used options.
Add Folder
Adds a folder with .class files within the workspace.
Add External Folder
Adds a folder with .class files.
The folder can be on arbitrary place within the system, it does not have to be in the workspace.
Add Classpath Variables
Adds a variable name pointing to a .jar file, folder with .class files.
It may be within the workspace or out of the workspace.
Add Library
Adds a library (.jar file or set of .class files with a predefined name).
Opens a wizard for adding a library. You can use it, for example, to add CloverDX Engine libraries.
Add Variable String
Adds an environment variable. The value of the variable will be added to the classpath.
