AWS Marketplace
Overview
The CloverDX Server offering on AWS Marketplace provides an easy way to create a CloverDX Server instance in the AWS cloud infrastructure. The offering spins-up a recommended cloud architecture that contains a standalone CloverDX Server with good defaults and recommended environment. The server instance uses AWS resources of the user, who is charged for them by Amazon.
The CloverDX Server AWS offering consists of an AMI image of a virtual machine and of a CloudFormation template that provides a simple configuration user interface and creates the required cloud infrastructure as a CloudFormation stack.
Quickstart
Prerequisites:
- license for CloverDX Server - this is a BYOL (Bring Your Own License) offering so you need to get your license from us - start here.
- basic familiarity with AWS EC2 infrastructure
- basic familiarity with AWS CloudFormation
- account on AWS and permissions to use EC2 and CloudFormation services
- key pair registered in EC2
High-level overview of steps:
- Subscribe to CloverDX Server on AWS Marketplace
- Configure and deploy the CloudFormation stack
- Activate and configure the server instance
Steps
Subscribe to CloverDX Server BYOL offering on the AWS Marketplace - use the Continue to Subscribe button on the offering marketplace page and proceed through the wizard to the Launch action (meanwhile accepting Terms and Conditions, selecting CloverDX version and template etc).
Deploy the CloudFormation stack
First step: Specify template - a CloudFormation template is already selected from the marketplace offering, continue with Next
Second step: Specify stack details - configure the stack:
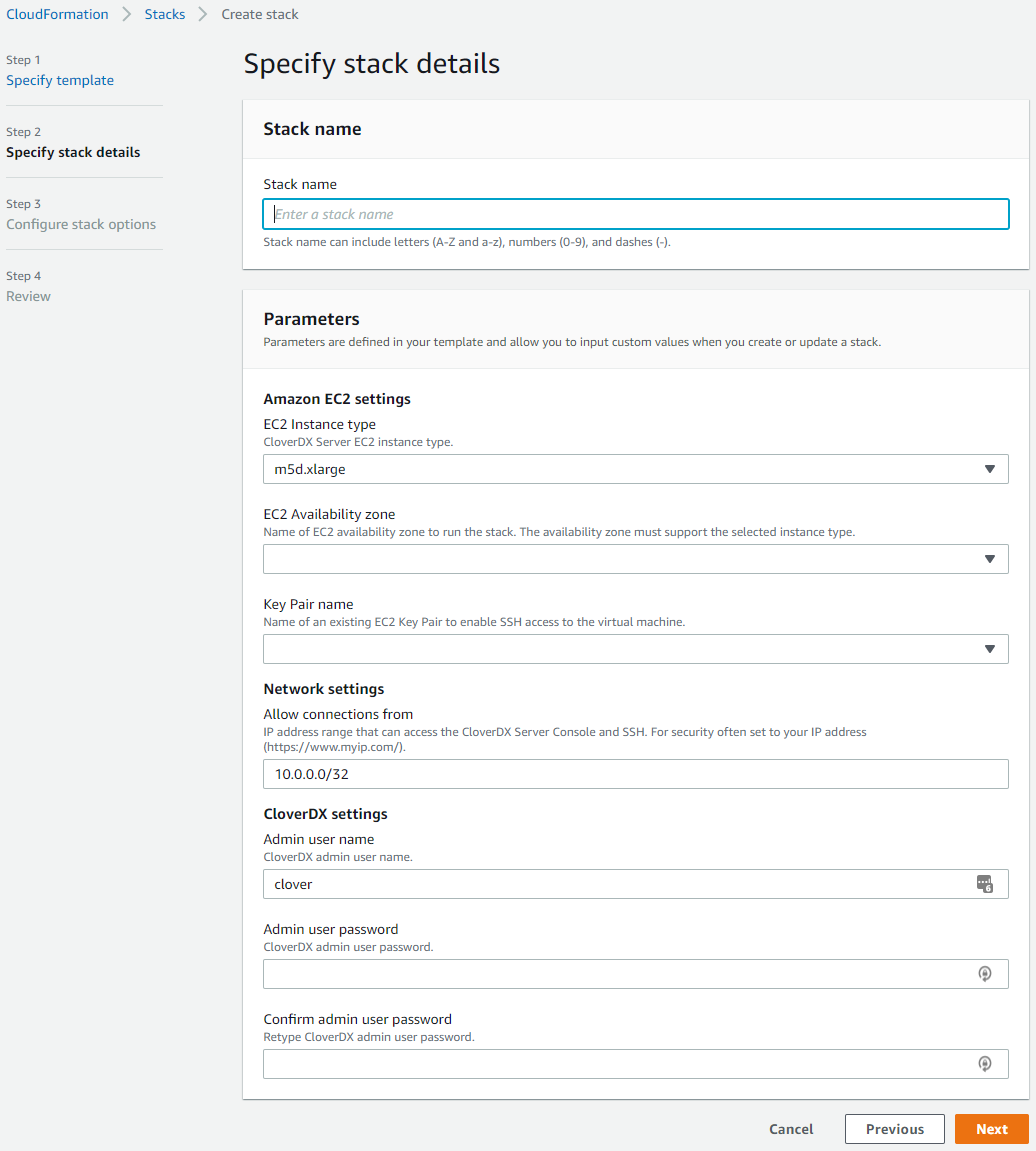
Figure 11.2. Stack details
- Stack name - unique name of the stack.
- EC2 Instance type - type of EC2 instance where the server will run. A default instance type is pre-selected. You can select one of the supported instance types - larger instances have better performance but at a higher cost.
- EC2 Availability zone - availability zone where the whole stack will be run. An availability zone is basically a data center. Some availability zones might not support the selected EC2 instance type or the instance type might be unavailable due to capacity reasons - in such case select a different availability zone. Such issue would manifest during startup of the stack in its Events log.
- Key Pair name - select a public key registered in your EC2 infrastructure. This key will be used to administer the EC2 instance via SSH.
- Allow connections from - the CloudFormation template creates a Security Group automatically that allows only connections from specific IP ranges to specific ports on the instance. We recommend that you provide a range of IP addresses from which the instance should be available - typically your offices or data centers. For evaluation purposes you can use your public IP, obtained e.g. from myip.com. We do not recommend making the instance visible to the whole internet.
- Admin user name - specify the user name of CloverDX Server administration user (or keep the default
clover). This user is the first user available in Server Console, for administration of the server itself. This is NOT the operating system user - you must use the above public key to SSH to the instance. - Admin user password - specify the password for the above admin user.
- Confirm admin user password - re-type the above password to confirm it.
Configure stack options and review the stack - next 2 pages allow you to set-up additional more advanced stack options, and review the whole stack configuration.
Create stack - click the final Create Stack button to start the stack. Creation of the whole stack takes some time (up to a few minutes). You will see a CloudFormation log of resources being created. The stack is created and ready to use when it gets into the
CREATE_COMPLETEstate.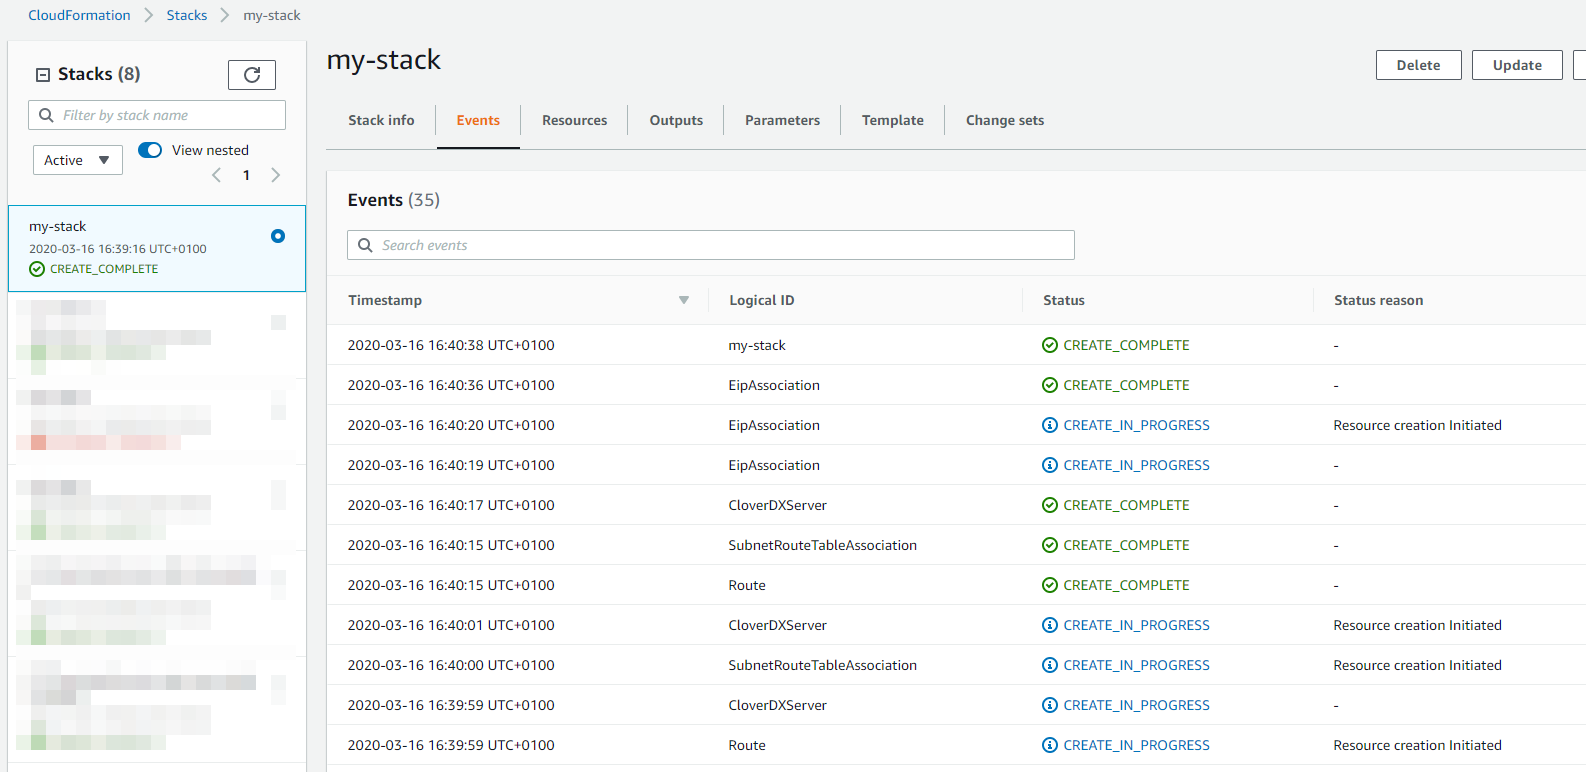
Figure 11.3. Stack deployment
Success. CloverDX Server is now available in AWS.
You can find its URL in the Outputs tab of the CloudFormation stack - the ServerURL entry.
There you can also find its hostname for SSH access.
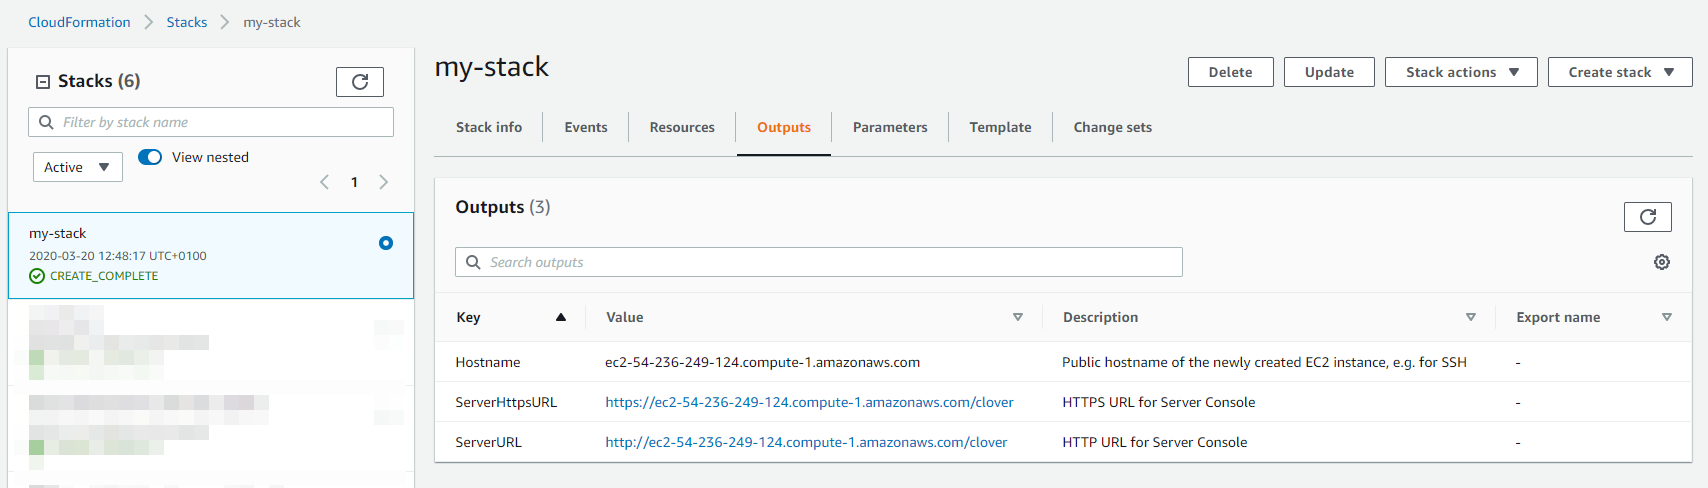 |
Figure 11.4. Stack outputs
On the Server’s URL you will see the login page where you can:
Activate the server - the Server is licensed in BYOL (Bring Your Own License) mode, so you need to get your license from us - start here.
To login, use the credentials set in the CloudFormation configuration wizard.
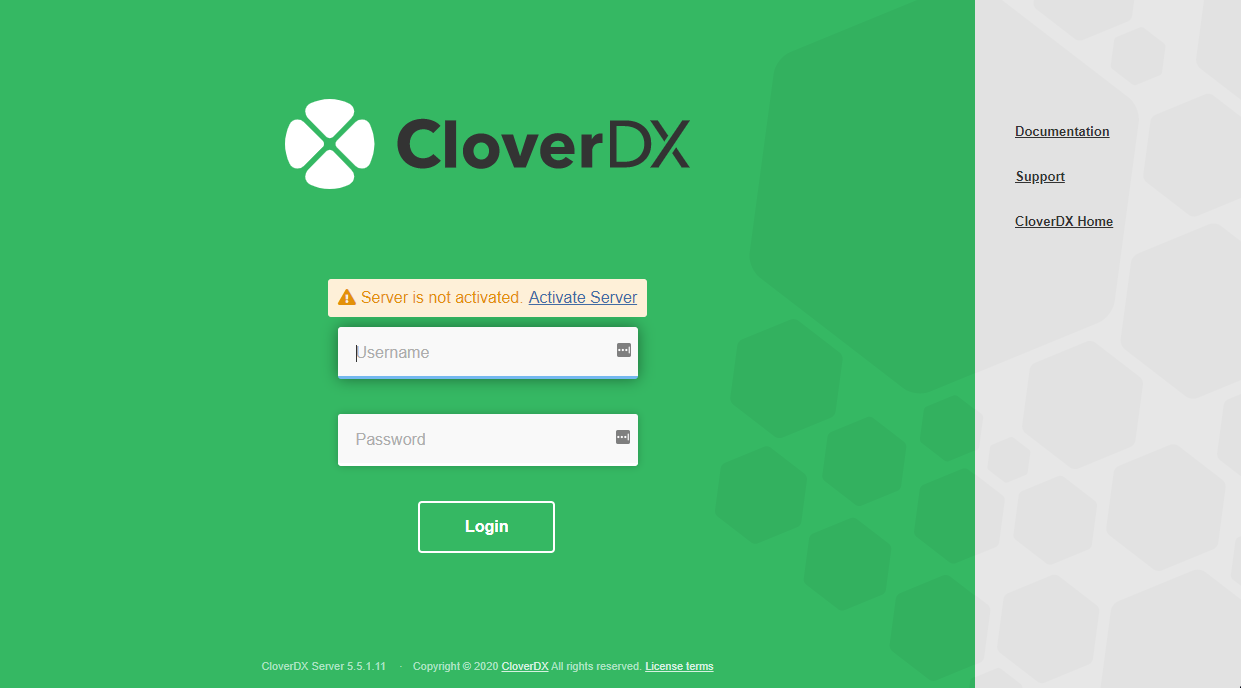
Figure 11.5. CloverDX Server login page
The Server is running with default settings, and is immediately usable. It can be configured further to get it into full production quality (i.e. it should use an external database).
Architecture
The CloverDX Server AWS offering consists of an AMI image of a virtual machine and of a CloudFormation template that orchestrates the required cloud resources:
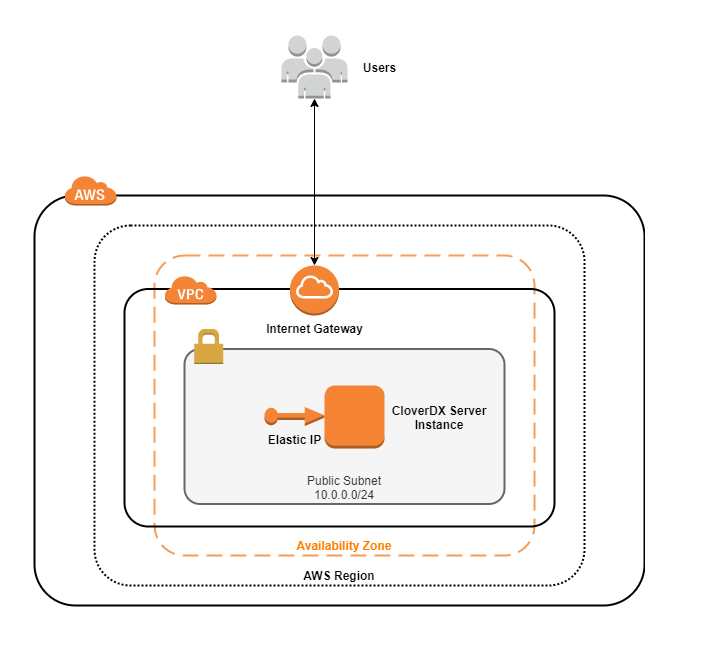
Figure 11.6. Architecture - CloverDX Server in AWS marketplace
Details of the AWS topology:
- The instance runs in the AWS cloud, in the Region selected by user and in one of its Availability Zones.
- A new VPC (Virtual Private Cloud) is created to isolate the CloverDX instance from other resources present in the AWS cloud. The VPC has an Internet Gateway for connectivity to the internet (also for the users to connect to the Server Console).
- A new Subnet is created in the VPC for the network resources.
- A single EC2 instance is created from an AMI. The CloverDX Server is running in this instance and uses a built-in Derby database. For full production use we recommend an external DB, e.g. RDS.
- The EC2 instance is available via an Elastic IP - this IP address doesn’t change between restarts of the instance.
- The EC2 instance uses a Security Group to limit access only to specific ports (22, 80, 443) and only from IP addresses from a defined CIDR range.
EC2 instance details (for additional information, see Common cloud architecture):
- Operating system: Amazon Linux 2
- AdoptOpenJDK 11
- Tomcat 9
- 2 disks - OS disk, data disk, both are Provisioned IOPS SSD EBS volumes
Configuration
For details about CloverDX Server configuration, see Common cloud configuration.
Memory
Heap sizes for Server Core and Worker are set automatically based on the instance memory size, see Common cloud memory configuration. It is possible to change the instance type of the VM and the memory sizes will be re-calculated - for this stop the VM instance in EC2 console, change its instance type and start it again.
Users
Users available in the EC2 instance:
ec2-user- standard AWS administrator user of the instance. Usesudoto run commands that require root privileges. Login via SSH using the public key selected when starting the stack.root- not recommended to be used, cannot login to it directly.clover- user that runs the CloverDX Server (i.e. it runs Tomcat). All files that CloverDX uses are owned by thecloveruser. It is not possible to login asclover.
Timezone
The EC2 instance uses UTC timezone by default. The instance runs on Amazon Linux, so to change the timezone follow the documentation.
Security
This section describes security related aspects of the CloverDX Marketplace offering.
Security Group
The CloudFormation template creates a security group that serves as a virtual firewall. The security group allows connections to the following ports:
22- SSH80- HTTP for Server Console and Server API443- HTTPS for Server Console and Server API
The connections are allowed only from the IP range specified when configuring the stack during its startup.
The security group settings can be modified - you can find the security group in the Resources section of the CloudFormation stack and click on its configuration.
HTTPS
The CloverDX Server running in the stack has both HTTP and HTTPS enabled by default.
You can find the server’s HTTPS URL in the Outputs section of the CloudFormation stack
under ServerHttpsURL key. The HTTPS connector is running on port 443.
The default HTTPS connector is using a self-signed certificate. So it is useful for encryption of communication
between client (e.g. Designer) and the Server, but not for server identity verification. When connecting from
a browser to the Server Console you will first see a warning about the certificate
(e.g. Your connection is not private, NET::ERR_CERT_AUTHORITY_INVALID), after accepting this
certificate you can work as usual and following accesses will not see this error. When first connecting from
Designer you will need to accept the certificate.
You can use your own production-quality certificate for the HTTPS connector:
- Add your certificate to
/var/clover/conf/serverCertificate.jkskeystore (via thekeytoolcommand), with an alias that is different fromclover. - Modify the
/opt/clover/tomcat/conf/server.xmlTomcat configuration file to use the new certificate alias for its HTTPS connector.
To disable usage of plain HTTP connectivity, modify the security group of
the stack to block all connections to port 80.